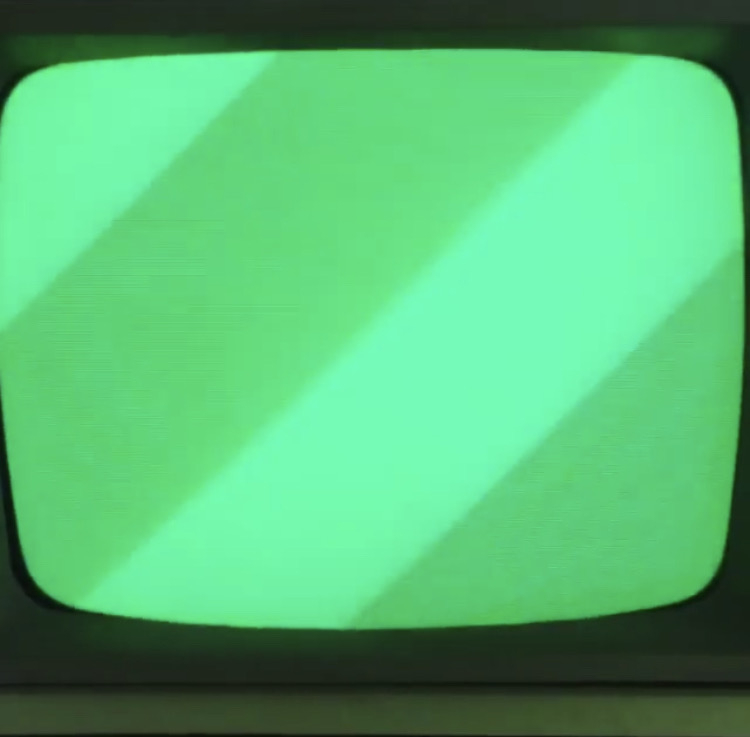
I'm new here so, hello! :)Recently I discovered an Apple IIe in what it used to be my grandfathers basement.Cleaned it a bit hooked up everything and power it on, it didn't work very well, sometimes seemed to beep and display text another times just a green screen AKA no video:
Stayed on for like 5 minutes and then POOF smoke started to came of the thing!, quickly disconnected it. THE SMELL lasted for days!Checked the board and seamed fine. But a filter paper cap exploded inside the PSU; an ASTEC AA11040B. And replaced the filter with this one:

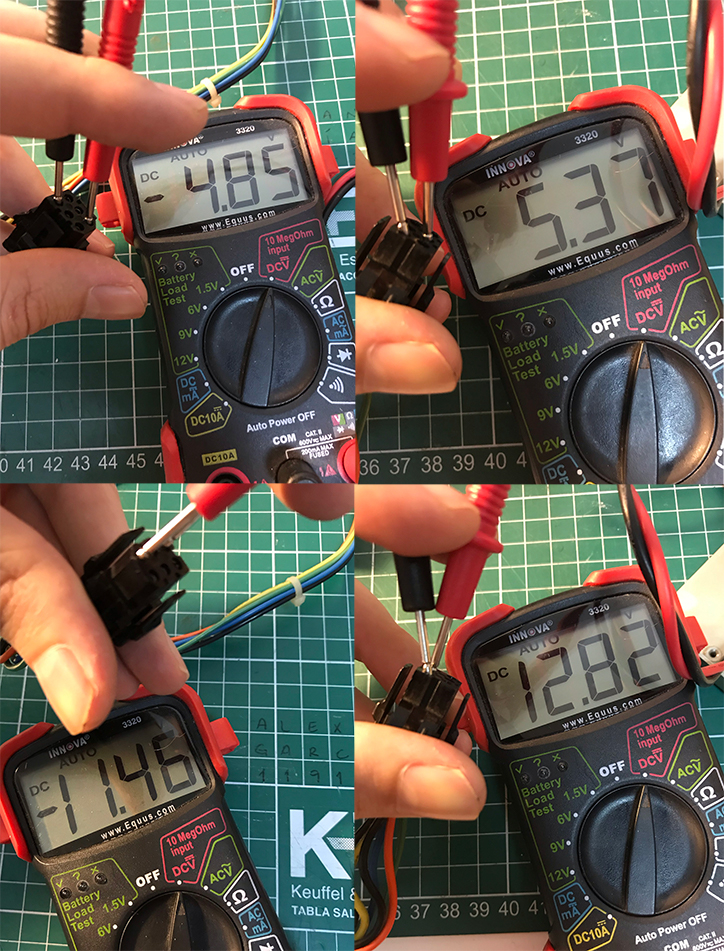
And output from PSU seems ok to me.
I proceeded to connect the PSU and nothing, no sound and the red LED on the motherboard doesn't turn on.
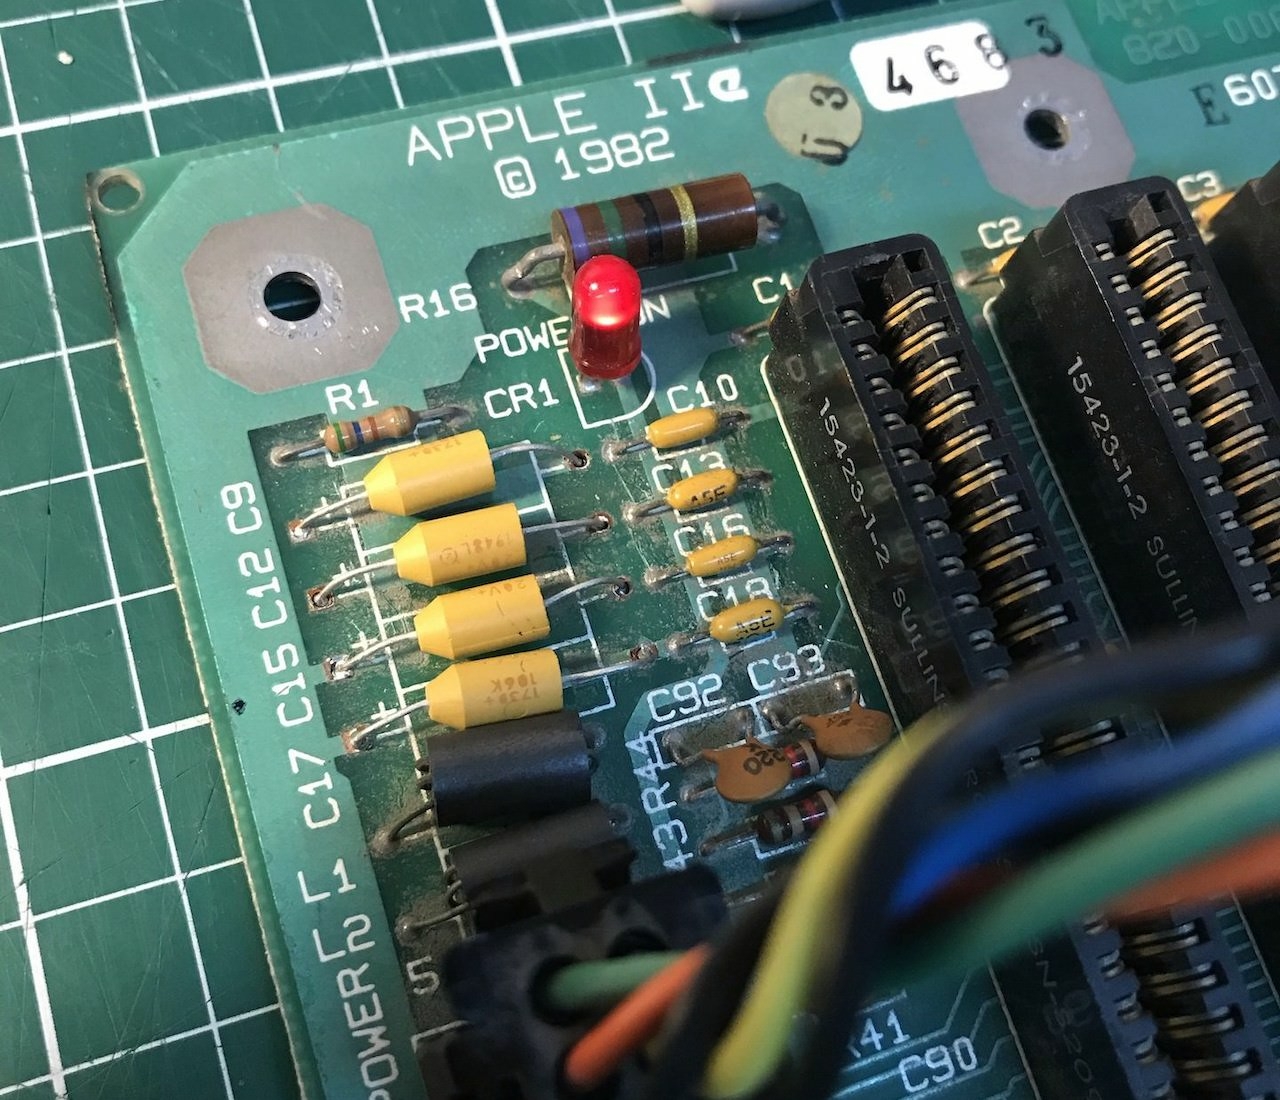
Later found out in another post in this forum that it could be the tantalium caps near the PSU connection. And got suggested to replace them, and... SUCCESS, now the board has power and the LED light turns on BUT we still have no video no beep. Btw cheked PSU under load and the reading looked ok (even better).

What is your suggestion on what should I do next? :( I'm running out of ideas.
Thank you so much in advance :)
M.
Yes, the IIe needs all the RAM chips to work properly. I would buy a new set of 8 (they are cheap) and replace them.
Rittwage where do you suggest I could get them? can't find anything solid.
Thank you for your reply! It gave me hope haha
So this turns out to be the same 4164 64K x 1 DRAM that Commodore were using in later C64s. You can buy these still from a variety of sources, including (at the cheap but possibly dubious end) AliExpress and all the way up to more legitimate sources
BTW I have ordered a fair amount of RAM from the AliExpress store without a problem. YMMV.
Hope this helps!
Chesh
Thank you Chesh, will consider the options and purchase the best one.Will update once the parts arrived and installed, wish me luck!
Is the keyboard connected? If not, then connect it, and that may solve your issues.
Some //e revisions will not beep or power on properly withot it.
Obviously, bad RAM will also do this sort of thing.
Timelord thanks fo the tip. Will keep that in mind when I get and intall the new RAM!
Hi guys, got the RAM from Buggie on eBay and swapped all 8 chips and no more burning hot chips, reseated and cleaned all ICs, connected keyboard and speaker but still no beep and no video ):
Starting to lose hope.
Some clues:
HAL chip running at 135º F? could it be something?
Guide suggests:
Screen Shot 2020-08-24 at 4.46.57 PM.png
Thanks!
I think my HAL is also running pretty hot on my //e but everything works fine.
Guess i'll chek the 74s02 and 74s109, any clues where to find them, if possible?
Thanks!
I am no massive expert here but you had beeps before the PSU exploded - is now the computer fully dead?
You may have done this already but I would start with checking that every chip is getting its 5 or 12V supply - and that Ground is connected too.
Looking at the troubleshooting manual, wondering if the drive spins when you power up. If it does not you may want to make sure the CPU is getting the clock signal and I would also check that the reset line on the CPU works as expected.
I'll go through the manual later on, I'm interested in better understanding what happens when you power up!
Yes it beeped and "kinda" booted, because it reseted every 30 secs or so.
About checking power to chips, do you have info where to check the pins documentation of every chip? or every chip gets power in the same pin? I would appreciate guidance.
About cheching the clock, i dont own an osciloscope ):
thanks,
Let me say first that there are users much more competent than I am on this forum. I only recently joined!
If you check page 137 of the SAMS repair guide, the "bell" is way into the boot process so that - I think - can rule out the clock. If no clock, it would never reach the beep stage. Same for "reset" line.
According to the flow chart, the "Apple //e" message is the following step after the "beep".
The same manual does not have a suggestion for "beep, no message". Does the disk spin and "rattle" when you power up? It shouldn't as that should happen AFTER the message on screen. Just wondering whether it could be a video issue and the system is working fine, just you can't see it.
To check power on chips, you should be able to google the name of each chip to test. Usually the main voltage is pin 1 or the last (pin 16 on a 16 pin chip) and ground is the last pin of the first row (pin 8 on a 16 pin chip).
apple1.JPG
apple2.JPG
I missed this part in one of the earlier posts:
I proceeded to connect the PSU and nothing, no sound and the red LED on the motherboard doesn't turn on.
If the POWER LED isn't illumnating, chec continuty to it, and check for voltage at it when under power. The mainboard LED should always be lit when the system is powered. This sounds as if +5VDC isn't getting to the board; possibly due to bad caps.
A system sitting in a damp basement for decades is likely to have suffered quite a lot. It may need a recap, and a reflow on the mainboard, plus oxidisation cleaning on all contacts.
Timelord,
Immediately after the sentence you quoted you can also read:
So I believe the "no power" stage is now resolved.
Guys i would like to update to you, because everything i have achieved has been from this forum.
WE MADE IT
System boots, beeps and blops, shows Apple ][ and i can enter BASIC no problem, everything works fine!! It was the RAM, checked all vcc pins from all chips like Tony said and seemed fine, but one RAM chip didnt read 5v, turns out one leg was bent lol newbie mistake. The only issue im working on rn is the keyboard, some caps dont work, i know is the caps because y jumped the solder points to a characterd that didnt work and showed in the screen. I removed some caps and opened to clean with 90% IPA. some kind of worked, others dont. If you have suggestions how to clean a keyboard let me know!
Here some pictures:
IMG_9454.jpeg
IMG_9451.jpeg
IMG_9460.jpeg
In review (so google crawlers can index):
1. Filter capacitor on PSU blown and caused spike that affected motherboard and RAM
2. Replaced Filter capacitor in PSU
3. Still no light, no beep no message.
4. Saw post from other thread with similar issue indicating replace the tantalium axial capacitors in motherboard near PSU connector
5. replaced tantalium capacitors and got ligth, still no beep no message
6. checked ram temps and 3 ics got very hot
7. got suggested in this thread that ram could be the issue
8. replaced ALL ram chips to be sure
9. got the system running: light, beep and message
10. some keyboard caps dont work, WIP
Thanks!
M.
FANTASTIC, well done!
Glad I could be of help. The bent pin is a classic, don't worry! I've done that myself several times!
Now, the next step is to adjust the brightness of that CRT! :) There is a trimmer at the back to adjust the black level, it shouldn't be so green!
Also, I recommend you take a look at the monitor too. It has 4 RIFA capacitors which you may want to swap - on mine they were already blown when I acquired the unit. I did go ahead and replace all the caps in the monitor too but there are quite a few so it depends on how you feel about that. Also, remember that CRT monitors have lethal voltages inside and you need to know what you are doing. As a minimum, check online on how to discharge a CRT tube and - as usual - you do that at your own risk. (Sorry if you already know about that)
The keyboard: how did you manage to disassemble and clean? On my keyboard the keys are soldered at the back and it seems that to open the key you need to desolder them all... You may want to try with a contact cleaner for switches: it leaves a tiny amount of conductive lubricant and it's designed to improve conductivity on switches - the key is a switch after all.
Hi Tony i saw this video, you can individualy desolder and remove each switch
https://www.youtube.com/watch?v=n99Eoicuy1c
also
https://www.youtube.com/watch?v=yhkL0nfBFFs
Flux and solder wick highly recomended.
Greetings!
Oh wow - I did not search for that as while I inspected the keyboard I didn't see a way to remove a single key without desoldering everything - I was wrong. Thank you very much! My keyboard is working to be honest, I think the "N" key tends to repeat sometimes but not sure I want to disassemble everything again now. But I will definitely keep that in mind for the future!
Cheers again"
Desolder every keyswitch. Get a pail and soak the switches in a mixture of water and alcohol for a few days. Every day reach in, pull them out, and actuate each of them a few dozen tiimes, then drop them all back and stir for a while. Dry them for a few days more, in a reasonably warm to hot place, but not hot enough to damage them. Cleaning them in place on the KB logic board isn't very effective.
If the water/alcohol mix starts to become too murky to see, drain it and replace.
Here's an update about fixing the Apple IIe keyboard switches, it's working perfectly now!
IMG_9471.jpeg
1. Marked all faulty switches, but at the end decide to take them all out
IMG_9470.jpeg
2. Removing switches one by one, see videos https://www.youtube.com/watch?v=n99Eoicuy1c or https://www.youtube.com/watch?v=yhkL0nfBFFs
IMG_9482 2.jpeg
3. Cleaning procedure:
a) Remove housing with needle pliers (see previous linked videos)
b) remove actuator and spring (careful)
c) remove interface with needle pliers (grab from the inverted Y and pull front and up)
d) use your nail to sliglty separete cooper plates from corner, insert needle pliers between plates and scrap a little, then use contact cleaner and finish with compressed air
e) test continuity and resistance, should read between 1.3 to 8 ohms
IMG_9498.jpeg
4. Place all fixed switches, solder and jump any broken traces or pads
IMG_9500.jpeg
5. Place all keycaps again
IMG_9505.jpeg
6. Test. Done!
thanks for the pictures! Great job!
Absolutely agree with ritt
I'm resuming this conversation as tonight I decided to take a look at my dodgy "N" key which was not working very well.
I disassembled the //e and realised that the button had been (badly) desoldered before. When I extracted the key I also found that some plastic had been damaged.
I opened the key anyways and it does not match the configuration mentioned on the video - pictures below, there is also a metal clip on top of the plastic device inside which is not shown on the pictures. I thoroughly washed the key with IPA and then applied lubricated contact cleaner - the one that leaves some lubricant behind and improves conductivity. Testing with my DMM at first I did not get a good contact but after a few tests I could get a reliable zero ohms every time I was actuating the switch.
I re-assembled it back and it's working like a charm - now the 3 has completely stopped working, which is weird as I did not touch it so I hope it just needs some solder.
Anyways, I was wondering if there was a procedure to clean this keys as I was unable to figure out how to disassemble the mechanism. It looks like the plastic cover is melted at the bottom so I did not want to break it.
Any help would be appreciated. Thanks!
IMG_2596.jpg
IMG_2597.jpg
IMG_2598.jpg
Tony hope this helps.
IMG_2598.jpg
yes it does. I suspected it was something like that but I didn't want to improvise. Thank you for taking the time to caption my pictures!
One thing I may recommend is to use "wet cleaner" after using IPA for removing dirt. That is basically designed for switches - not for PCBs. It leaves behind a small layer of lubricant which is designed to improve conductivity. I guess it's similar to "DeOxit" which is not easy to find outside of the US.
Thanks again!
Update: my "3" key works again. Not sure what was wrong with it, it did not show continuity, I reflowed it and still did not show continuity. I removed it from the PCB and it seemed ok - I opened it anyways and "serviced" it. It's now back on the PCB and all is well! :)