Getting your Apple II VGA Card up and running: Ralle Palaveev version
The Ralle Palaveev VGA card is an extension of the Apple II Vga project by Mark Aikens. A few versions of this project exist, but this post is focusing on the Ralle Palaveev version, which has a lot of capabilities (and the added complexity that goes along with them).
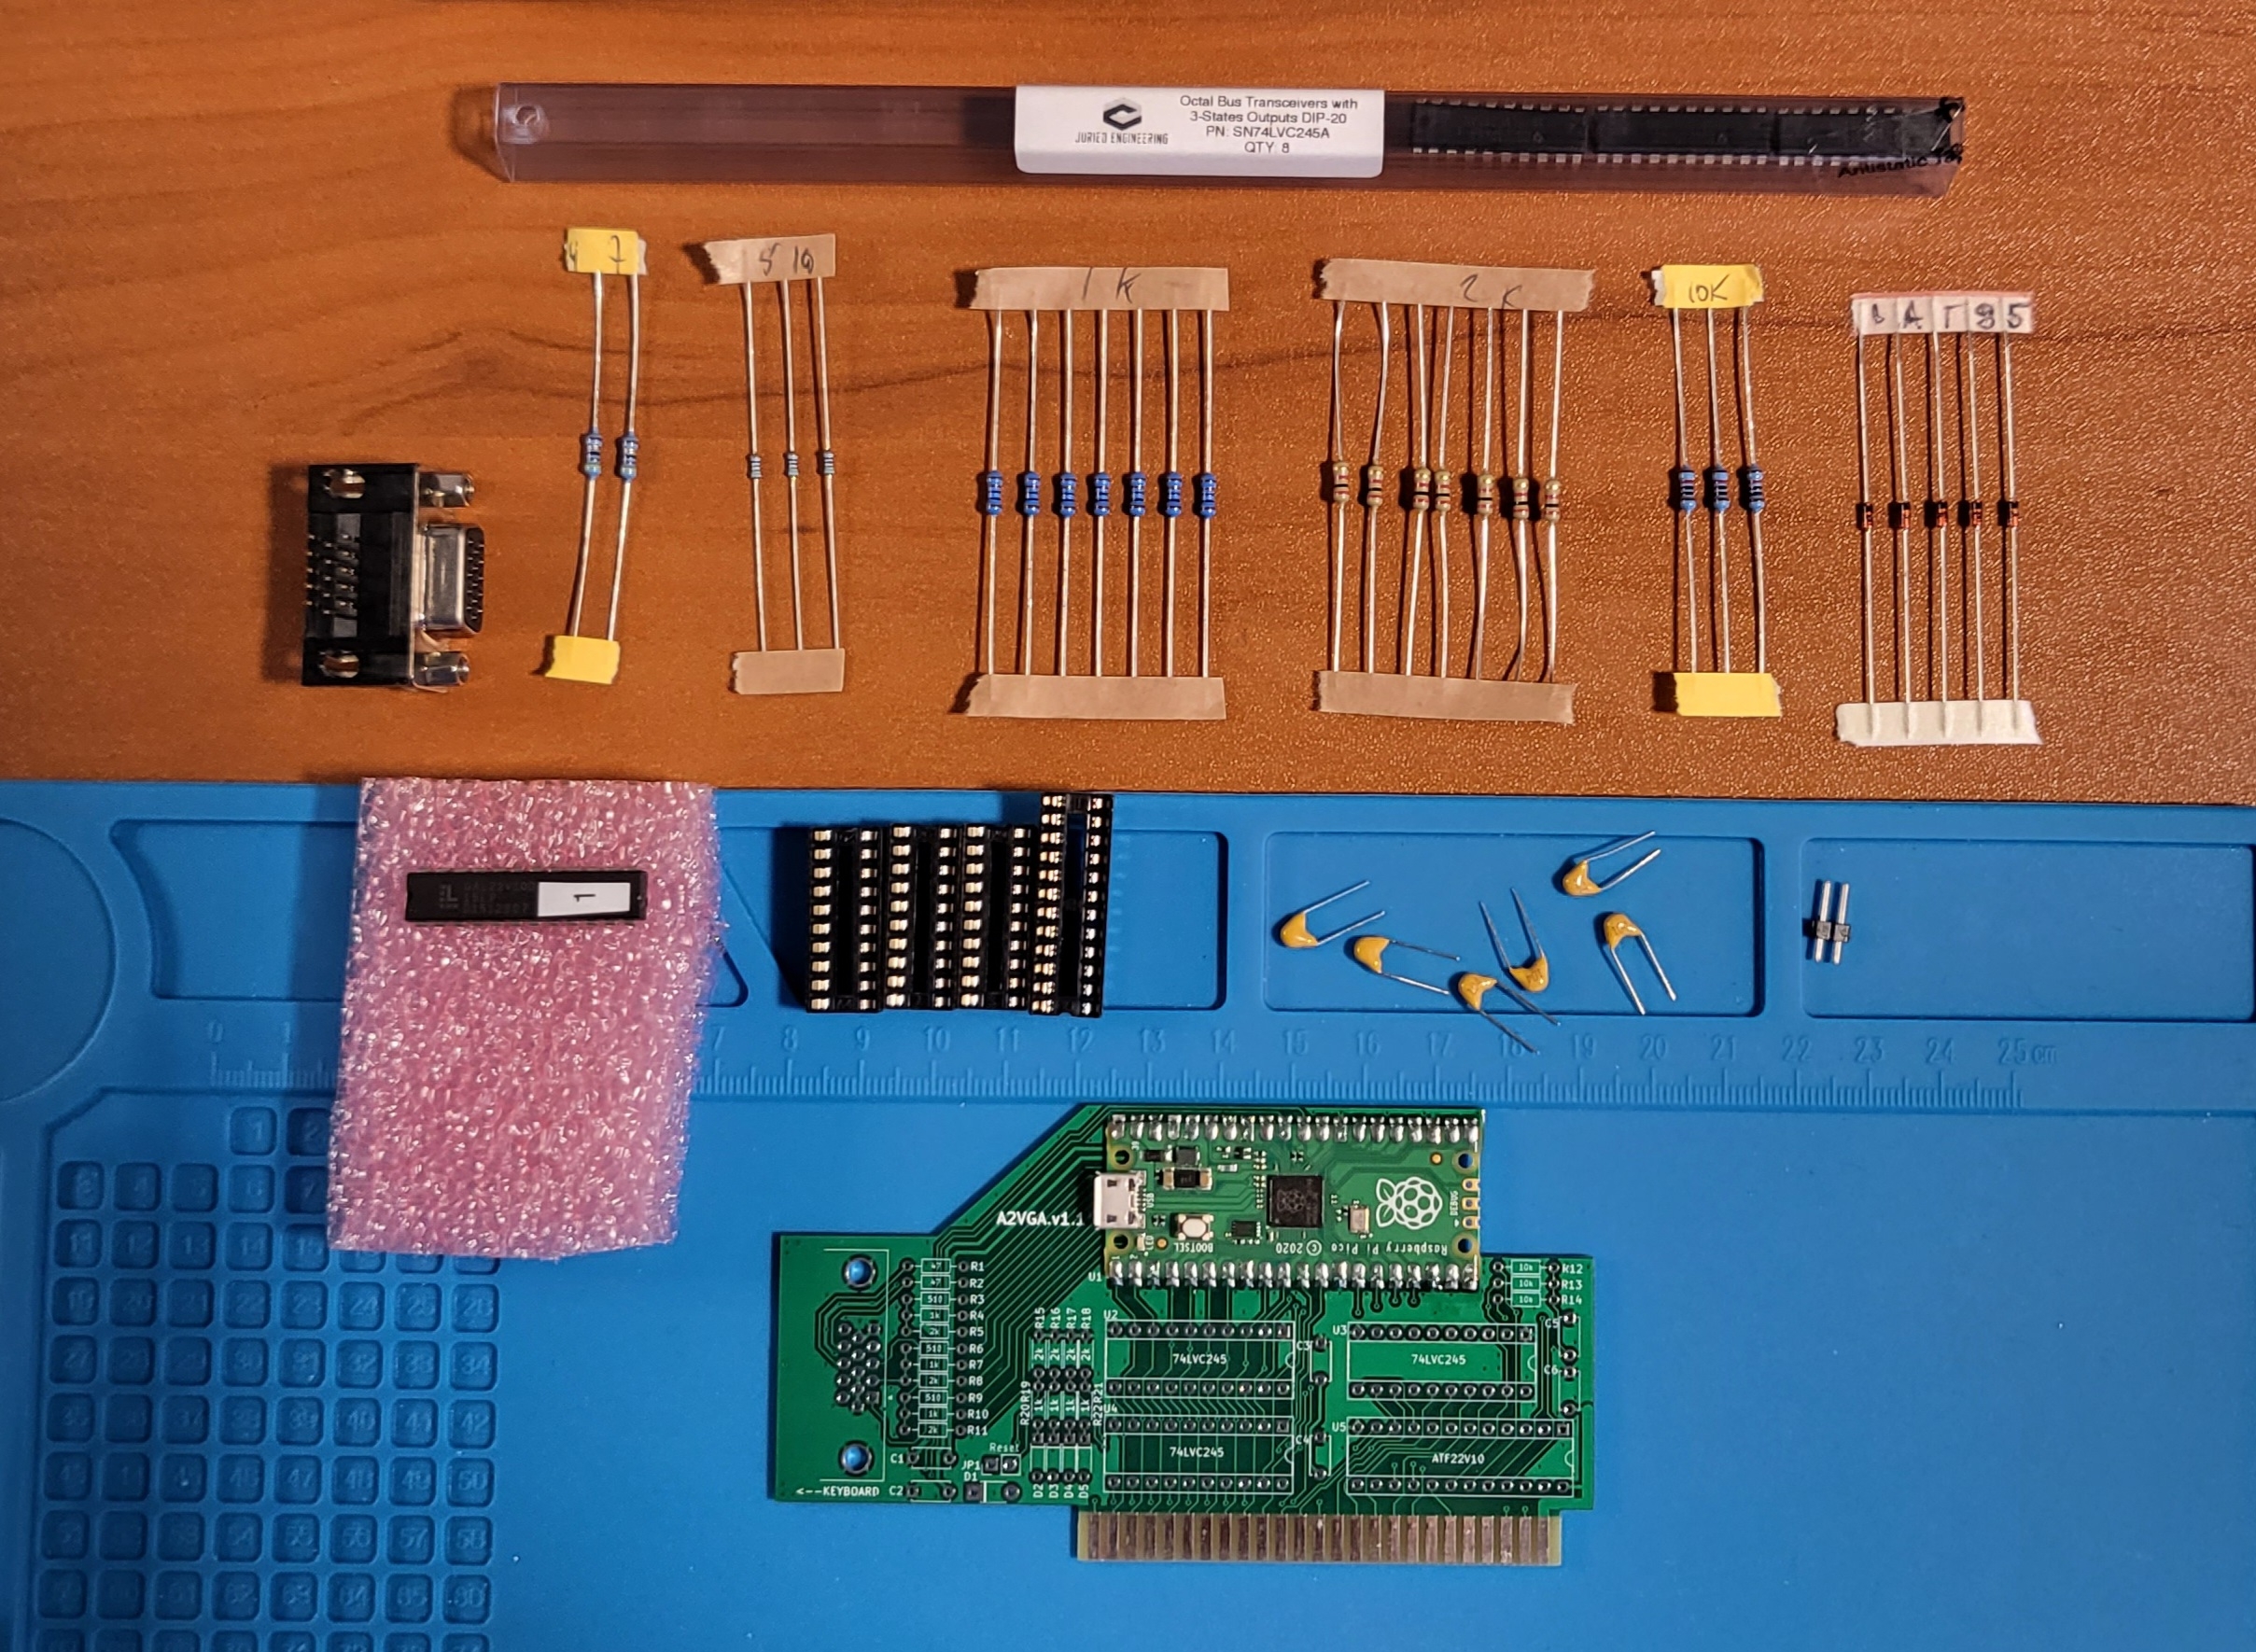
First if you have an IIe and no reason to want a Z80 card, consider the Briel version. However, you could build this version too. You will need the following parts:
1x PCB (1.1 or 1.2, as seen here https://github.com/rallepalaveev/analog/tree/main) # Version 1.2 adds power presence on the VGA output pin 9, per the standard. Some people have powered modified VGA to HDMI adapters this way.
1x MF-R020-2 Fuse (OPTIONAL, only if VGA output is powering something do you need to install this).
1x VGA Right angle Solder Type
1x 24 pin narrow DIL socket
3x 20 pin DIL socket (technically optional).
6x .1uf / "104" capacitors
1x 2 pin jumper header (optional)
1x ATF or GAL22V10D IC
1x Pi Pico or Pico W
3x 74LVC245 IC (use reputable suppliers! I recommend sockets if your chips are untested!)
2x 47 ohm resistors
3x 510 ohm resistors
7x 1k ohm resistors
7x 2k ohm resistors
3x 10k ohm resistors
5x diode (I used schottky BAT 85)
That's the easy part; you can flush mount the pico with the castellated holes but it may be harder to reflash the firmware. If you're not tight on space in your Apple II consider using headers for ease of attaching a USB cable later, or even socketing the Pi. I noticed the DSUB footprint was a bit tight but not unworkable. Resistor space is tight but also not unworkable.
Here is my completed card, I stood up the 1K and 2K resistors by the diodes for space purposes.
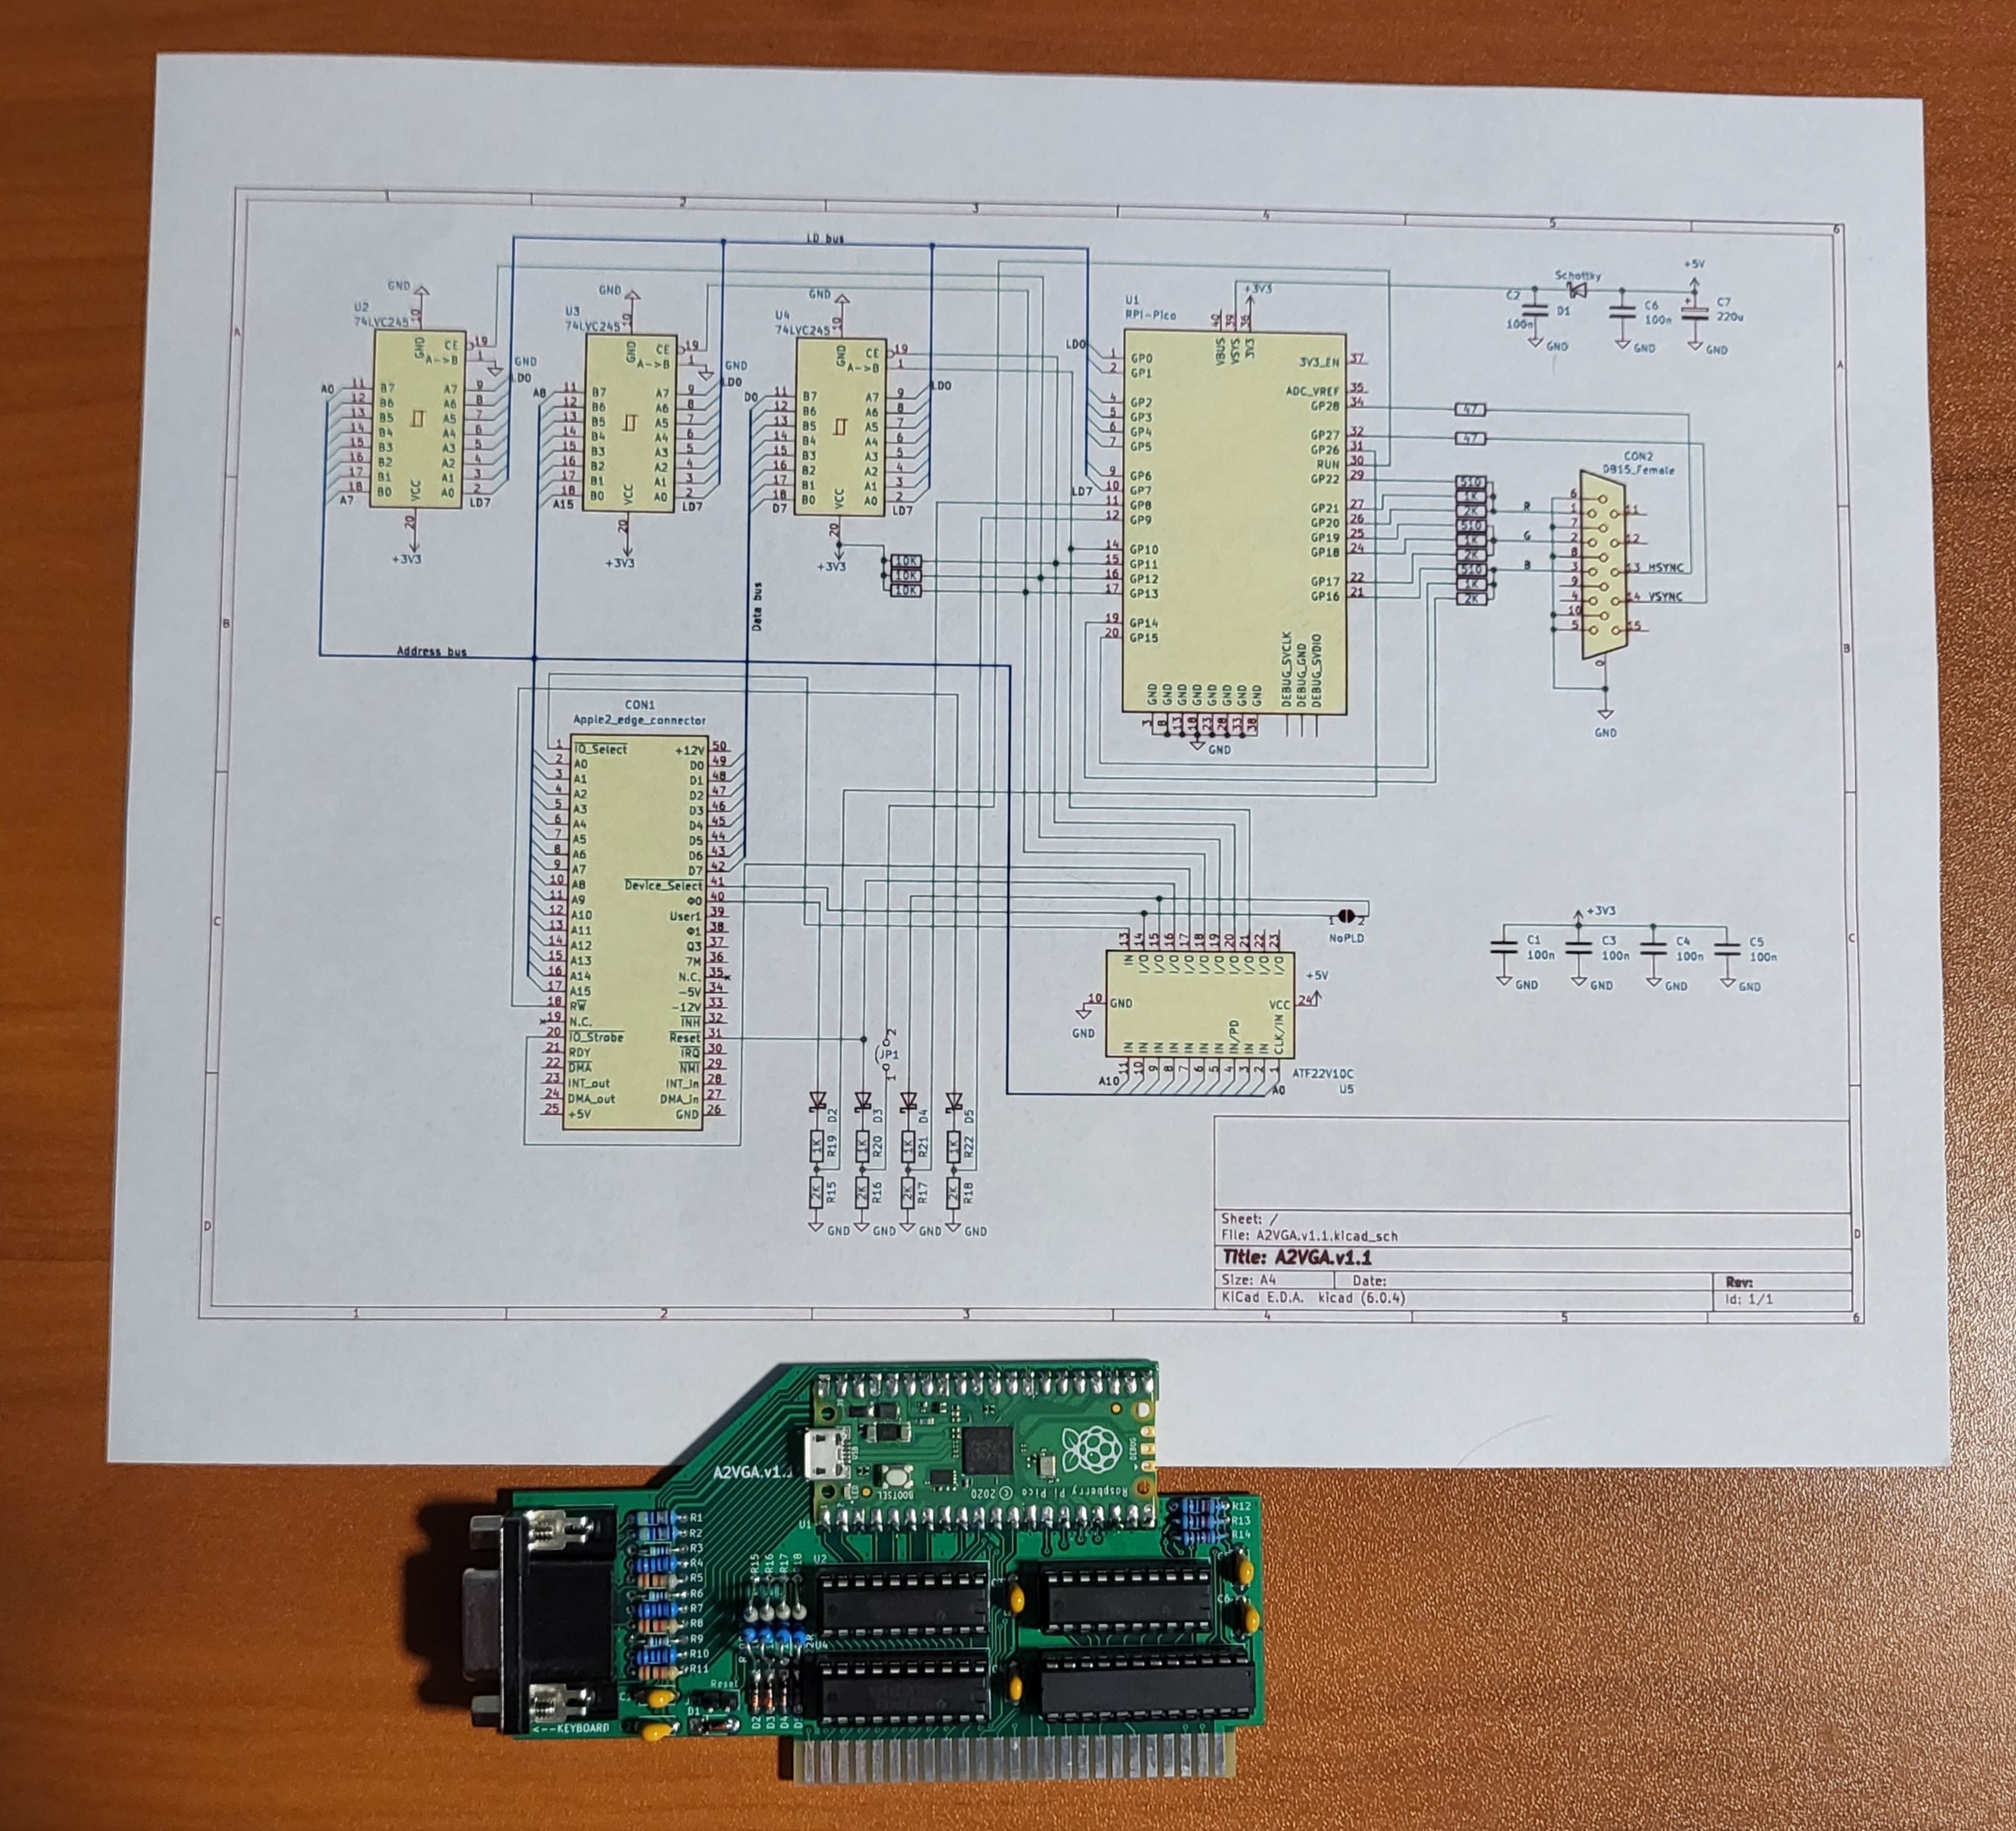
Now to demistify a few things; because all of these projects are open source they are somewhat intertwined, so it may be hard to find exactly what you need. Let's avoid sending you, our reader, down this rabbit hole. You simply need 2 things:
1 - The .jed file for the 22V10D, provided by Ralle by way of SoftwareJanitor here: https://www.applefritter.com/files/2023/11/17/PICOPAL-N.jed_.zip
Program this to your ATF/GAL22V10D using any standard EPROM programming type device, I used a TOP3000.
2 - The various compiled firmware files from the V2Retrocomputing repository:
https://github.com/V2RetroComputing/analog/releases/download/20230504/V2-Analog-RGB9-20230504.zip (mirror: ![]() V2-Analog-RGB9-20230504.zip)
V2-Analog-RGB9-20230504.zip)
Installing the firmware is only slightly harder on this version [than the Briel or other versions], as it is a 2 step process. First, hold the 'bootsel' button on the Pico while plugging into USB. Now, from the above .zip archive, drag and drop the "v2-analog-preloader.uf2" file. DO NOT UNPLUG THE PI YET! This step is step 1 of the 2 step installation. This sets up fonts and some other things, however, then you can select the rest of your firmware. The Pi should show back up a few seconds later, at which time you can drag and drop the appropriate firmware. If you use a Pico W, use a file with 'wifi' in the name. If you have a normal Pico, use a file with 'lc' in the name. The 4ns versions run faster and you can try them first. So for VGA with a Pico W, your 2nd file would be "v2-analog-wifi-4ns-vga.uf2". Once the Pi shows back up from the preloader step, and you drop the 2nd file onto the device, it will eject a 2nd time. Now you can unplug it, and your card shoud be ready to go!
Within the .zip linked above are also disk images of various utilities by V2Retro Computing.
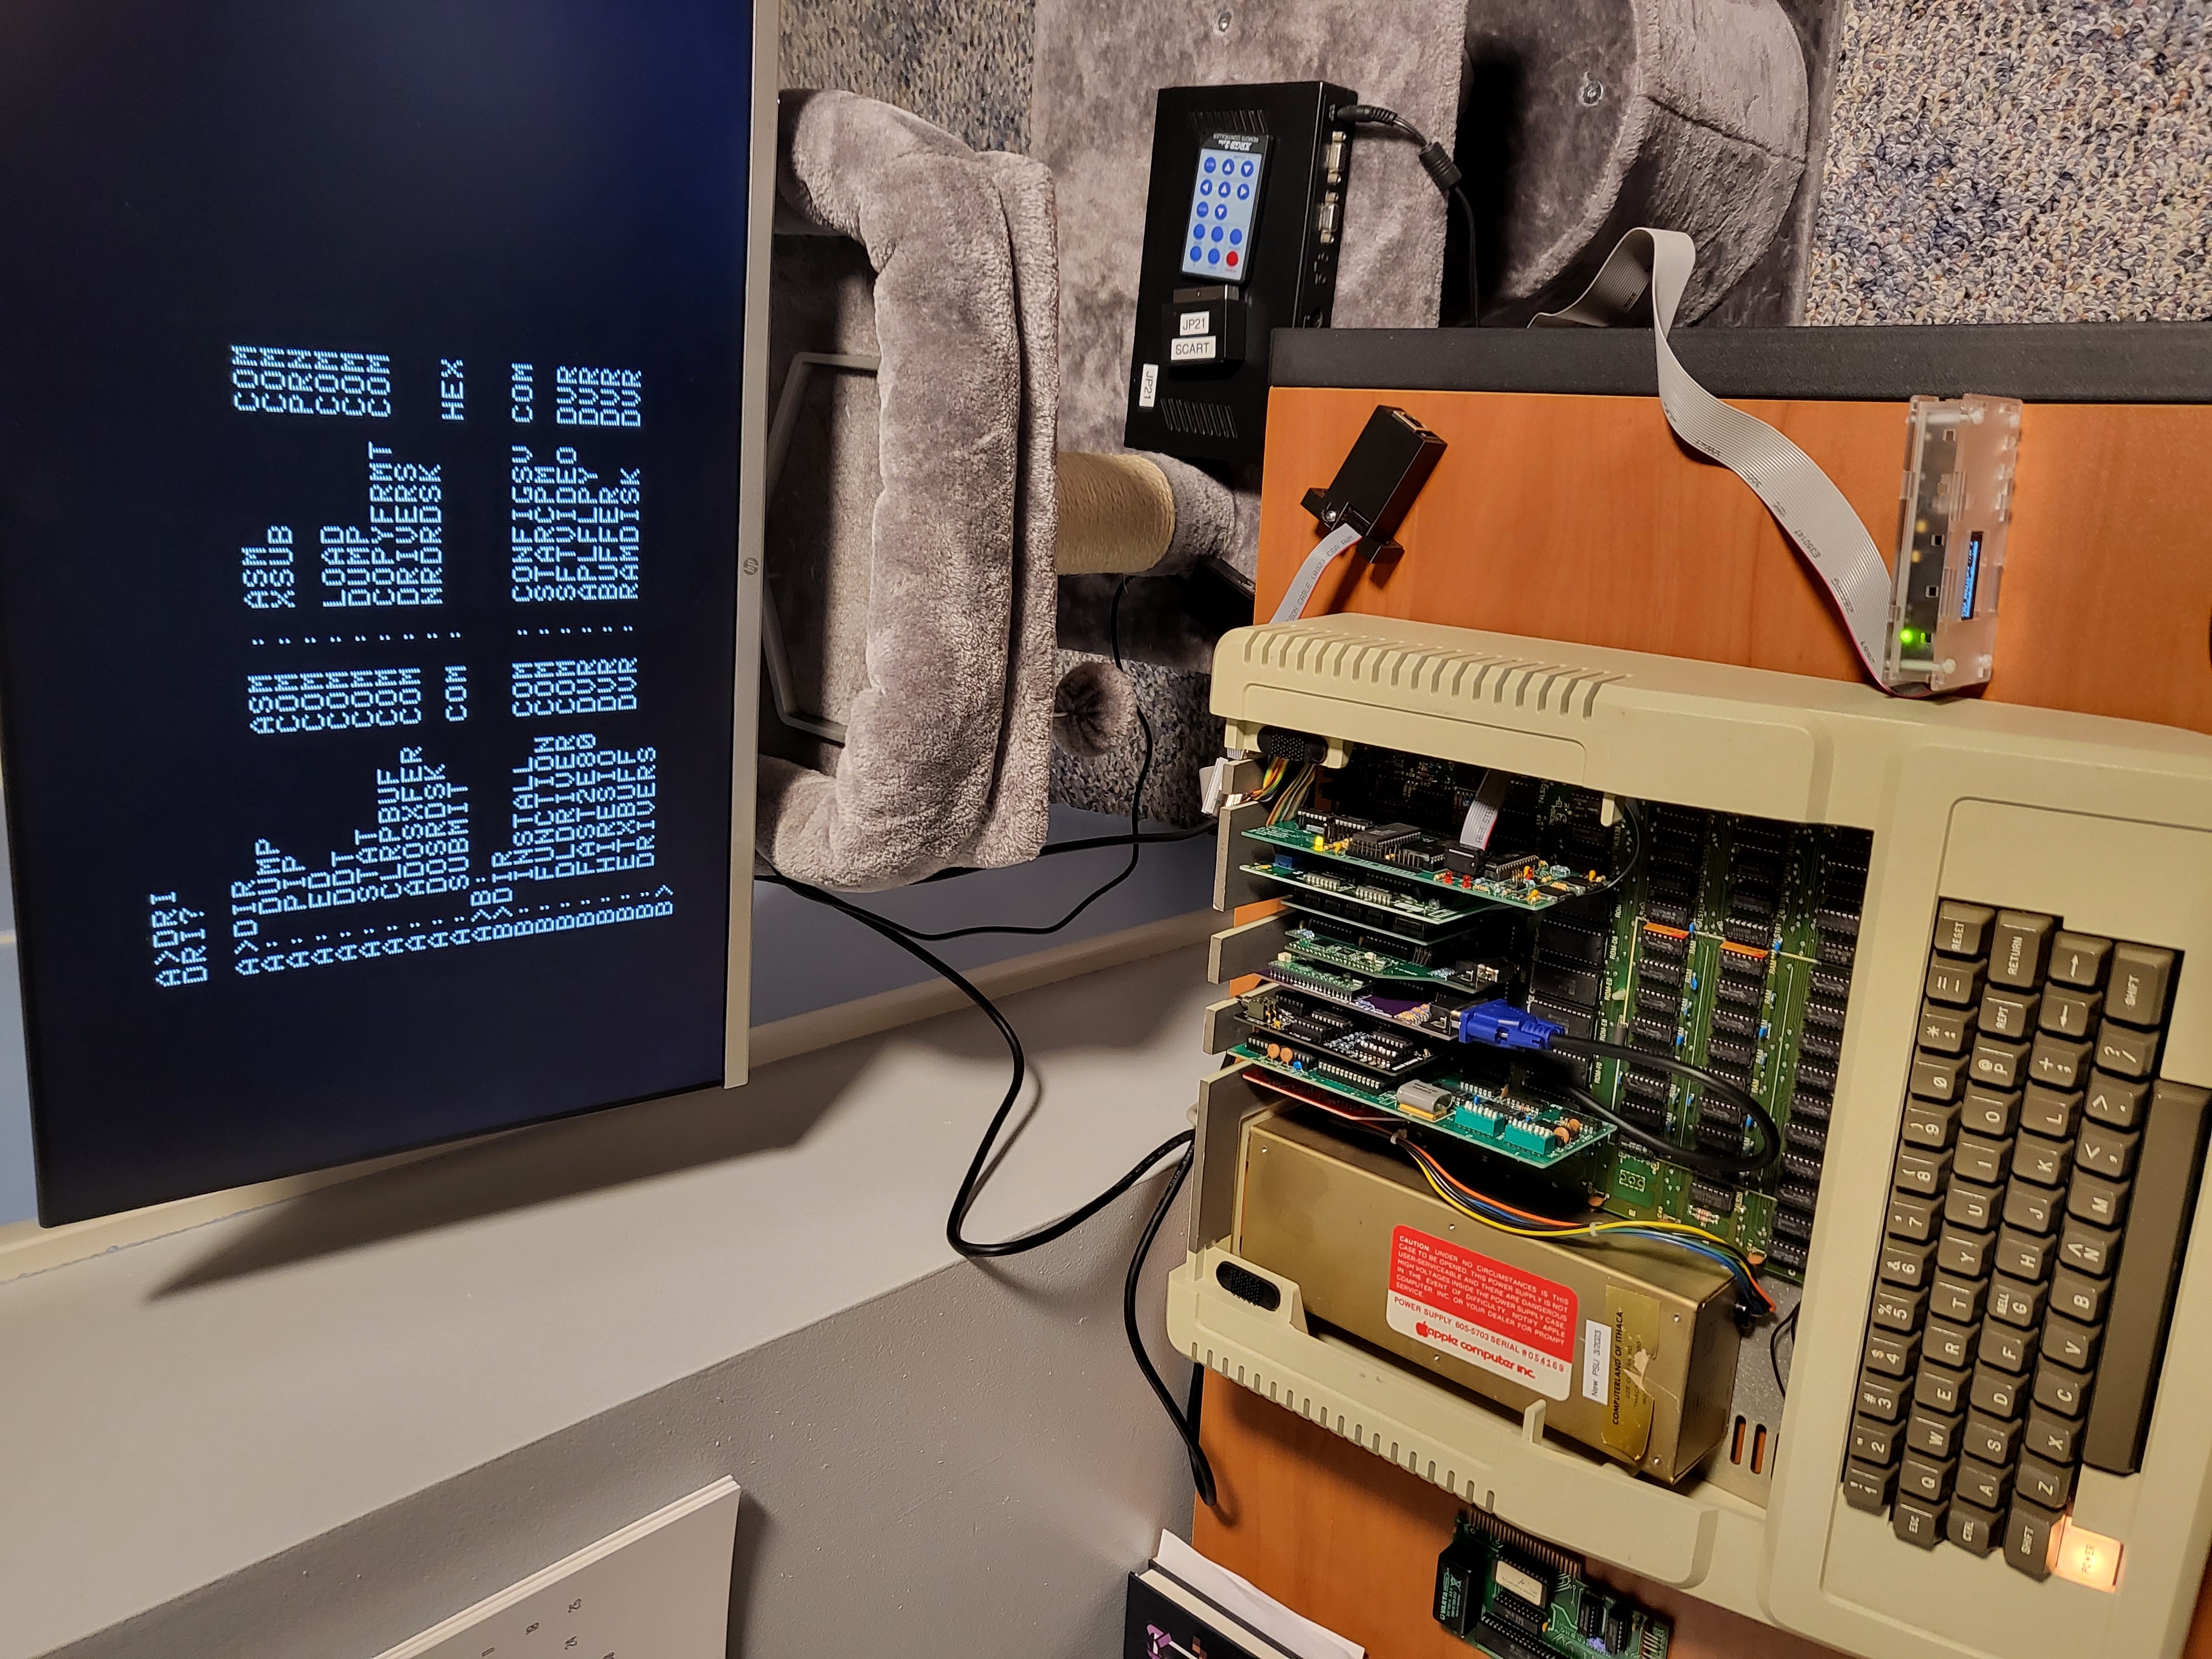
Here is the card in Z80 mode, using a different card for video:
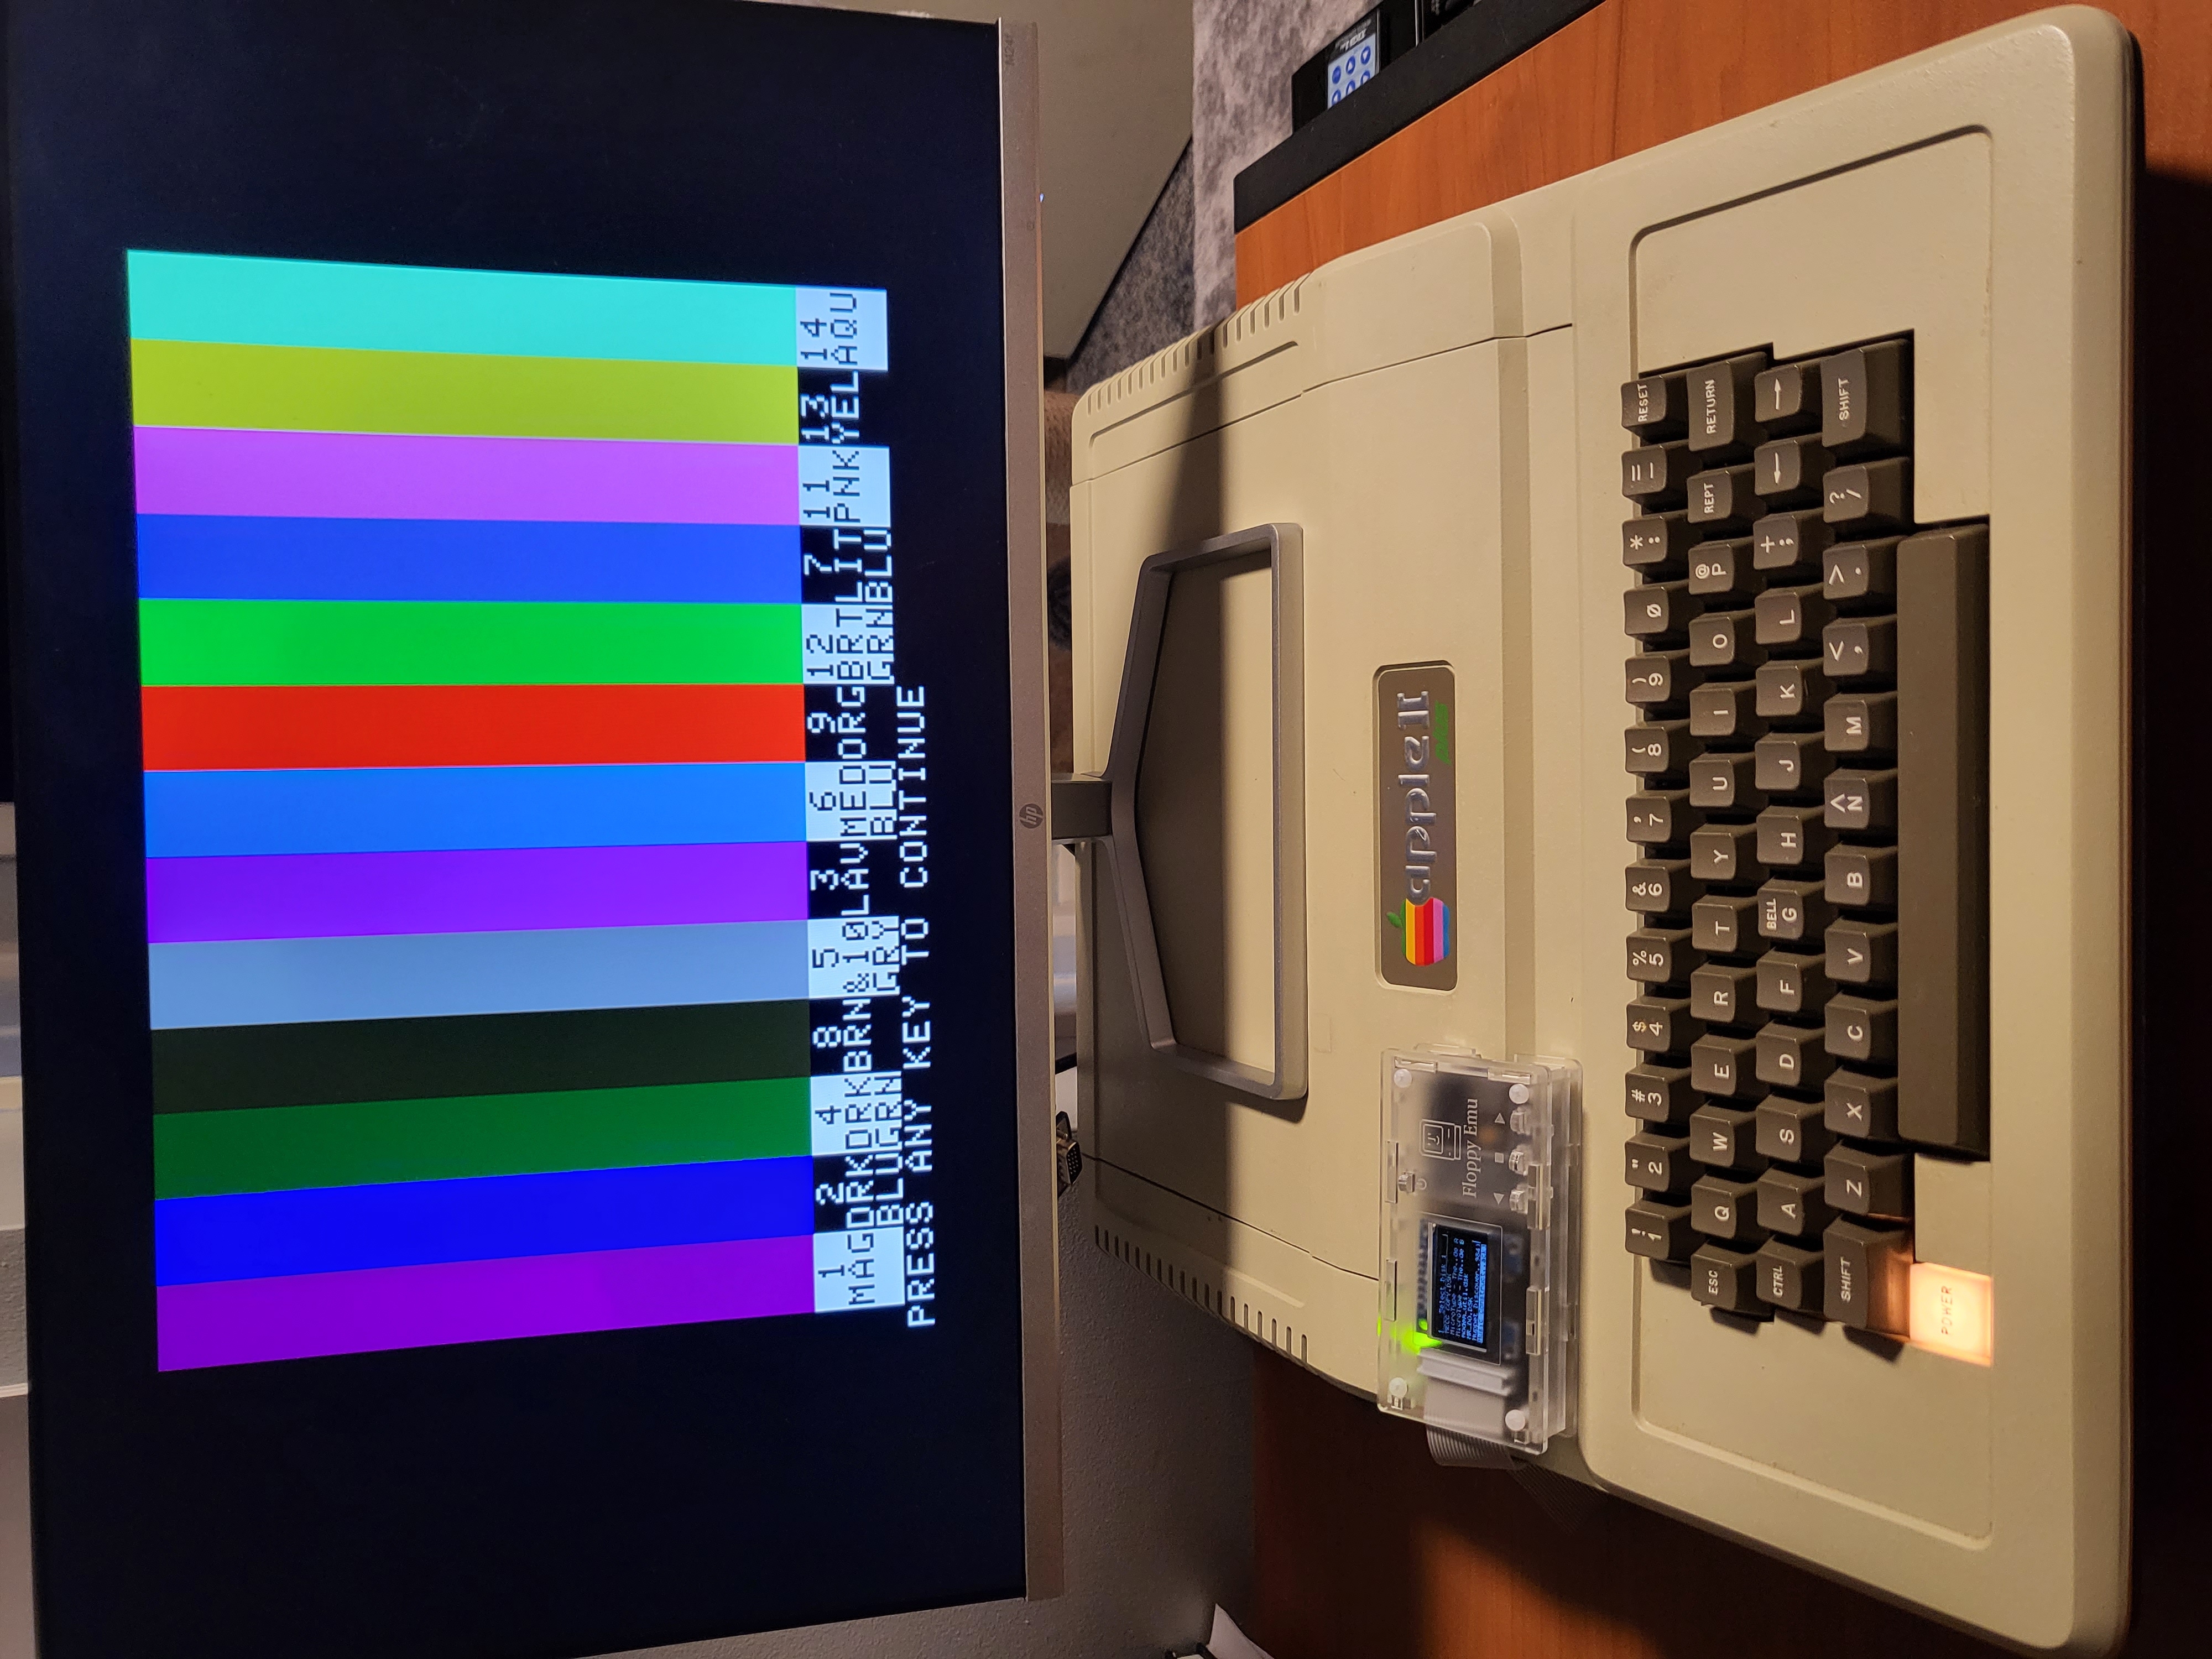
Color Test (My camera is not particularly accurate or calibrated for color accuracy):
I hope this makes this project easier for some people to complete, without having to first go through multiple different github repositories.
Thanks / Acknowledgements
Mark Aikens / MarkADev
David Kruder for V2Analog
Ralle Palaveev for this layout / PCB design etc
SoftwareJanitor for sending me a couple of boards :)
CVT
- skate323k137's blog
- Log in or register to post comments
Comments
Super Fun Project
This looks like a super fun project. Versioning is now up to 1.6. Could you expand on the difference/improvements between v1.2 and 1.6?
1.6 has the USB functionality
1.6 has the USB functionality integrated. I have 5 PCBs that arrived last week that I haven't started assembling yet. The RPi Picos for them showed up on Monday and I have all the other parts on hand so I will probably start building soon.
softwarejanitor wrote:1.6 has
Version 1.6 Has since been completely deleted from github. I am assuming there was an issue with the design. Have you built and tested one of your 1.6 boards yet Softwarejanitor?
I have built 5, three work
I have built 5, three work fine as Mouse cards, two have issues, but i'm not sure they aren't bad 74LVC245s yet.
I also haven't tried a 1.6
I also haven't tried a 1.6 card for VGA out or Z80 emulation yet.
I will be debugging the two
I will be debugging the two other 1.6 cards I have tomorrow or sometime later in the week probably. I will first try to make them work as Mouse cards then I will try to get them to work for VGA out and as Z80 cards. I will report back with what I find.
softwarejanitor wrote:I have
So 3 of the new version 1.6 work fine for you? Thats great. I havent built mine yet as I was shcoked to find the 1.6 directory deleted from github. As far as the 74LVC245 ICs you are 100% right. I am going through this myself. A ton of them I bought are fake. They seem to be 74ls245 rebranded! And they dont work or work very intermittantly. The ones I bought from china and AMAZON are all bad. I just bought some from Digikey but havent tested them yet. I am sure those digikey ones will work. This is the first time fake China chips has affected me.
3 of the 1.6 cards work fine
3 of the 1.6 cards work fine as Mouse cards. I haven't had time to test any of them for VGA output or as Z80 emulators yet. All of these A2VGA cards are extemely sensitive to 74LVC245 chips. I'm not sure that the fake ones are 74LS, I'm suspecting 74HC or 74HCT maybe. But I could be wrong.
softwarejanitor wrote:3 of
Im in total agreement these cards are incredibly sensitive to components. Diodes, 74lvc245s, and Gals. If I build 5 its not uncommon at least 2 give me trouble. I dont know why they are soo horribly sensitive but they are.
I find myself reflashing the gals and pico over and over and Find what assortment of cards the apple II has seem to make a difference.