
| Attachment | Size |
|---|---|
| 250.12 KB | |
| 261.83 KB | |
| 237.62 KB | |
| 235.86 KB | |
| 232.6 KB | |
| 236.36 KB | |
| 2.34 MB | |
| 331.5 KB | |
| 169 KB | |
| 2.62 MB |
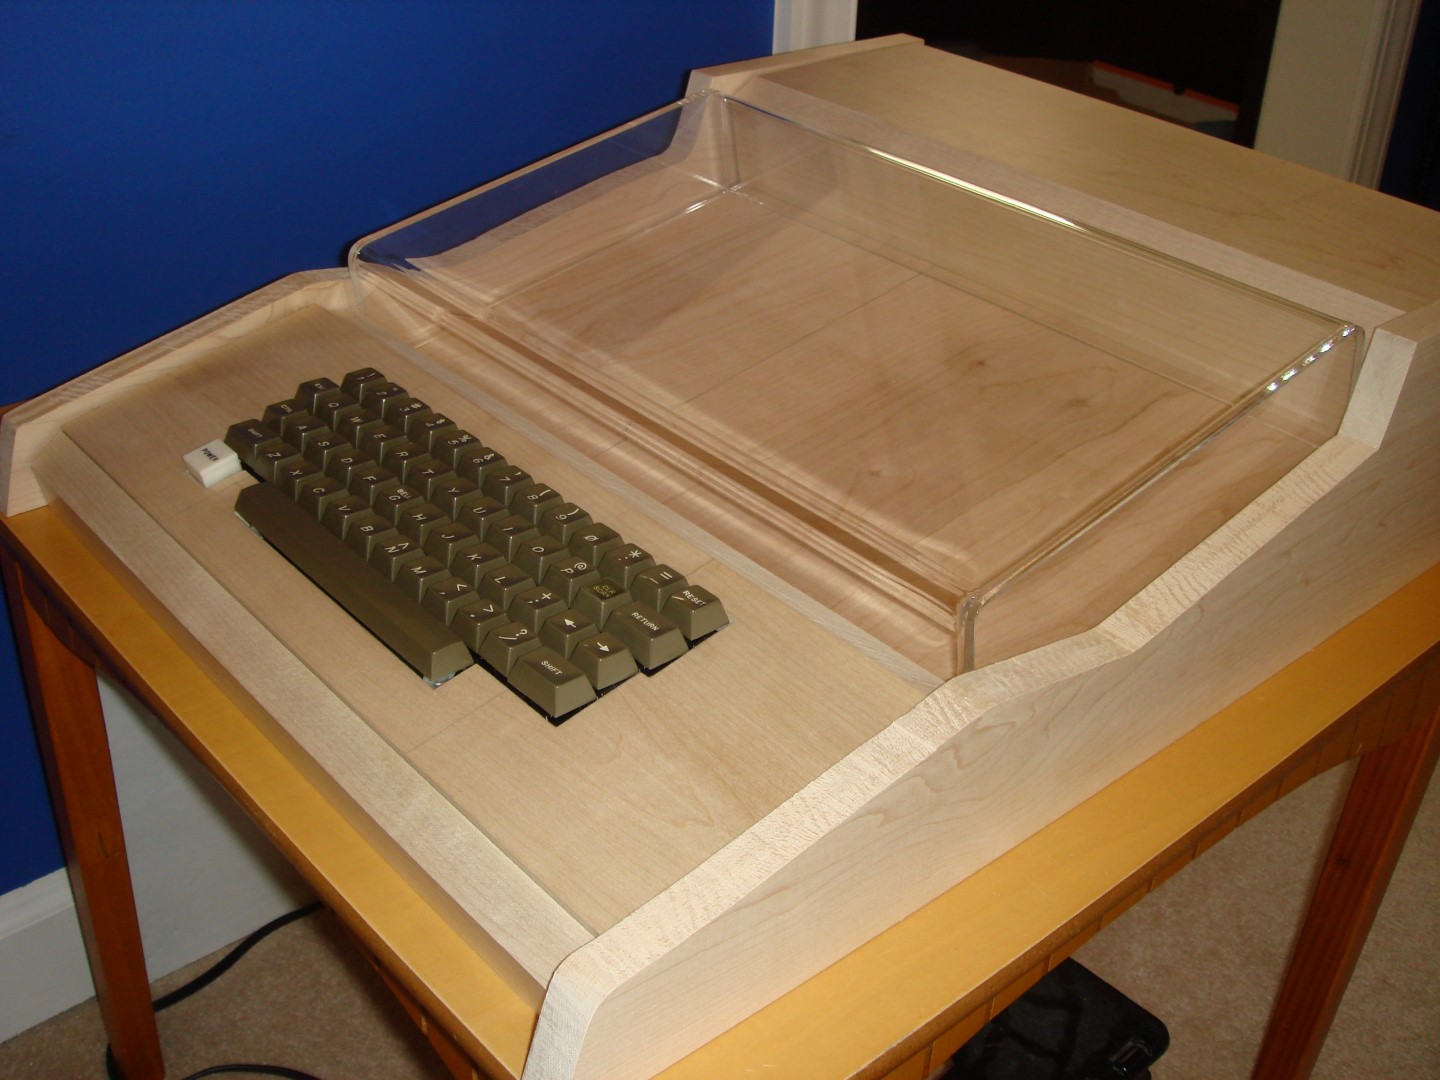
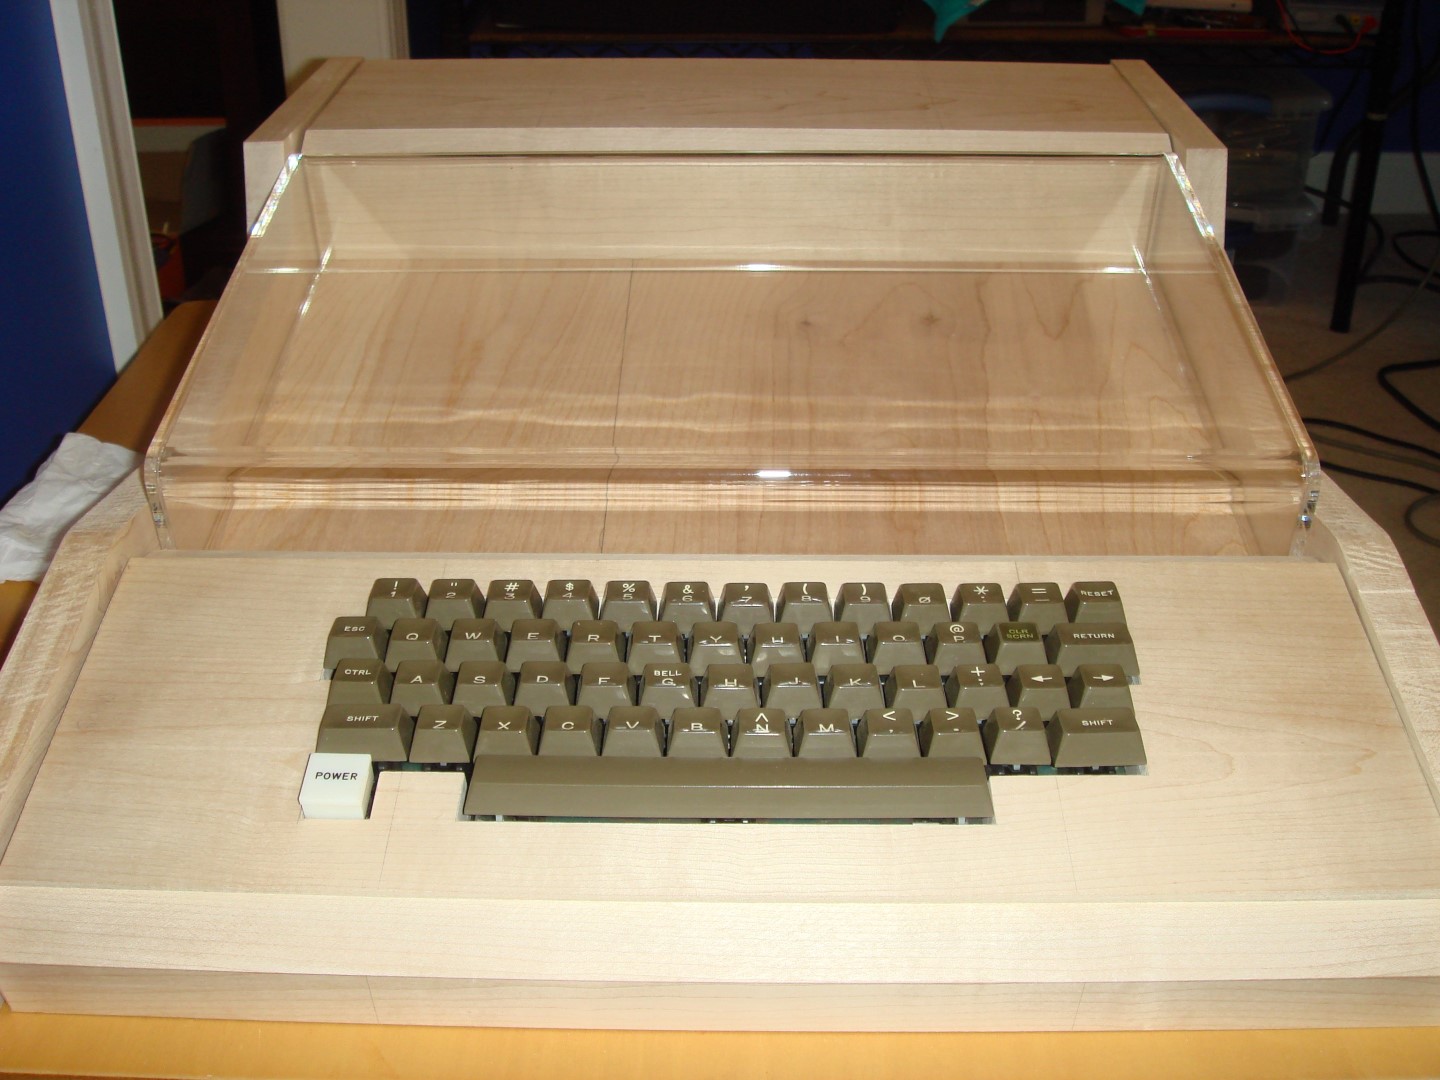
So, I've finally got enough to show the progress on my case. It's been a frustrating experience, as I'm having to learn a lot about woodworking, and other things. Simple things like cutting wood to the correct size, making the wood square, cutting a bevel, etc are all things I've had to take a crash course on. Plus, I'm trying to do it with the equipment I've got on hand, so it probably would be easy for some others if you've got a bunch of tools lying around.
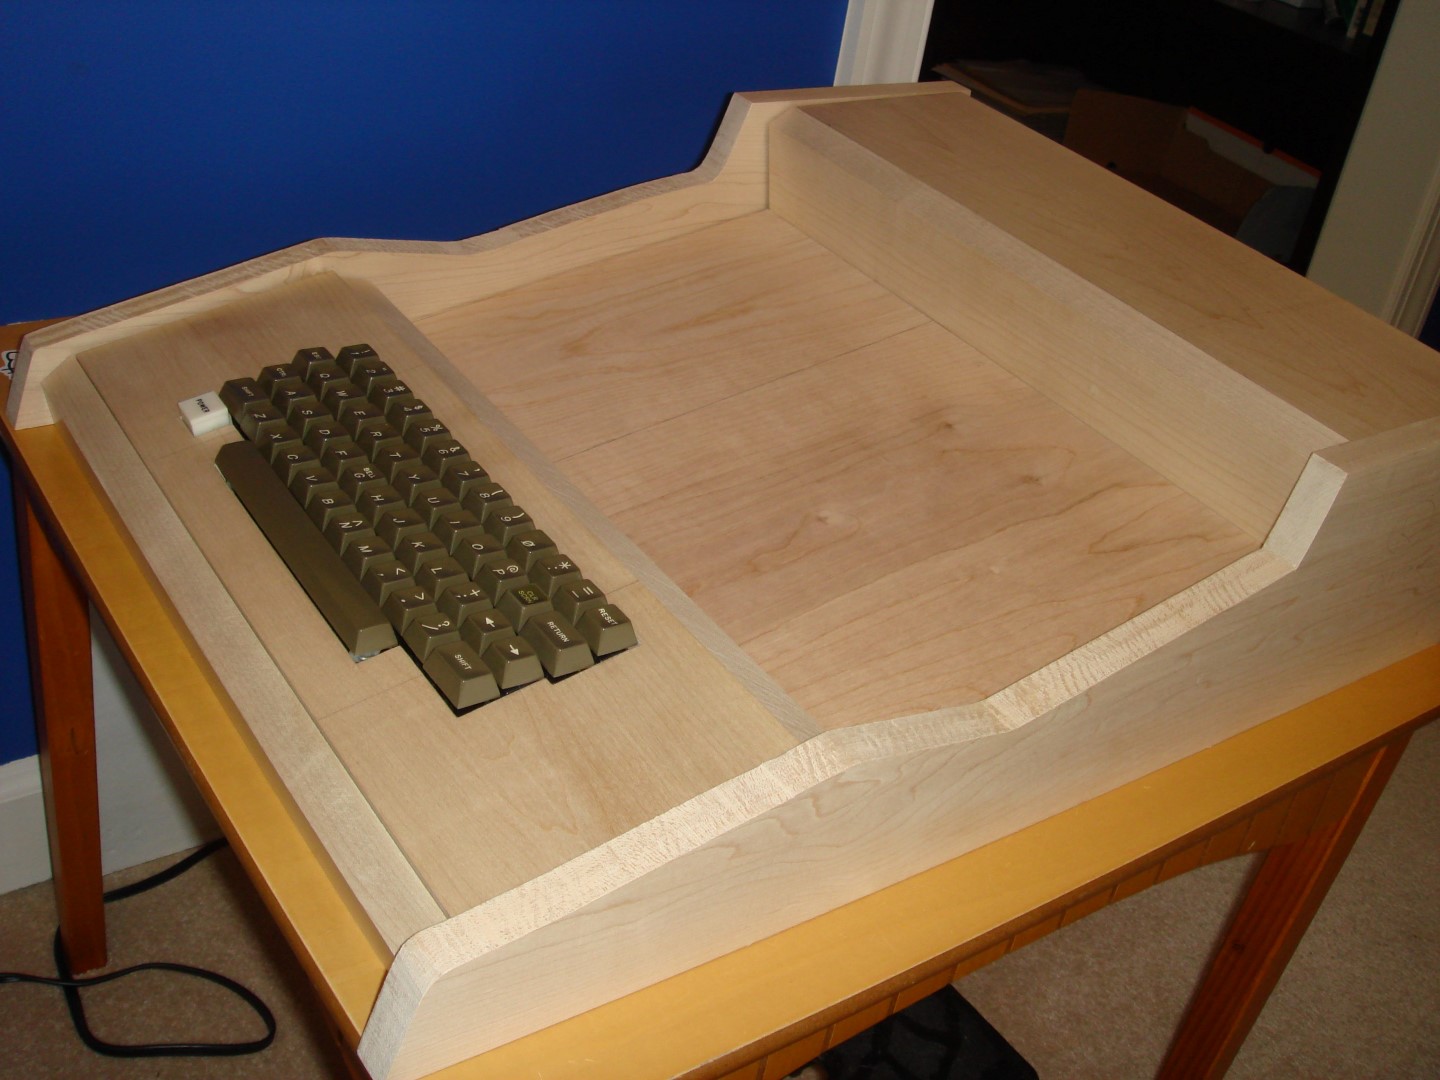
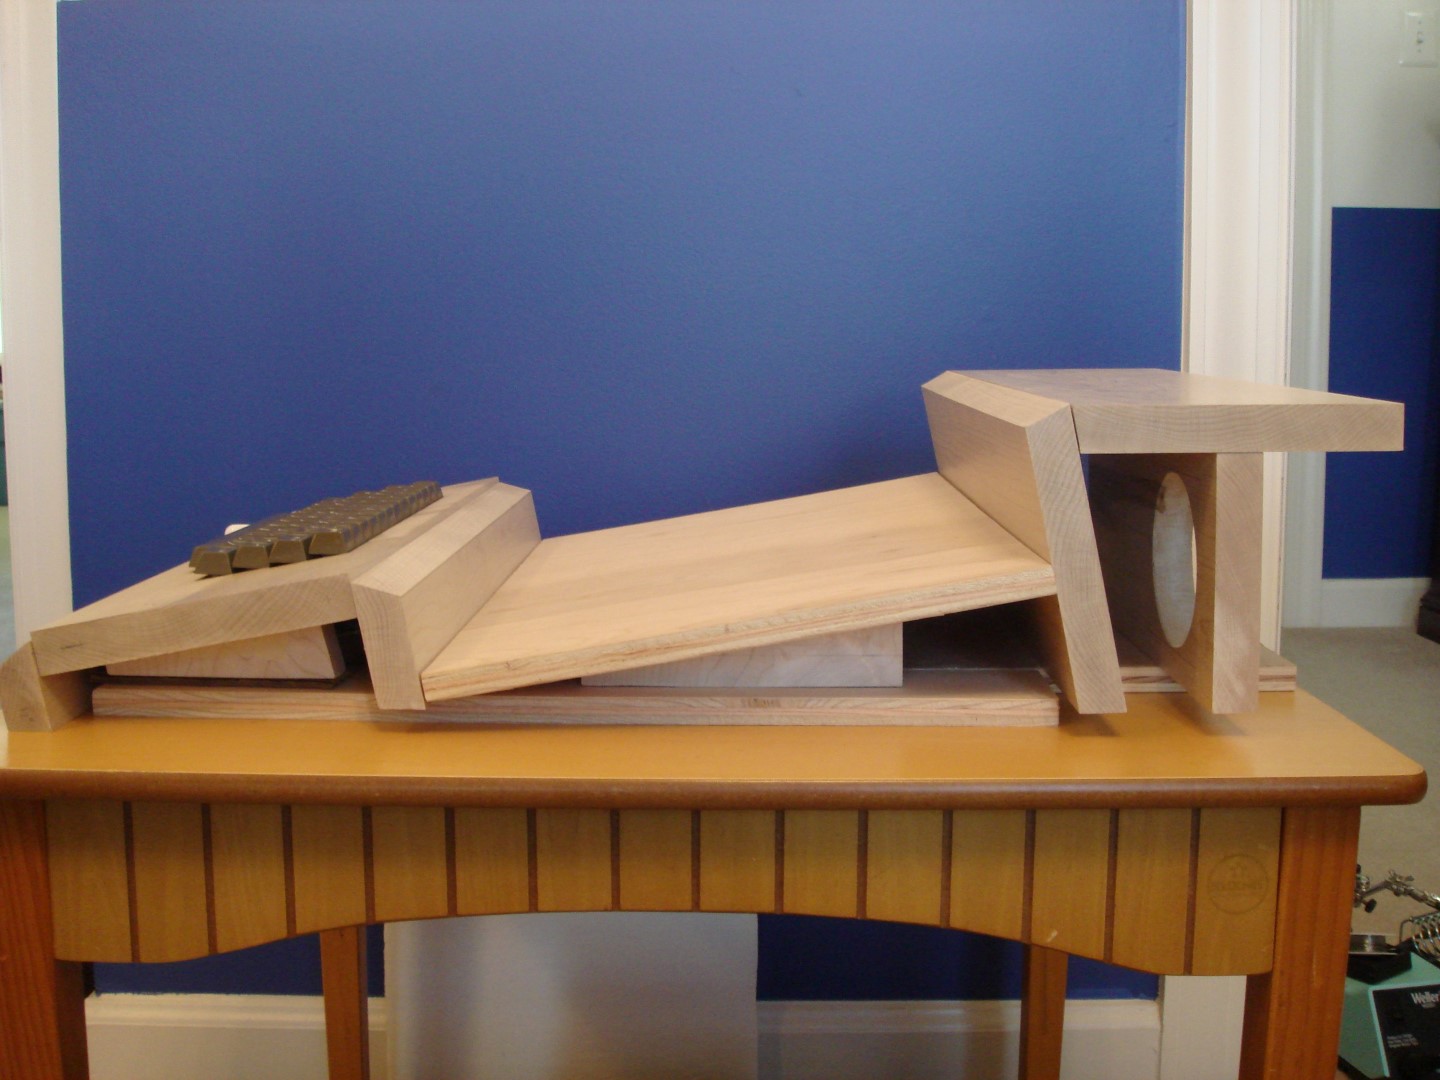
Here are some preliminary pictures of all my cut pieces laid out mostly in their final positions, and you can get an idea of how it will look. I still need to cut the sides down to their final size, but they're roughly the right shape. In the end, everything will be flush with beveled edges. Right now, nothing's attached together, and it's all balanced on each other like a deck of cards!
Tell me what you all think!
PS. the back board with the holes in it will be flush with the back when I've attached everything together. I put it this way in the pictures because that rear-most horizontal board is balancing on it! The holes cut in the back board are for the fan (round hole), and the power plug and switches and ports (rectangular hole which I will cover with an aluminum plate which I'll mount the things on).
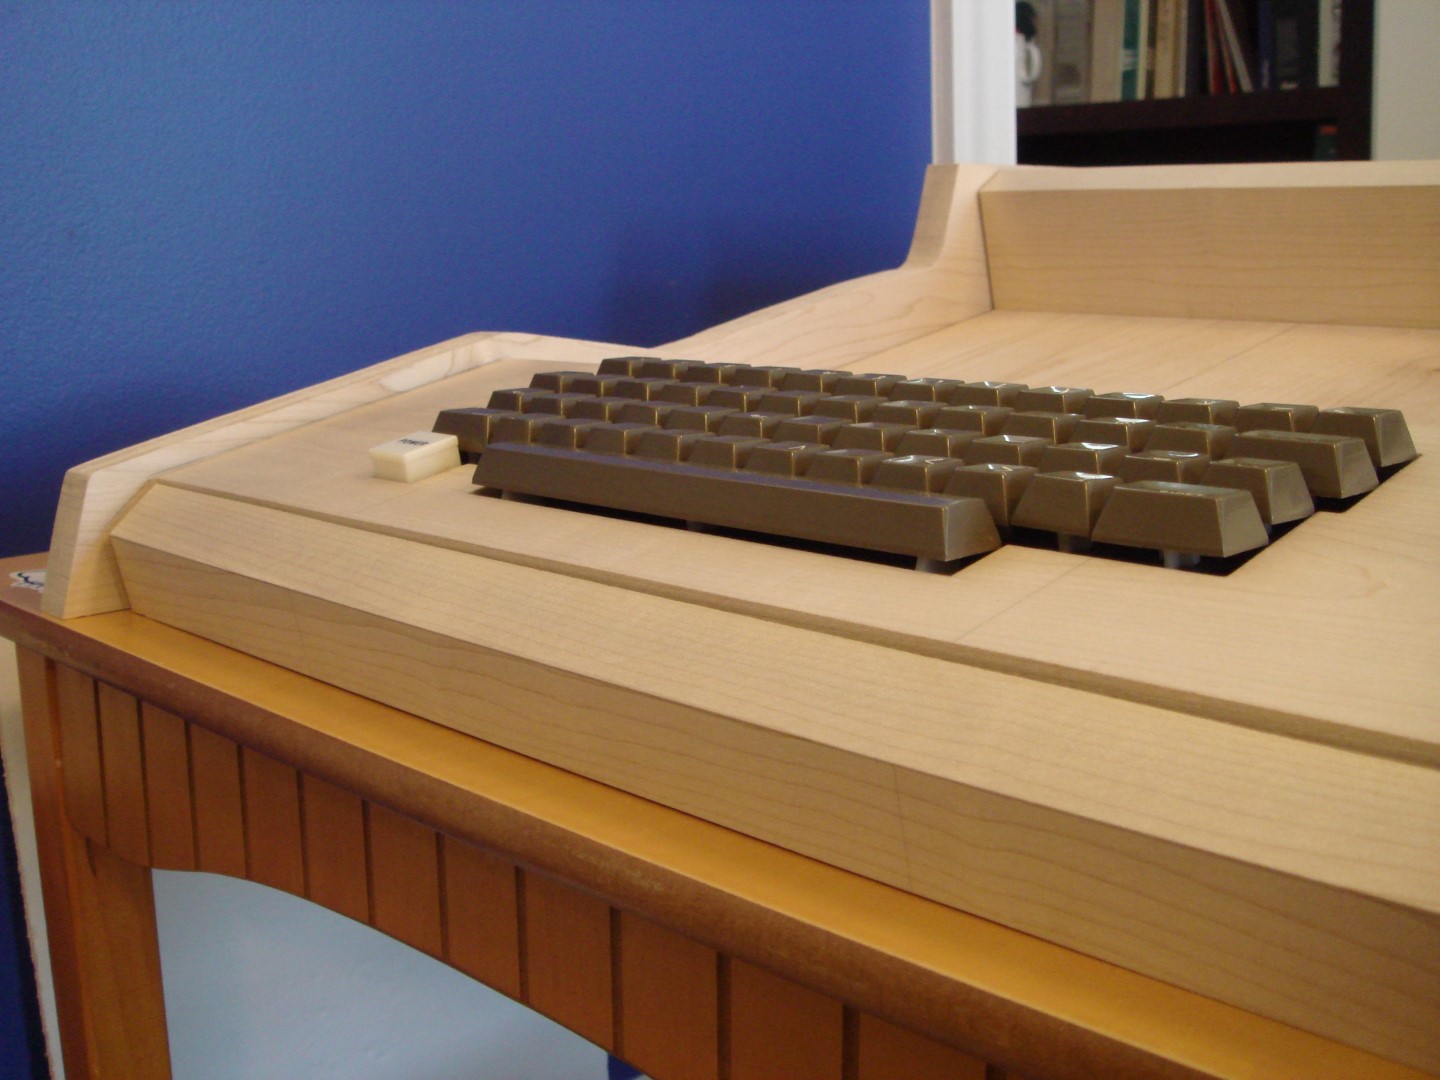
I also plan on putting an acrylic border around the keyboard, which I think will frame it nicely.


Awesome!!!!!
What kind of tools did you use? You say that you used what ever is lying around. Well the results are pretty impressive. I'm guessing you have more than a dremel and a hand saw.
Thank you Corey!
I mainly used a circular saw (for the straight and bevel cuts), jigsaw (cutting out the holes and keyboard), chisel (hollowing out the wood that goes over the keyboard so it will sit flush), and bunch of metal/wood files (to smooth the edges of everything), and a workmate as my stand. It's all made out of maple, which I'm learning is a really hard wood. I picked it because I thought it looked the best from what was at my local hardware store.
To make the cuts as straight as I could, I used one of those cheap aluminum clamp-on saw guides, which works okay, once you figure out its idiosyncracies. It would have been a lot easier if I had a good table saw that actually worked.
I've still got to cut a hole in the wood that sits right behind the LM323 heatsink, so the fan will pull the air through and hopefully keep it cool. I plan on cutting some holes in the sides of the acrylic cover so that cool air can be pulled in with the cover on.
The acrylic lid is a custom turntable cover from a company called JMK Displays and is made of 3/8" acrylic, and cost about $80-90, which is a really good price for a custom turntable cover (some places charge well over $200-300), and it came back perfectly dimensioned.
I'm very happy with how it's turning out. Prior to this, I haven't been able to really imagine it beyond drawings crude mock-ups. Zan, who is a member here, gave me the idea of putting the Mimeo at an angle, and the design really grew out of this. Because the motherboard is angled, you can get a good view of it while you're sitting in front and using it.
That looks amazing. I just convinced myself that I don't need an Apple 1 clone and then I see this and imagine how cool it would look on my desk. The turntable cover is a really nice touch. Do you plan on keeping it the natural/blond color or are you going to go for a "retro" look with a dark color stain?
Thank you! I will likely stain it with a light colored stain, maybe a light honey maple color or something. I've heard that maple doesn't take stain well, though, so I'll see what I can get on some scraps first. I'd love to keep the color on the light side, though, so the angular nature of the design doesn't get lost.
It's funny, originally my idea was sort of a "turntable" setup with just a simple thick plank of nicely finished wood for the mimeo to sit on top of, with an acrylic cover on it and a separate wood keyboard. I kept the turntable cover idea because it provided a nice way of being able to see it from all angles, like the all-acrylic cases.
Thanks again!
That case is awesome......
the really tricky thing will rise when making cuts in acryl for use of the Slot and the
cassete Interface card....
Corey has gathered quite a lot of experience with handling of acyrl,
so i´recommend to ask him for hints on that topic....
sincerely speedyG
Thank you Speedy! The cover will just be tall enough to fit the ACI in it without modification. I plan on leading the audio cables down from the ACI into the board underneath the Mimeo. The ACI input will be routed to a plug which will be mounted in the back, and to this I can plug the iPod. The ACI output will go to an amplifier and a speaker which will be mounted under the keyboard to provide audio feedback of the ACI.
I do plan on cutting a few holes for venting, because I would like to be able to use the cover while operating the Mimeo. I've worked a bit with polycarbonate and acrylics like this in the past, although never with a piece this thick. I generally will drill it slowly with a sharp bit, and only increase the size of the hole slowly to avoid splitting the material. After I've got a good sized hole in it, I usually hang-up with power tools and just use hand-tools like a coping saw and small hand-files to cut the rest. I've read online about smoothing the edges with finer and finer grit sandpaper, and finally with polishing compound, which I've heard produces a "clear" edge similar to flame polishing.
Corey definitely has some serious skills with this stuff, though, with his amazing bent acrylic case. After seeing his results, I actually thought about trying to bend my own custom acrylic top, but figured it took a bit more than I could do myself. I read about how to do it, but working with flames and such was a bit scary to me!
my remark was rather more targeting to the general handling and not to the work with flaming....
his skills and experience go much further ahead than working with flames....
he can recommend which kind of drills to use and how to treat acryl in every stage of craftship....
speedyG
That is such an excellent case, great job. Very fitting for such an important replica too.
Thank you very much!
So that you don't ruin your custom turntable cover, I'd suggest buying plexiglass specific drill bits. They will make sure you don't overheat and crack the plastic.
Something like this works http://www.amazon.com/Source-One-LLC-Plexiglass-Plastics/dp/B00VYYB5OQ
You should still put blue masking tape over the area on both sides you will be drilling, but a special bit will reduce the risk a ton. I used to use regular drillbits and be careful and work slowly going forward to start the hole, then switch the drill to reverse, but with a proper drill bit you don't want to do any of that, you just drill. The big problem is they work so well that you need to make sure you don't hit the plexi with the drill when it finally pushes through.
Cheers,
Corey
I've only used regular drill bits before, but I think I'll take your advice and get true plexiglass bits this time so I don't risk damaging the cover. What's the purpose of the masking tape on the far side?
Have you used the plexiglass jigsaw bits as well? I'll probably try the coping saw first, but if it's too slow or difficult I'll probably use the jigsaw. I'll definitely not try a regular saw bit as I've read about the melting thing.
Thanks for your suggestions.
If others are interested in building this case, I can upload my plans. I drew it all out on PowerPoint, which also allows me to take rough dimensions for each part. Let me know if these would be helpful for anyone.
Hello Sherlock,
i´d just remind you about the fact that these postings will be reviewed in a couple of
months or years by new joining members...... so maybe now there´s no demand for publishing it at the moment,
but that demand might rise from future unknown new member....
I´d recommend just to publish it right away now.....
It will for sure become interesting at different stage of building of relica to other members too....
and then it will be availiable right at the moment in the posting....
sincerely speedyG
Don't use a coping saw. You will most likely crack the plastic. Yes if you have a jig saw, get a plexi specific blade. It will cut like butter. Just go slow or you will cut too much.
As for the tape, which you should also use for cutting, it prevents small chips in the plexi from the tool by supporting the area.
Cool. Thanks for the suggestions!
OK. So I just uploaded all my design files for the enclosure. You should find them in the first post.
They are all done in Microsoft Powerpoint. They were originally in .pptx format, but the website doesn't accept this extension, so I had to convert them to .ppt, but I think they were all converted okay.
The one with most of the information in it is the "side view" file, which has the key elements of the design. It's got a ton of slides in it, and it's in reverse chronological order, so you can see my design evolve from the beginning! If you want to know the exact dimensions of any object, you can click on it, then right click it, and select "Size and Position" and it will tell you the dimensions. I mainly used these dimensions to cut my wood, and it turned out pretty much right on. YMMV! You can also control the angle of any object, and I used this to get the pieces into their correct positions.
Enjoy!
Looks great! Your finished board will look very nice in this case.
Thank you!
I was looking for some ideas to make a case, this is a work of art and exactly achieve what I want to do.
Seriously considering replicating this case for my replica
This is an old post, did you make any progress you could show us?
Thank you very much! I'm very happy with how it turned out.
Yes, here are some links to my follow-up threads, which show the case coming together, detailed pictures of the insides, and final thoughts on the cooling setup and final temperature testing.
http://www.applefritter.com/?q=content/mimeo-1-build-new-enclosure-update
http://www.applefritter.com/?q=content/mimeo-1-build-temperature-testing-and-final-pictures
I hope they help.
Let me know if you have any questions. I have plans for my case drawn out in a powerpoint document, which I could send to you if it would help you. It's got the rough dimensions of all the wood pieces laid out on it, and should help you put yours together.
This is even more amazing, you do have lot of patience to get to this result... wow!
I downloaded the PPT from this original post, but if you have an updated one, I'm definitely interested as I'd love to make the same
Thanks again!
It took a long time for me, and took every bit of patience I had at times. But as it came together, that motivated me more and more.
The .PPT attached is pretty much the final design. I made some small adjustments to things like the supports and stuff, but externally the sizes should be correct. One thing to pay attention to is the cut angles on some of the pieces. Some of them have to interface to surfaces at are not 90-degrees, so make sure you pay attention to that when cutting. If you have a good table saw that you can set the angle precisely, it should be easy. I mainly used a circular saw with a fine-cutting blade, and a cheap aluminum cutting guide (but be careful as these bend when you apply pressure to them, so I supported mine with other stuff while cutting). Again, a good table saw will really help here.
Also, I ended up using a combination of the Kreg Pocket-Hole jig + wood glue, and Gorilla epoxy in other areas for the main joining. The epoxy dries clear, which helps a lot, but it's fast setting which can be good or bad, depending on the situation. It's plenty strong, though, in my experience with it. Let me know if you need specifics on anything. You should be able to tell what I used where from the pictures on those other links.
Good luck!
Yank down the Mona Lisa and put that thing up. OMG that's gorgeous!
LOL! Thanks very much. I'm really happy with how it turned out.
By the way, this is an old thread! Here are the links to the finished case:
http://www.applefritter.com/?q=content/mimeo-1-build-new-enclosure-update
http://www.applefritter.com/?q=content/mimeo-1-build-temperature-testing-and-final-pictures
Thank again!
I’m trying to replicate your amazing design, but have some questions about the drawings you posted. The PPT file with the side view has multiple versions in it. Perhaps this is an artifact of the conversion from PPTX to PPT format. Would it be possible to get the original PPTX version of the four drawing files for me to look at?
Also, did you make the 3D view in SketchUp? If so, would it be possible to get that file as well?
Thank you!
Actually those Powerpoint files are correct. The top-most page is the most recent. When designing something, I always keep old designs in later pages, so I can look back and see if I messed something up, or if I want to revert, and keeping different files is always too much of a hassle for me.
The 3D Powerpoint is actually mostly hand-drawn, if you can believe it. The keyboard section was also done in powerpoint, by building a 2D layout of the keyboard and each key, filling it with different colors/textures, and applying the built-in 3D rotation/extrusion features of Powerpoint, which are actually quite powerful. Just right-click the object and select "Format Shape" to get to the 3D options.
These design files are the best ones I have. Please remember that inevitably you have to look over everything carefully for yourself to make sure it all makes sense. Each piece needed some final fitting to make sure it all went together. I attempted to draw everything to scale. These are the final files I used to build my enclosure.
To attach the pieces together, I mainly used a combination of pocket holes (drilled with a Kregg pocket-hole jig), wood glue, and Gorilla 5-minute epoxy (which dries nice and clear). The wood I used was maple, and sealed it with dewaxed shellac as discussed here: https://www.woodworkerssource.com/blog/woodworking-101/tips-tricks/awesome-wood-finishes-curly-maple/
I hope this helps, and good luck!