How to: DIY keyboard beeper circuit
Happy new year!I was asked about this add-on board after mentioning it in this thread.
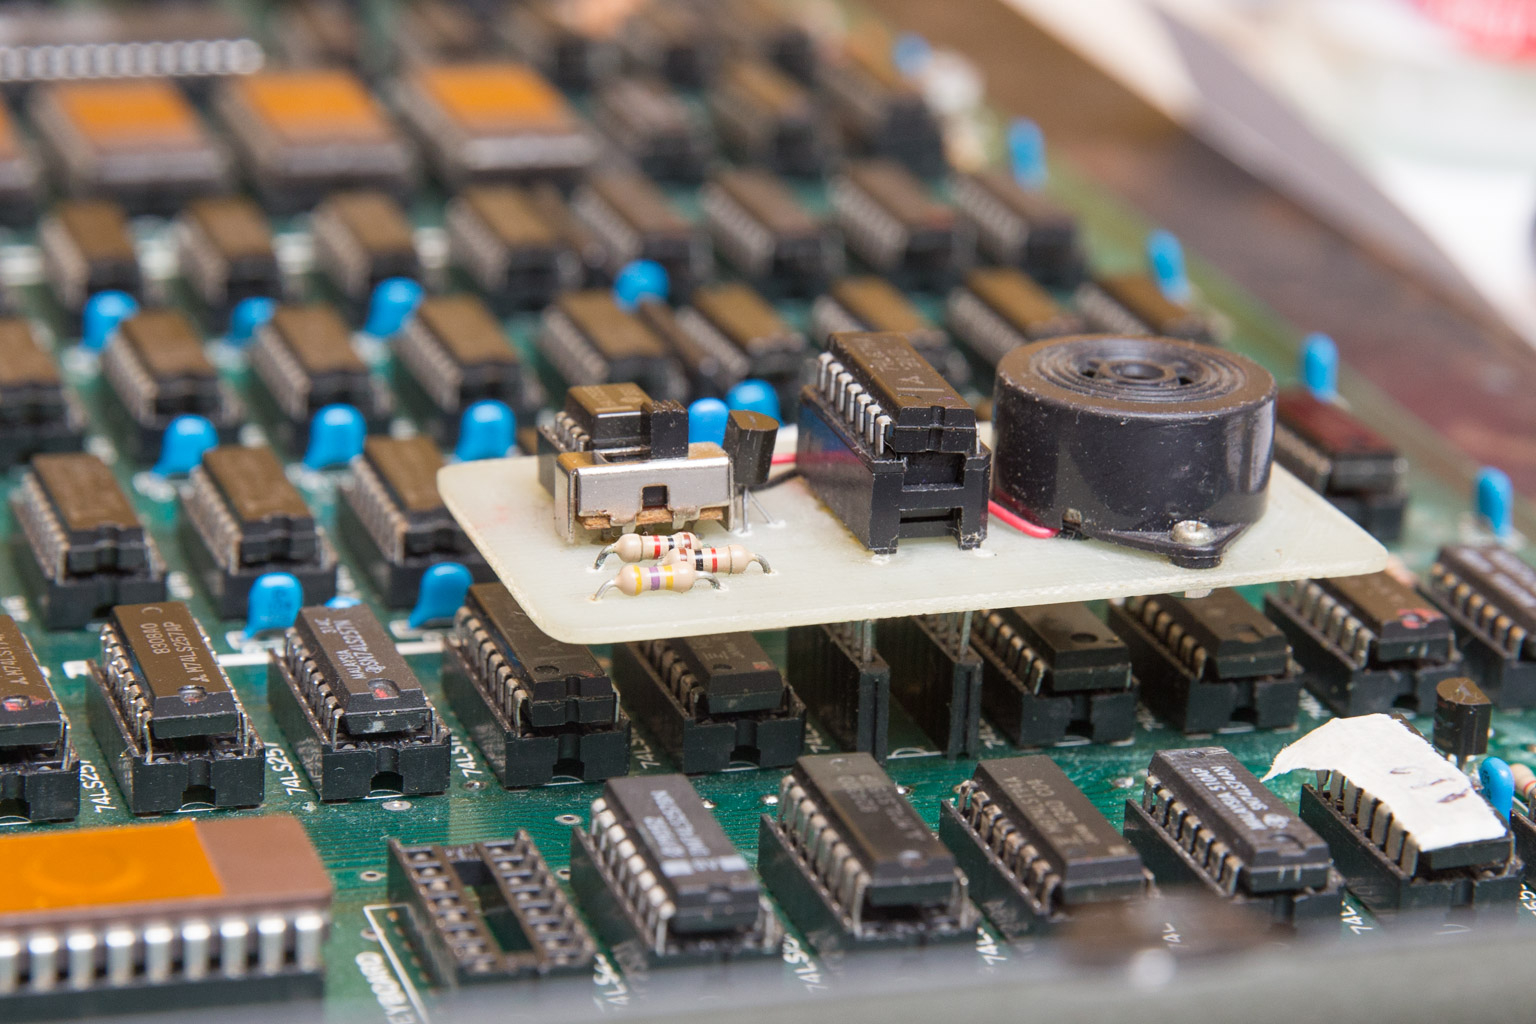
So, here follows instructions on how to make a "keyboard beeper" circuit for your Apple II which adds a short, high pitched electronic "beep" (from the board's piezo-buzzer) whenever a key is pressed. A switch on the board allows you to switch it off without removing the board.
I'm not the designer, but built one back in '83 or so for my Apple II+ clone, etching the PCB etc. Today I would probably redraw the circuit in Eagle, KiCAD or similar software, to have it professionaly designed and probably cheaper too). I'm not familiar with all the different Apple II designs (I'm sure others reading are though) so I can't say tell which ones won't take the board, but at least the II+ takes it.
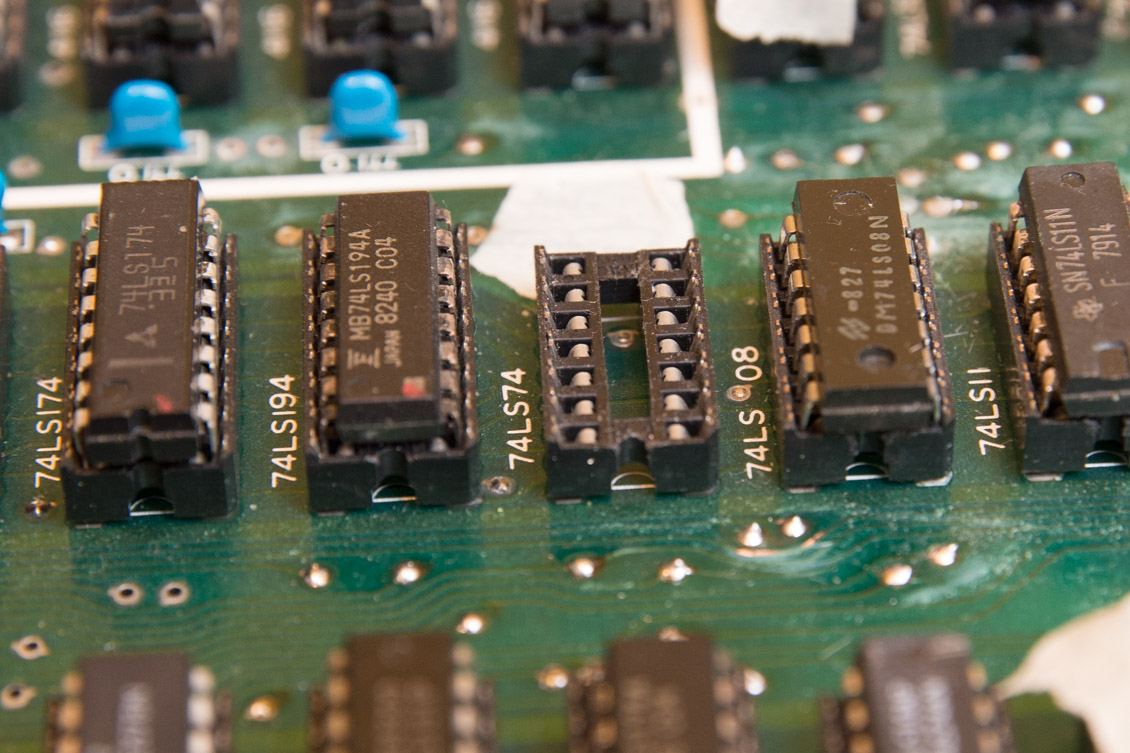
As you can see from the photos the small board plugs into the Apple II's B10 socket (74LS74). The 74LS74 in turn goes into the board's "through" socket (wire-wrap socket) which has its legs plug into the B10 position. I'd say it's more or less essential to de-solder the B10 socket and replace it with something that can take wire-wrap pins or else you can risk it falling out of the (regular) IC socket on the main board and in worst case short circuit your precious Apple II because regular IC-sockets aren't designed to hold the much thicker wire-wrap legs.Unfortunately I could no longer find any wire-wrap sockets in my area, so I opted for two 8-pin Arduino stackable headers instead (carefully cutting and removing one pin at the end, creating 7-pin headers). Worked great!

Here's the (Chinese, sorry. And no, I can't translate) instructions/PCB layout:

Parts list
- 14-pin wire wrap DIL socket (or 16 pins if you cut off two pins)
- 470K resistor
- 1K resistors (2 pcs)
- 0.1 uF capacitor
- 9013 transistor
- NE555 timer IC
- 8-pin DIL socket (optional, for the NE555)
- 2-position single pole slide switch
- 5V piezo buzzer
- 14-pin wire wrap DIL socket (for replacing the Apple II B10 socket),
- or.... (2 pcs) 8-pin Arduino stackable headers
Here's the completed PCB itself, first the component (top) side:


Next, the solder side (note: the wires are to replace some bad traces):

B10 socket replacement (Apple II main board)
I'd personally start by getting the Apple II B10 socket replaced, then move over to the fun stuff after that :-)
Begin by desoldering the existing socket. I used a cheap desoldering iron which (with patience, good eyes (or glasses) and careful use) worked fine without causing damage to the Apple II.
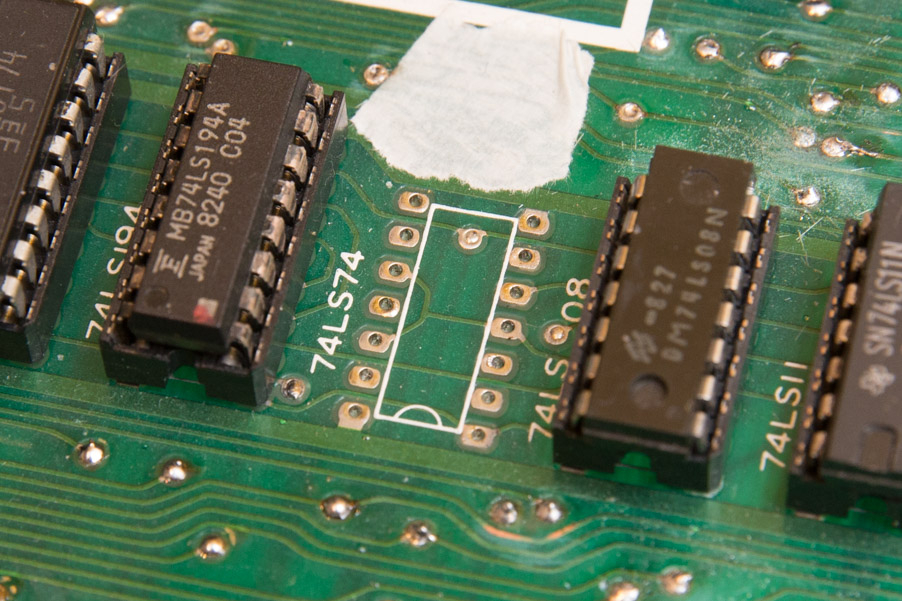
Once that's done, solder a new (14 pin) wire-wrap socket (like the one used on the keyboard beeper board) in its place, or alternatively two 8-pin Arduino stackable headers (one on each row) with the last pin carefully removed with a knife /pliers. Finish by cutting off excessive lengths of the legs.


As you can see here, the 74LS74 fits the new socket nicely on its own as well, and testing it without the keyboard-beeper board is probably a good idea to ensure you didn't damage anything in the B10 socket de-soldering process.
That's it!
Make sure you put the board the correct way, and of course the 74LS74 also the right way. It should be totally transparent to the computer, not affecting it any way, but just adding the "beep" function (if switched on). Have fun !
- Fuji's blog
- Log in or register to post comments
Comments
Has anyone found interest in
Has anyone found interest in this project? Possibly planning to make one of their own.
Besides being mostly for fun I actually found a practical use for this board: helping me to pinpoint an issue I had with the keyboard.
I found it useful... I plan
I found it useful... I plan on making my own but it will be a prototype build.
I did a similar project for
I did a similar project for the Sinclair/Timex 1000 computer. With its membrane keyboard this had a much greater impact.
It used the expansion connector on the back (which if I remember correctly, was the same as the Apple expansion specs) and also gave it the same software controlled, 1-bit audio capabilities as the Apple II. I envisioned the same polyphonic sounds that programmers were able to get out of the early Apples. Unfortunately, although millions of these computers were sold, they had a very short life and the aftermarket for add-ons was limited.