How to: DIY 6x game connector switchbox
What's this for?
Back in my youth I played a lot around with the Apple II game connector (joystick/paddle connector) as I found out it could be used to experiment with inputs/outputs to the outside world. Hence a lot of insertion/removal of different devices, so I built this switchbox.
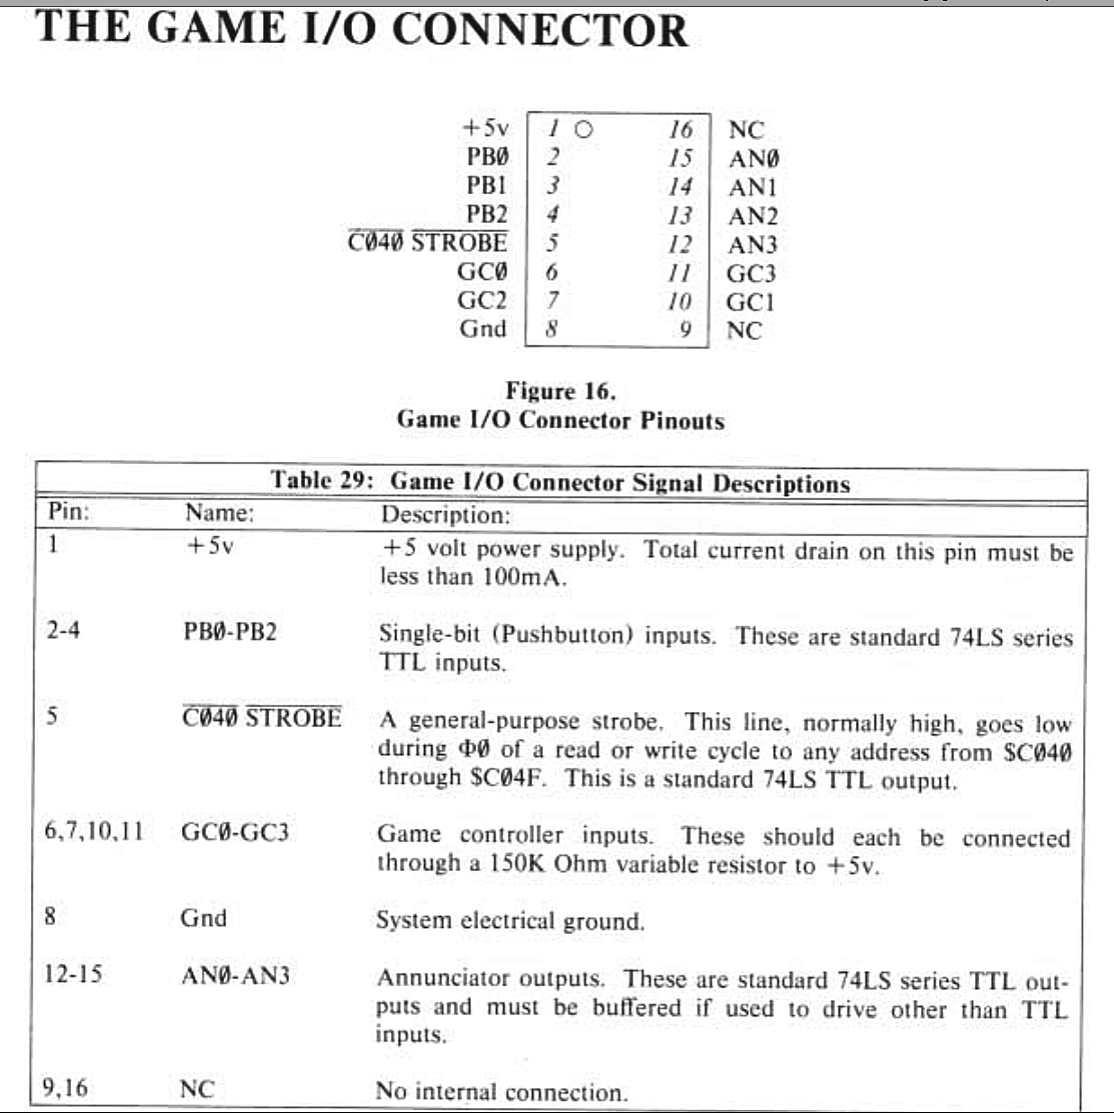
(source: The Apple II reference manual, page 100)
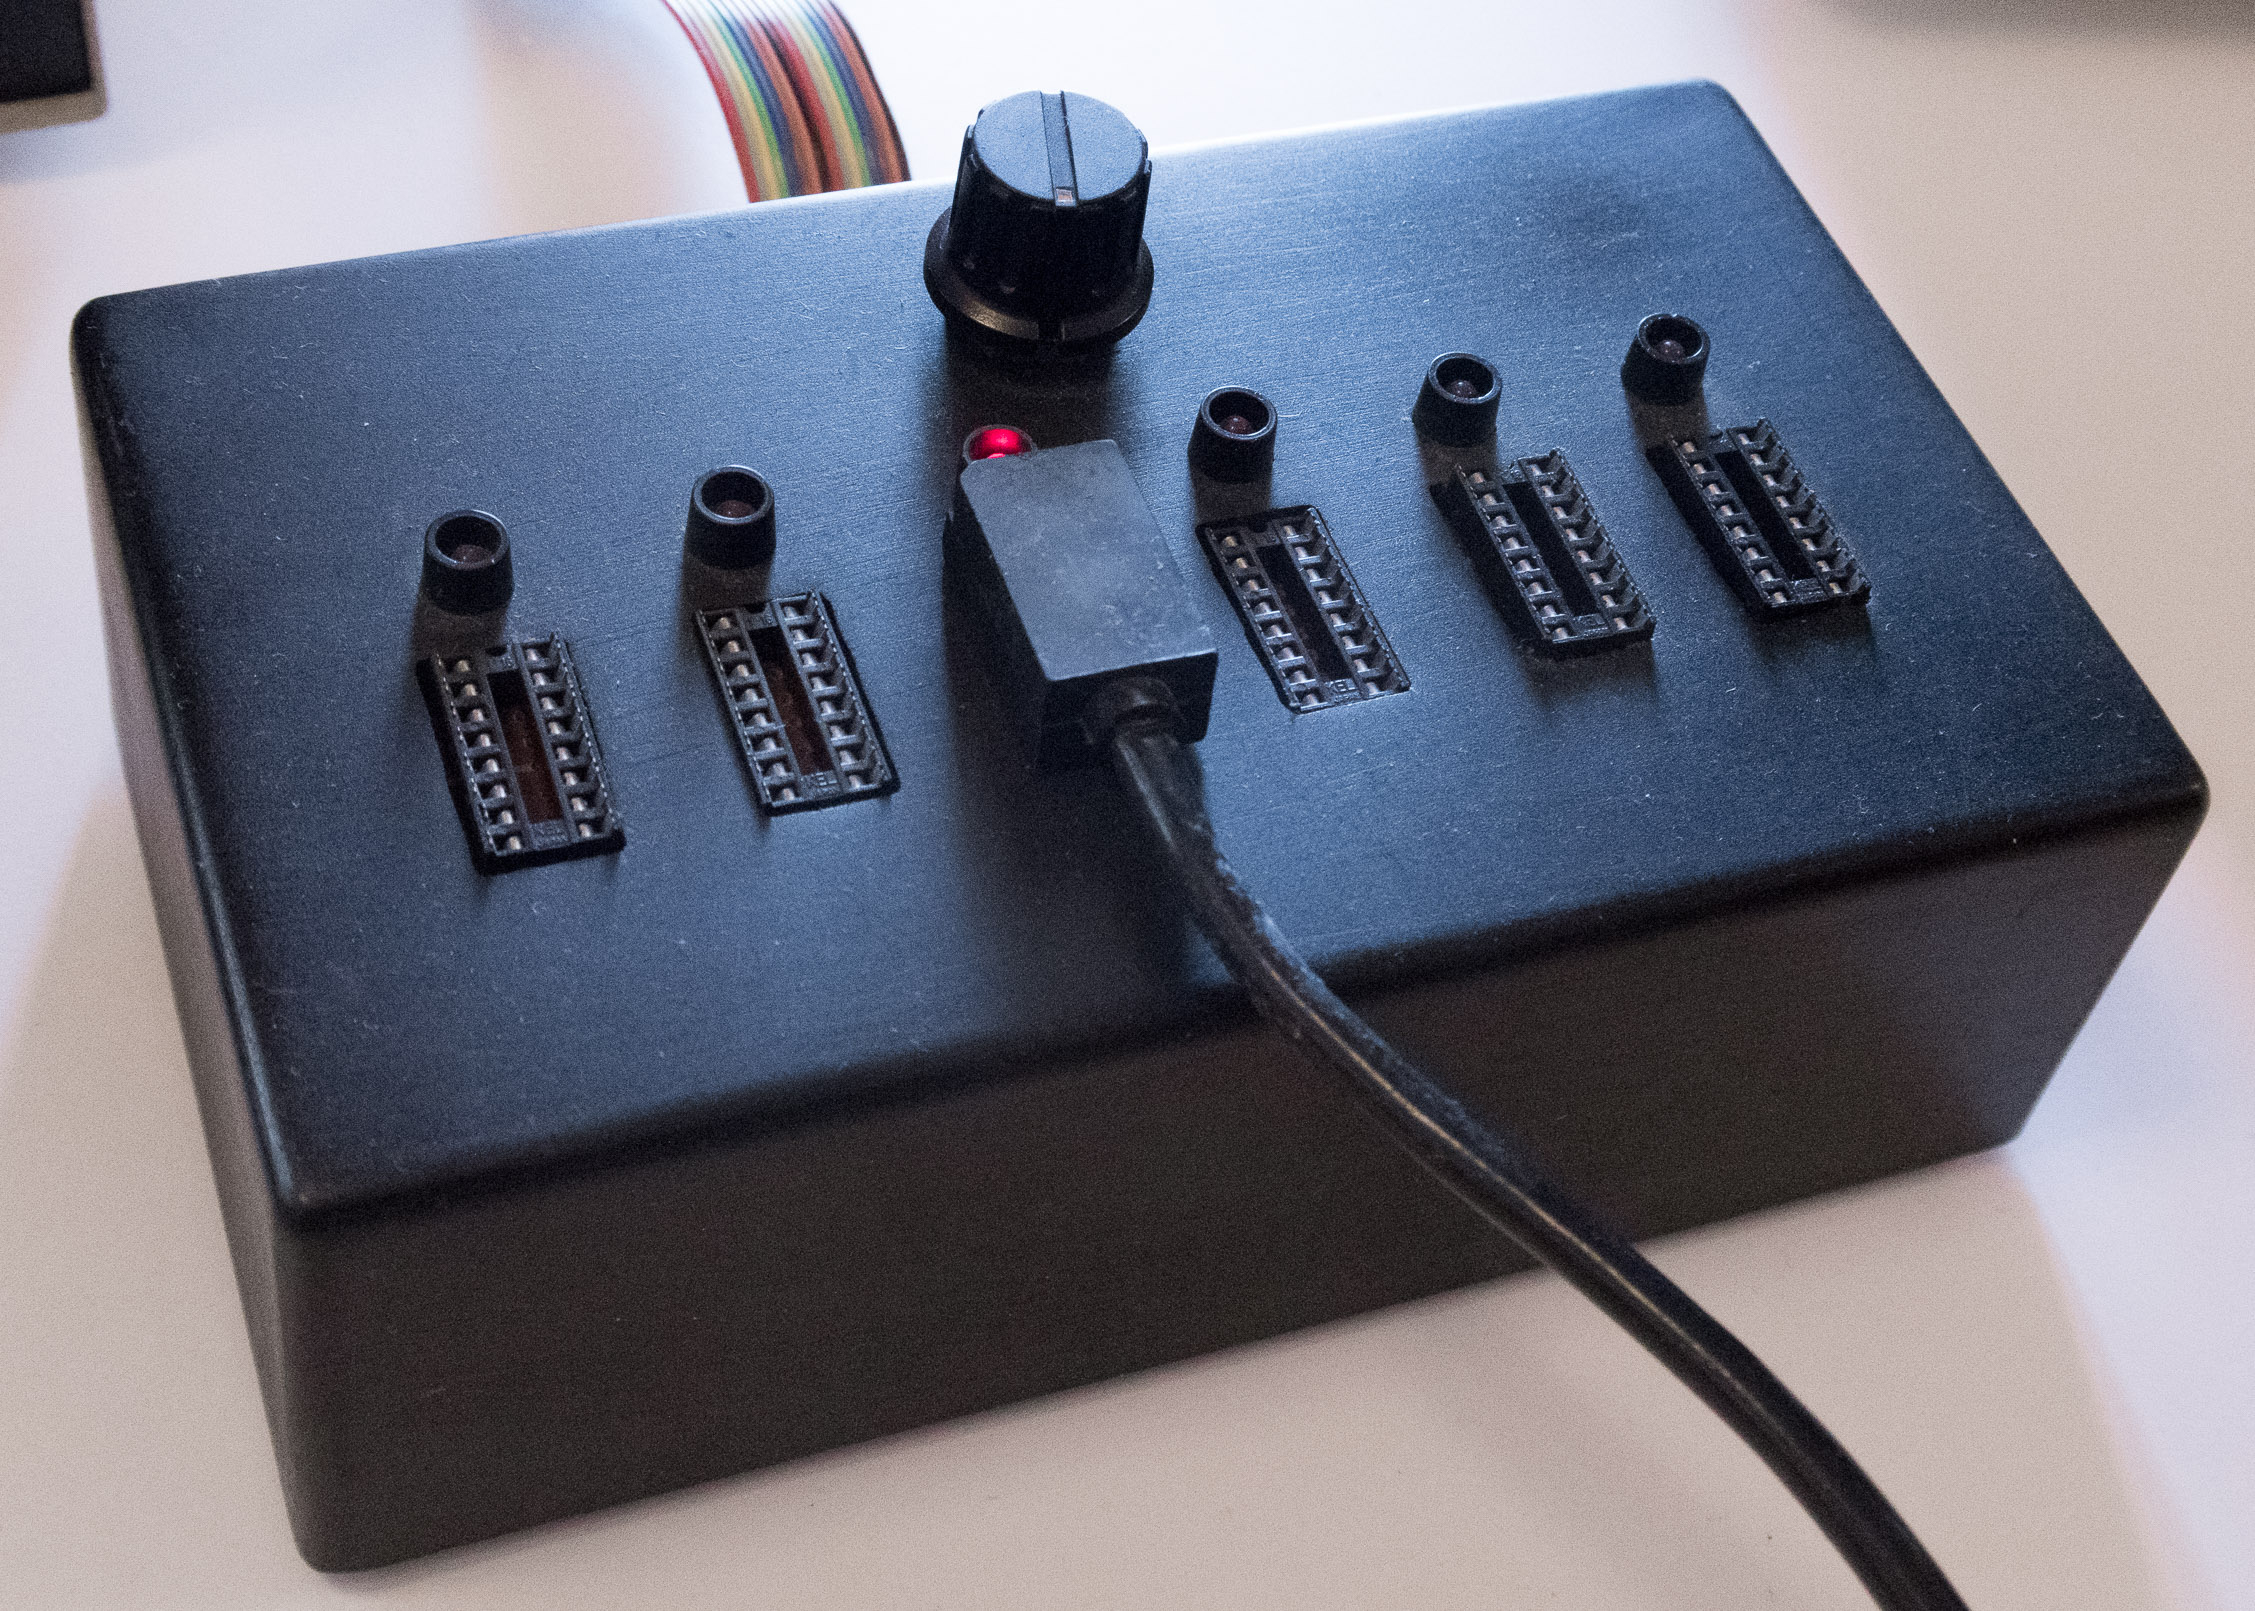
It plugs into the Apple II mainboard 16 pin game connector (IC socket) and allows up to 6 devices (joystick, paddles etc) to be plugged in. A 6-way rotary switch changes between the devices and an LED lights up above the socket currently selected. So no more risking bent pins, fiddling in between the interface cards and joystick connector.
How it works -quick overview
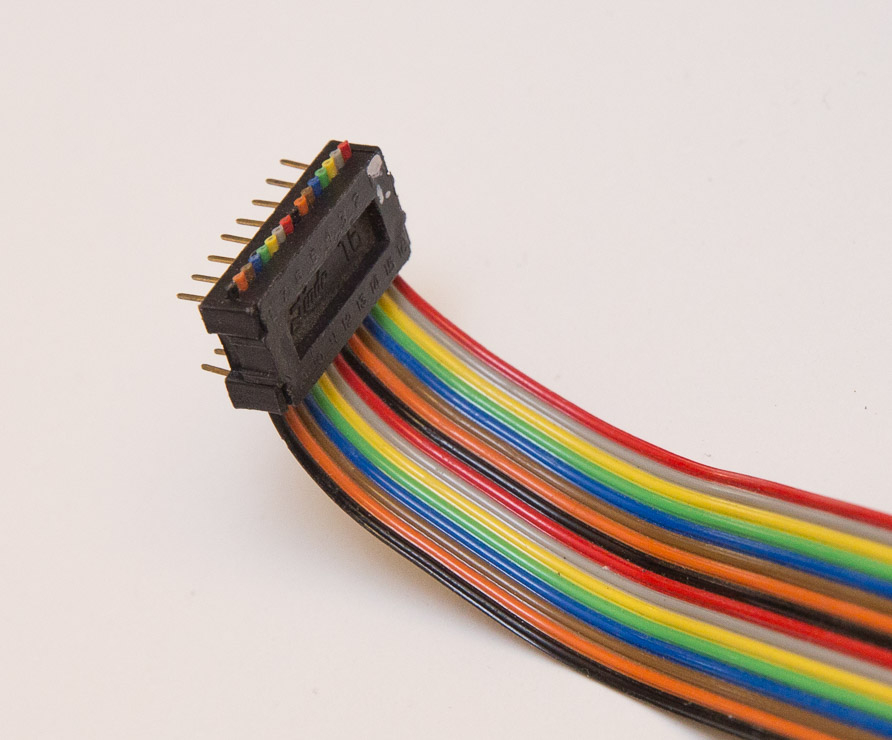
A 16 pin IDC connector with an IDC cable (flat ribbon cable) plugs into the Apple II game connector and extends into a suitable plastic project box. The box houses a circuit board with 6 IC sockets and a 6-way rotary switch.
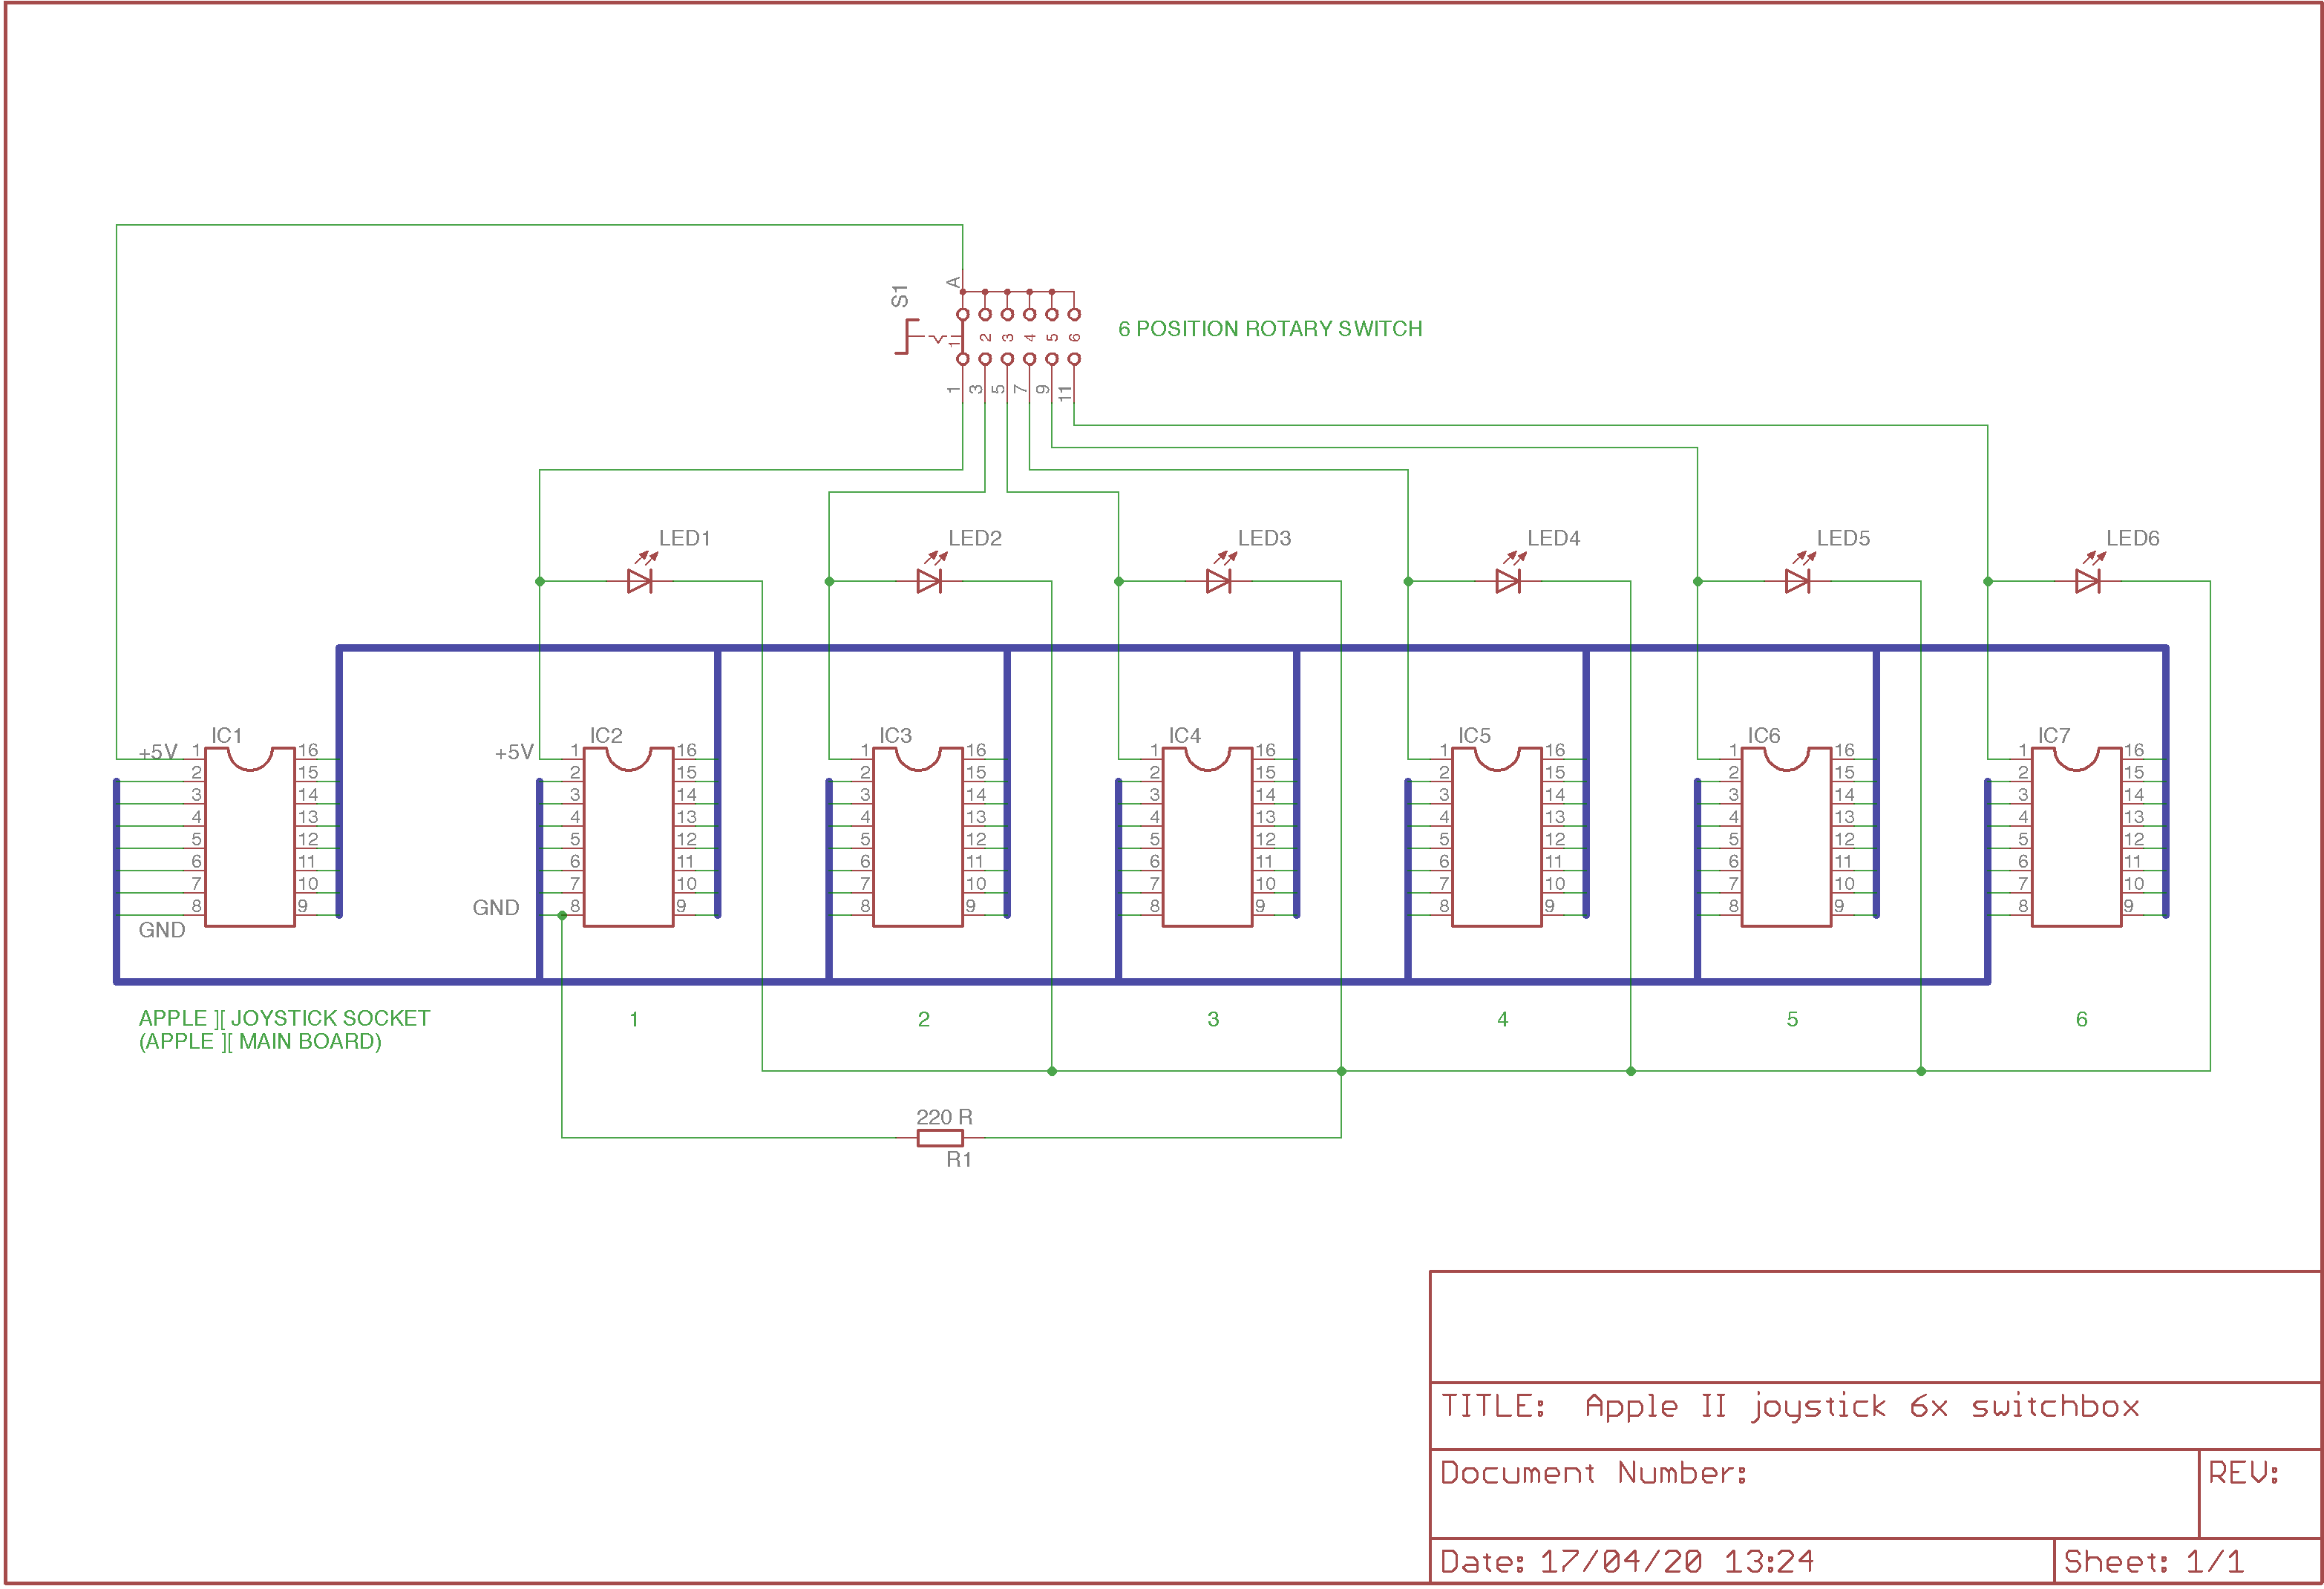
Pins 2 to 16 are all joined together (i.e. they all connect to the same pins in the Apple II game connector) while pin 1 (+5V) of each socket goes through the rotary switch, hence the socket which gets +5 becomes active.
Each socket has an LED attached to its pin 1 and a shared currency limiting resistor which goes to ground. The active socket gets +5V which also lights up its LED.
Parts list
You need the following components:
- 16 pin IDC connector
- 16 way IDC cable (suitable length for back of computer to where yoy want to place the box)
- plastic box, suitably sized to fit everything
- veroboard or other type of experimentation board to mount the IC sockets (or a custom made PCB perhaps?)
- 16 pin DIL IC sockets (6 pcs)
- 220 Ohm resistor
- LEDs (6 pcs)
- 6-way, single pole rotary switch
- knob for rotary switch
I simply soldered the wires from the IDC cable to one of the 6 IC sockets, then extended wires from there to the same pins on each of the other 5 sockets. And using epoxy glue I fastened the PCB to the inside of the box after cutting out the square openings. Not very elegant, but it works! Your mileage may vary (YMMV) as they say, and I'm sure people reading might have better solutions.

- Fuji's blog
- Log in or register to post comments