
| Attachment | Size |
|---|---|
| 244.03 KB | |
| 14.73 KB |
Howdy friends:
A few years ago fellow Fritter Friend Dave, aka @PTB created an amazing Floppy EMU case from an original Apple Floppy II case. At the time I did nto have the funds available for a kit. Recently I learned Dave no longer had kits but shared all the various files he used to create the case (see link above).
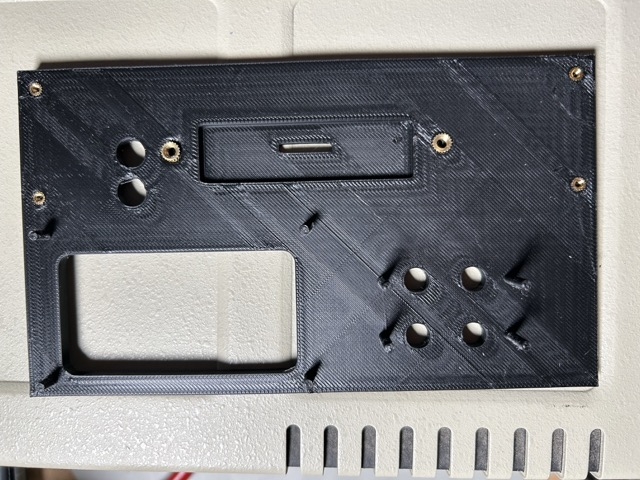
I downloaded the files and began looking at the prospect of building one. Well, the cost for one faceplate from the fab facility was $150, so I started looking at the idea of 3D printing the faceplate, in addition to the other 3D printable parts already provided by Dave. I began by converting the fabrication file (an .fpd) to an svg using the fabrication companies software. From here I imported the file into TinkerCad. Not everything converted well, but it was good enough to begin from. This is a jpg converstion of the svg I imported into Tinkecad. The green circles represent the posts that would have been alluminum in the actual plate. The specs of each hole, post, excavated area, and cutout could be read in the faceplate fabrication file using the vendors free software.

After a bunch of trials and errors, I ended up printing posts for the button PCB and the display. For the other connectors I placed holes in the faceplate that would receive threaded brass inserts that were melted into the faceplate using an old soldering iron I snipped the tip off for just this kind of use.
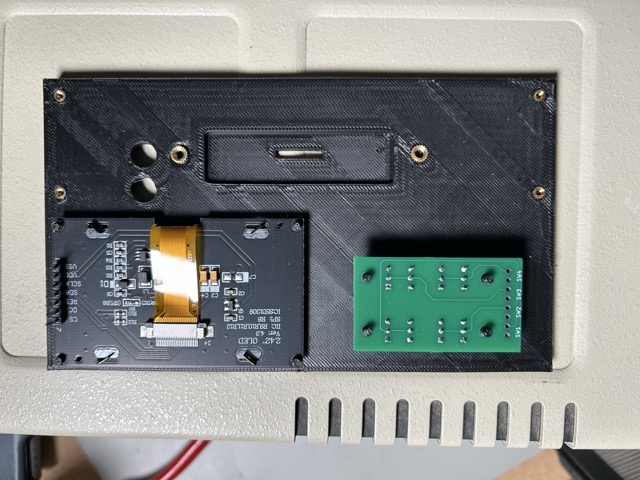
I printed the bracket pieces as originally provided by Dave. I had button PCB's made from JLCPCB. I had to make trial and error print for button caps for the momentary switches.
I then made all the soldering connections to the EMU as per Dave's guide document and connected everything, including the LEDs as per Dave's directions.
Since the display and PCB were positioned by pegs and coupld not be held in place with nuts as in Dave's original, I used hot glue to hold them in place, it worked quite nicely. Same for the LEDs. The 5mm LED bezels fit, but Dave's original method, which used additional 3D printed rings on the interior of the hole, did not work with the plastic face plate. If I ever print another, I think I would make the LED hole slightly smaller so to hold the LED bezels snuggly and not need hot glue.

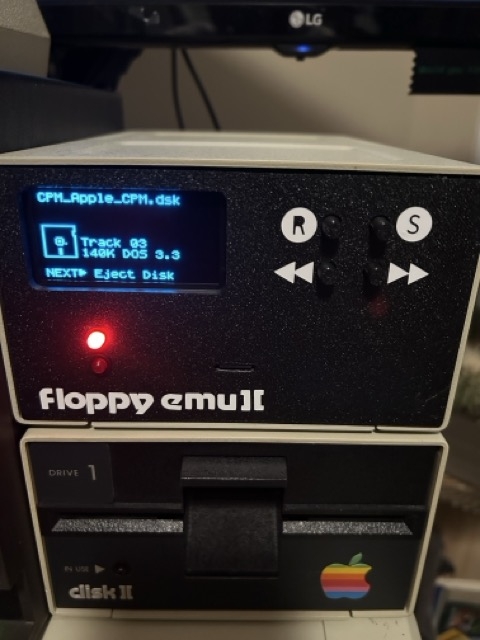
I began working on front panel labels using a Circut to cut vinyl stickers. The Cricut is fighting me on small graphics and letter so I had to get creative. The Apple sticker will be the tricky one.
One thing Dave used in his build was a perspect window in front of the display, I did not use that in mine.
Ping me if you have questions.
Cheers,
Mark
This is great ! I love it. A bit of reverse engineering to bypass the expensive aluminium panels. They were by far the most expensive part of the kits.
I had originally tried to get something 3d printed for the front panel, but gave up. The inserts in the thin panel are well done without impacting the front face on the other side.
The funny thing about these kind of projects is you are always thinking of little improvements. Physically they might be finished but mentally they never are. ;)
Good Job.
Cheers Dave
Fantastic work on this .. much more of a vintage feel for a floppyemu!!