Glowing Wallstreet
When I first got my Wallstreet 250 two years ago, one of the first things I wanted to do was to adapt it to have a glowing logo. About a year and a half passed before I actually had any idea of how to mod the logo. Thanks to digital's directions on the forum page, I've just modded my logo to know, and I thought it would be worth sharing with the Wallstreet owners.
The tools:
1. T-8 screwdriver
2. Hard plastic spatula
3. Various small flathead screwdrivers
4. Container for screws
5. Exacto knife
6. Small sanding block with 220 grit (and finer for a more frosted effect) sandpaper
The process:
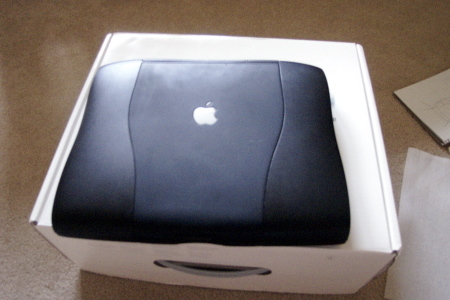
I started off with my normal 1998 PowerBook G3 Wallstreet 250. Not a single mod, unless you consider the missing latch a mod.
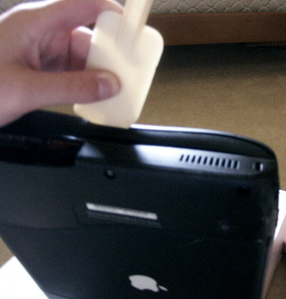
At this point, I removed the plastic covers from the bottom screws and the rubber stoppers from the upper screws. After taking the screws themselves out (upper ones are silver; lower ones are black), I taped them to a sketch of the computer, but they are easy enough to tell apart. Also, before closing the screen, I put the foam pad that was shipped in my iBook over the keyboard to protect it and the screen.
Considering I got somewhat lost when it came to taking off the cover, I'll explain how to properly remove it.
You must first start by removing the cover over the power and volume buttons. It is very difficult to get the hinge potion of the back cover off without this off. Then, in the back portion of the sides, gently pry the outer cover upward, therefore unclipping it there. At that point, lightly bowing the sides of the bezel out with a spatula will unclip two more clips per each side. From there, there will be 3 clips visible between the hinges. Pushing on each (both sides first, then the center one) will release the back of the screen. From there, you only have to gently lift the rear part of the cover to unlatch the clips at the latch end of the display.
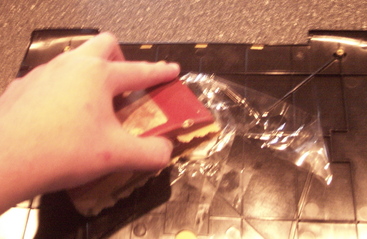
With the foil backing visible, I lightly scored it with a exacto knife after determining where the logo was by holding the cover in place and guessing where the center of the logo met the foil. You must score it VERY LIGHTLY, gradually making it thinner where you want to cut.
After I scored the backing, I discovered a bulge where a circuit board is. I lightly pressed at the edge of that board on one of my scored lines, cutting a small hole. At that point I simply had to pull up the square I had cut out (along with the paper beneath the foil). I made the peeling easier by cutting along the scores again with the exacto knife, but the shiny surface beneath the foil and paper is the LCD itself, so you must avoid touching it at all costs.
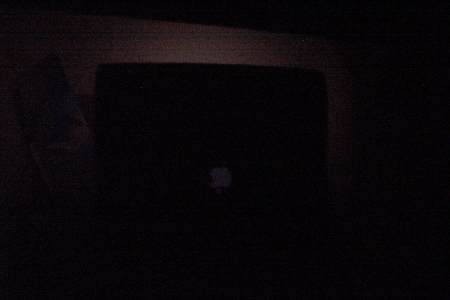
After having finished cutting out the hole in the backing, I carefully opened the display-being conscious of the display cables- and turned on the computer to make sure the screen hadn't been harmed. Seeing the LCD was fine, I took a sneek peak at the glow from the it in pitch black. This picture isn't very good, but the glow is a rather eerie purple that fades to the metal surface when brought back in light. Afterwards, I shut down the computer, closed it, and covered the back of the LCD.
Moving on the the back cover itself, I tried my original idea of soaking a rag in rubbing alcohol and leaving it on top of the painted plastics of the logo. The paint held up against the alcohol, so I decided to tape off the plastics around the logo, and simply sand off the paint in circular motions. Once the paint was gone, I kept sanding with the same motion to give the logo a frosted appearance. I used 220 grit paper, but I think that the results might have been better if I were able to use a finer paper afterwards.
This is the cover against daylight after the paint had been removed. It's very translucent and appears white, but light transfers through it very well as the picture shows.
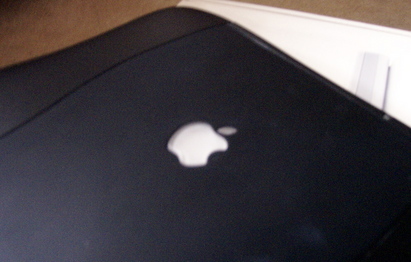
Putting the cover back onto the display was probably as hard as taking it off depending on where you start. I began with trying to line up the clips around the latch. With the cover lined up, I snapped the sides back in place followed by the clips between the hinges. The latch edge is much harder however. The cover must be pressed down into the bezel plastics and back toward the hinges at the same time to force the plastics back into the clips. After that, the only thing to do is open the display, put the screws back in their proper locations, and put the covers back on. In the end, my logo looked just like it did before I started, which is just what I wanted.
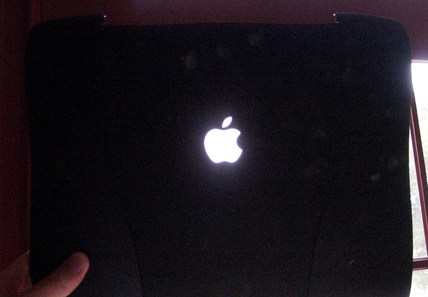
In pitch black, however, the normal looking logo actually glows a dim purple. It's not noticeable in the picture, but it's very cool in person.
So after 3 hours sitting on the floor with my PowerBook, trying to force the plastics to do what I wanted, I finally have the glowing logo I desired. There are probably ways of getting it brighter that I haven't though of, but I like the purple as it is. I hope this page was of use to any Wallstreet (or maybe other PB G3) owners, and I'd very much like to see anyone else's results after having tried this.
Note that I am not responsible for you damaging your PowerBook in any way. The LCD is fragile, and must be treated accordingly. Breaking any clips around the rear cover of bezel will not cause any harm. The screws and remaining clips will hold the display together just fine.
| Attachment | Size |
|---|---|
| 69.92 KB | |
| 54.05 KB | |
| 46.84 KB | |
| 130.68 KB | |
| 110.55 KB | |
| 101.95 KB | |
| 59.92 KB | |
| 73.81 KB | |
| 56.15 KB | |
| 55.72 KB | |
| 8.79 KB | |
| 0 bytes |
Comments
Great case mod! If you don
Great case mod!
If you don't like the frosted plastic from using sandpaper, try using wet&dry paper to get it smoother.
Good Tutorial
Thanks for the tutorial, I only wish my Wallstreet was still wtih me so I could try it .
.
iamdigitalman
Credit also goes to iamdigitalman for completing a very similar project in December, 2005. To read more, visit the forum discussion: Wallstreet light up logo mod.
Update
Just a few weeks ago, I put in a rainbow logo that I printed out after carefully scaling it down to the correct size. I must say, once you know how to open the display, the process is much quicker to do over.
Second Update
Tried something new today with it.
When I first cut into the backing on the screen, I scratched the silver surface behind, and that scratch glowed brighter than everything else when the LCD was on. So, I opened the screen again, and picked at that scratch, pulling back the silver surface which I found to just be tape designed to keep light from leaking through the back of the screen. The logo glows at least ten times as bright now.
I only reccomend however that anyone who attempts this on top of everything else be very careful. You are picking at the back of the LCD itself, so you must be very precise in peeling off the tape and make sure not to gouge the LCD during the process.
This was the result: