
| Attachment | Size |
|---|---|
| 299.61 KB | |
| 319.06 KB | |
| 250.15 KB | |
| 330.63 KB | |
| 280.45 KB | |
| 215.39 KB | |
| 246.67 KB | |
| 366.32 KB | |
| 336.62 KB | |
| 369.22 KB | |
| 424.33 KB | |
| 332.8 KB | |
| 408.58 KB | |
| 470.89 KB | |
| 343.6 KB | |
| 337.27 KB | |
| 301.11 KB | |
| 337.85 KB | |
| 389.87 KB | |
| 277.97 KB | |
| 315.99 KB | |
| 244.58 KB |
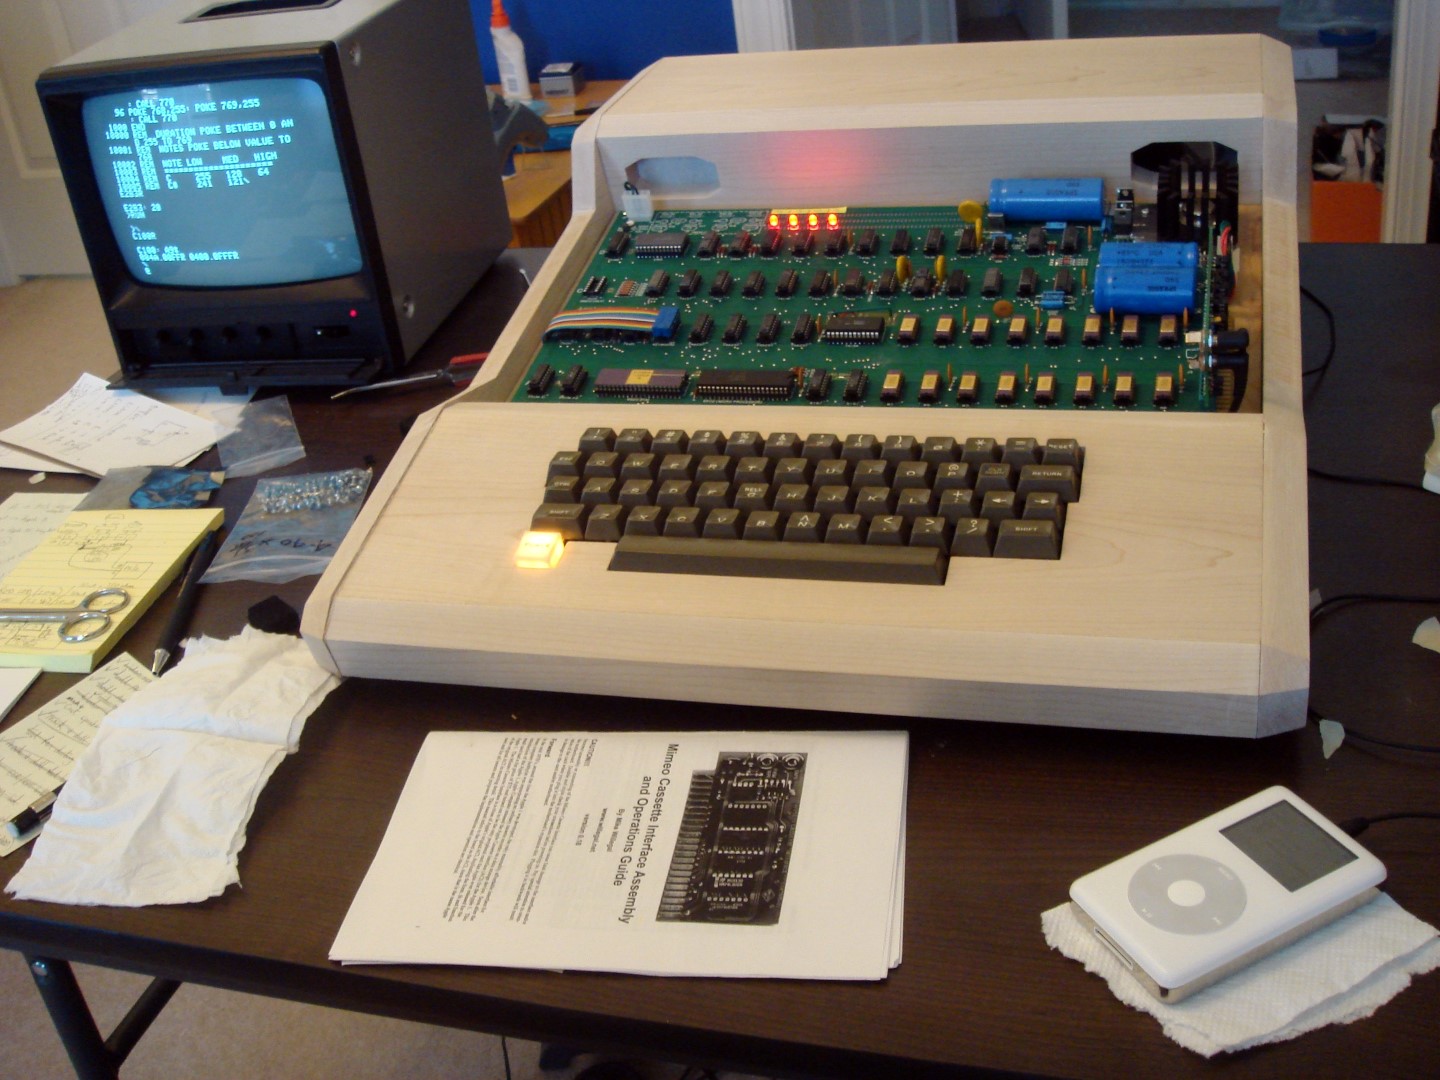
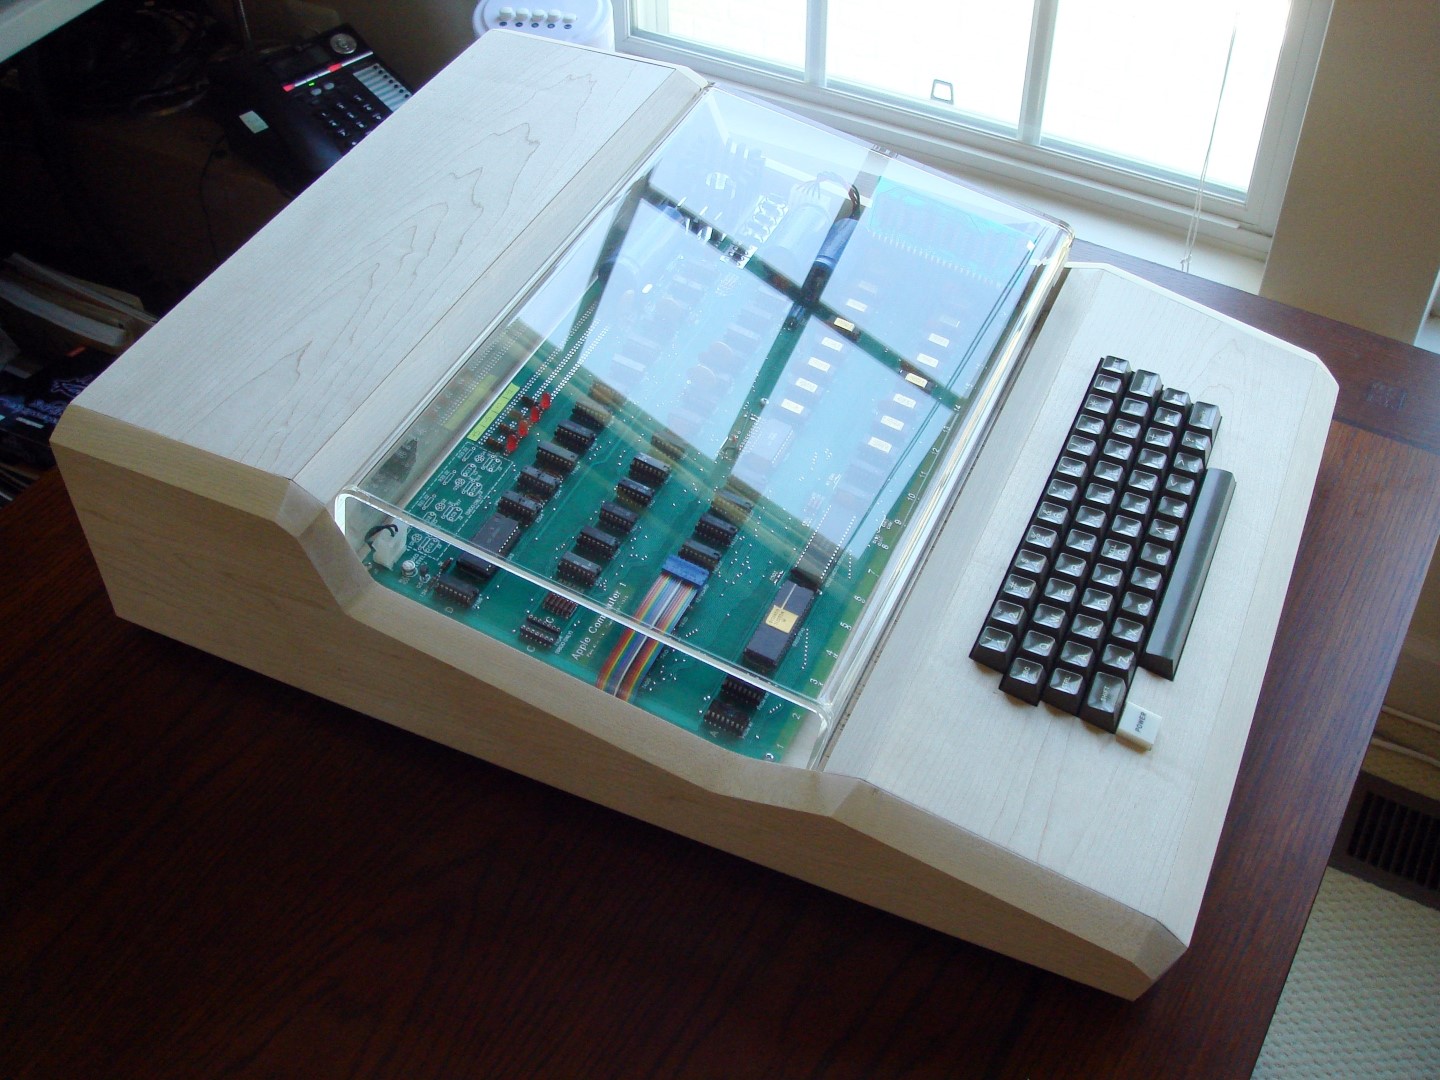
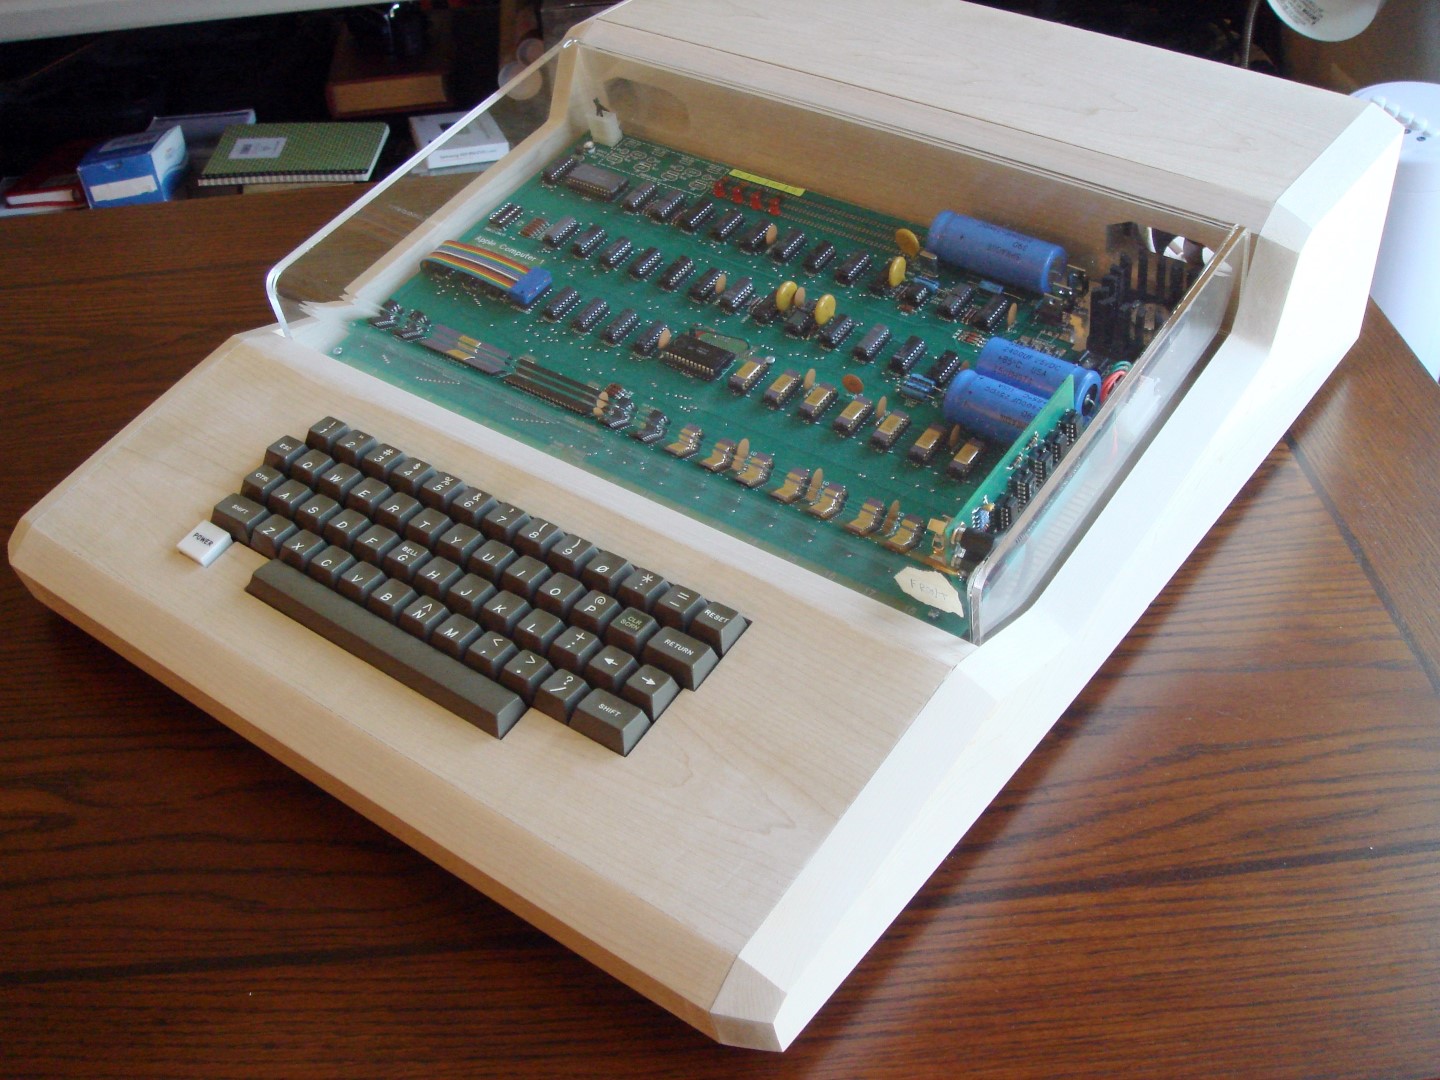
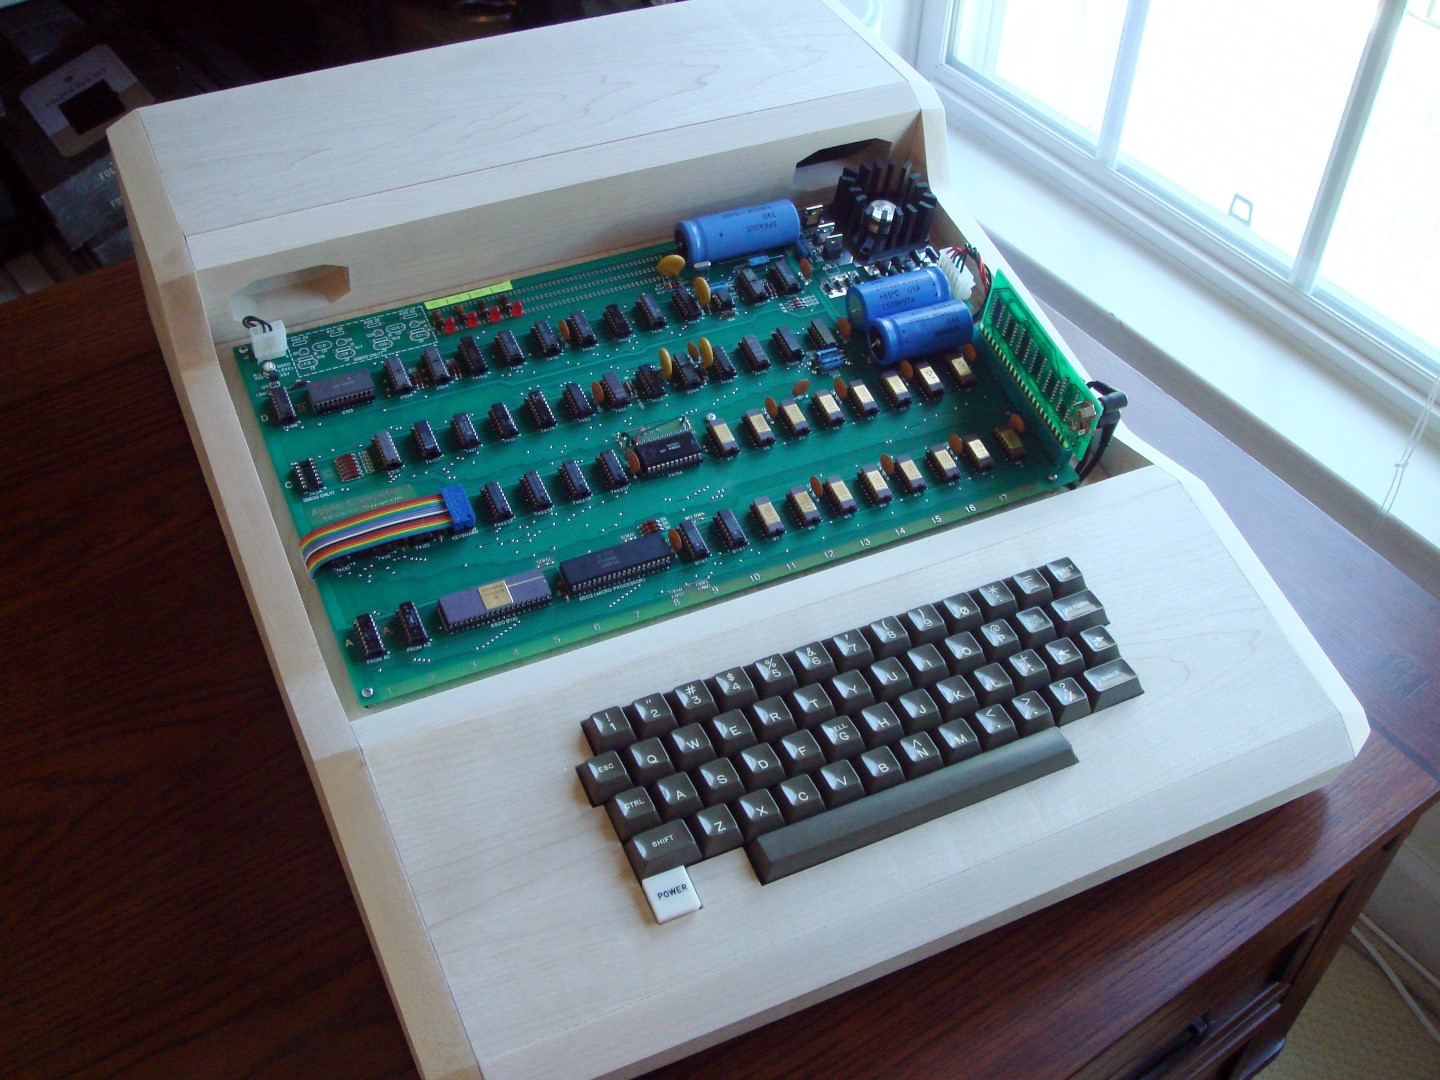
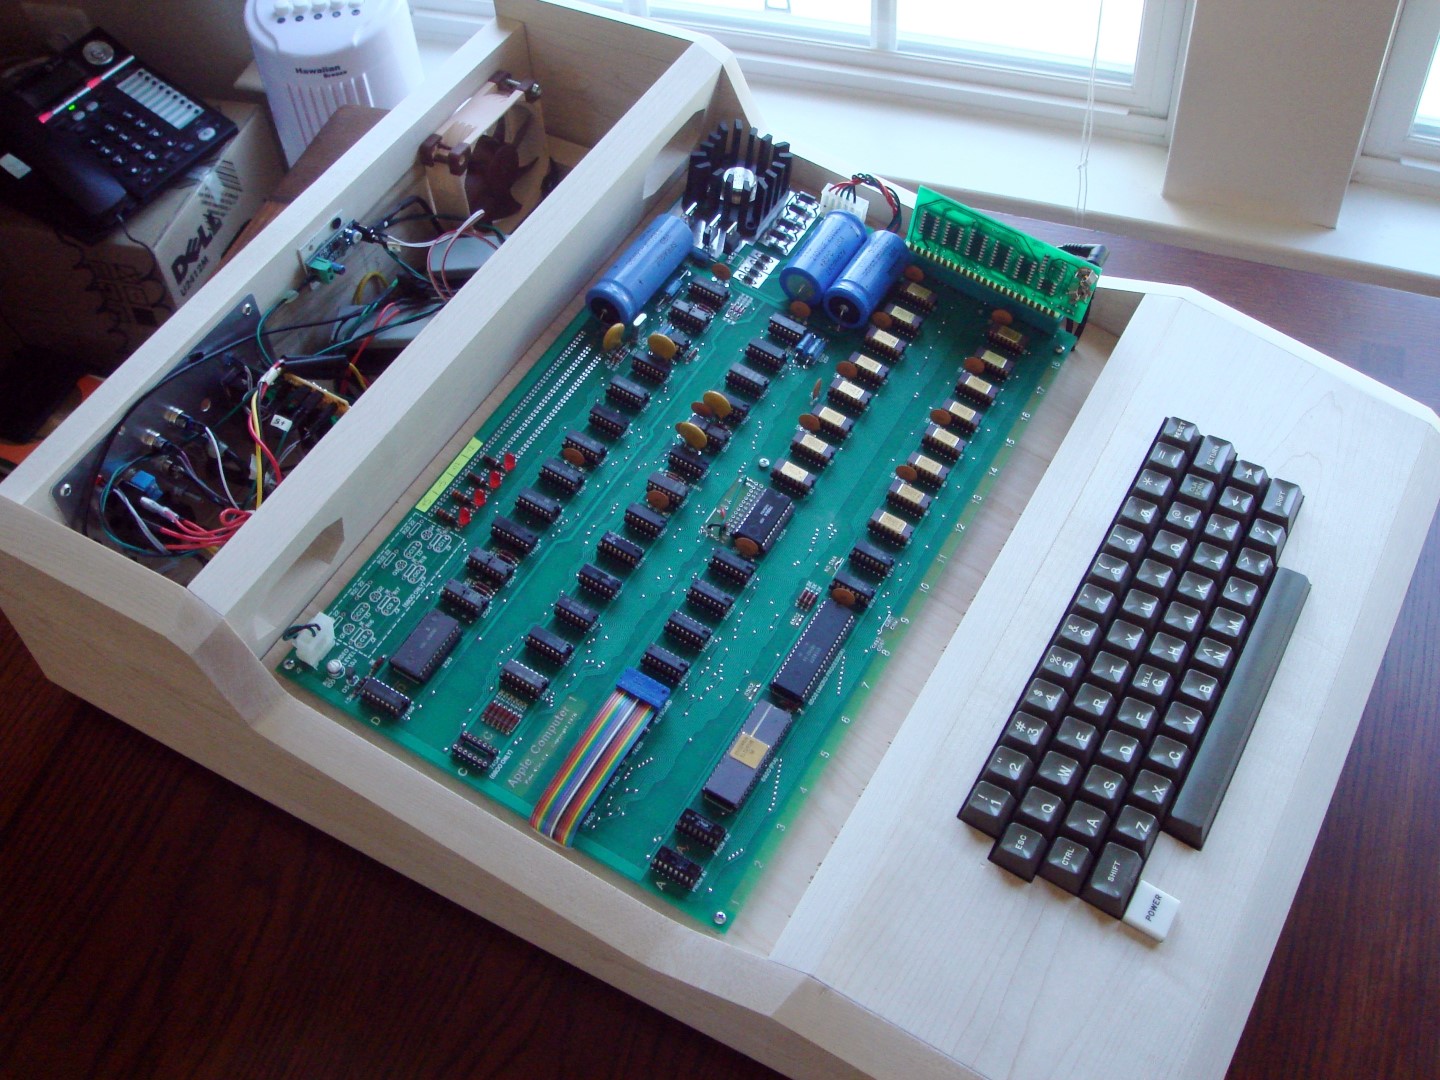
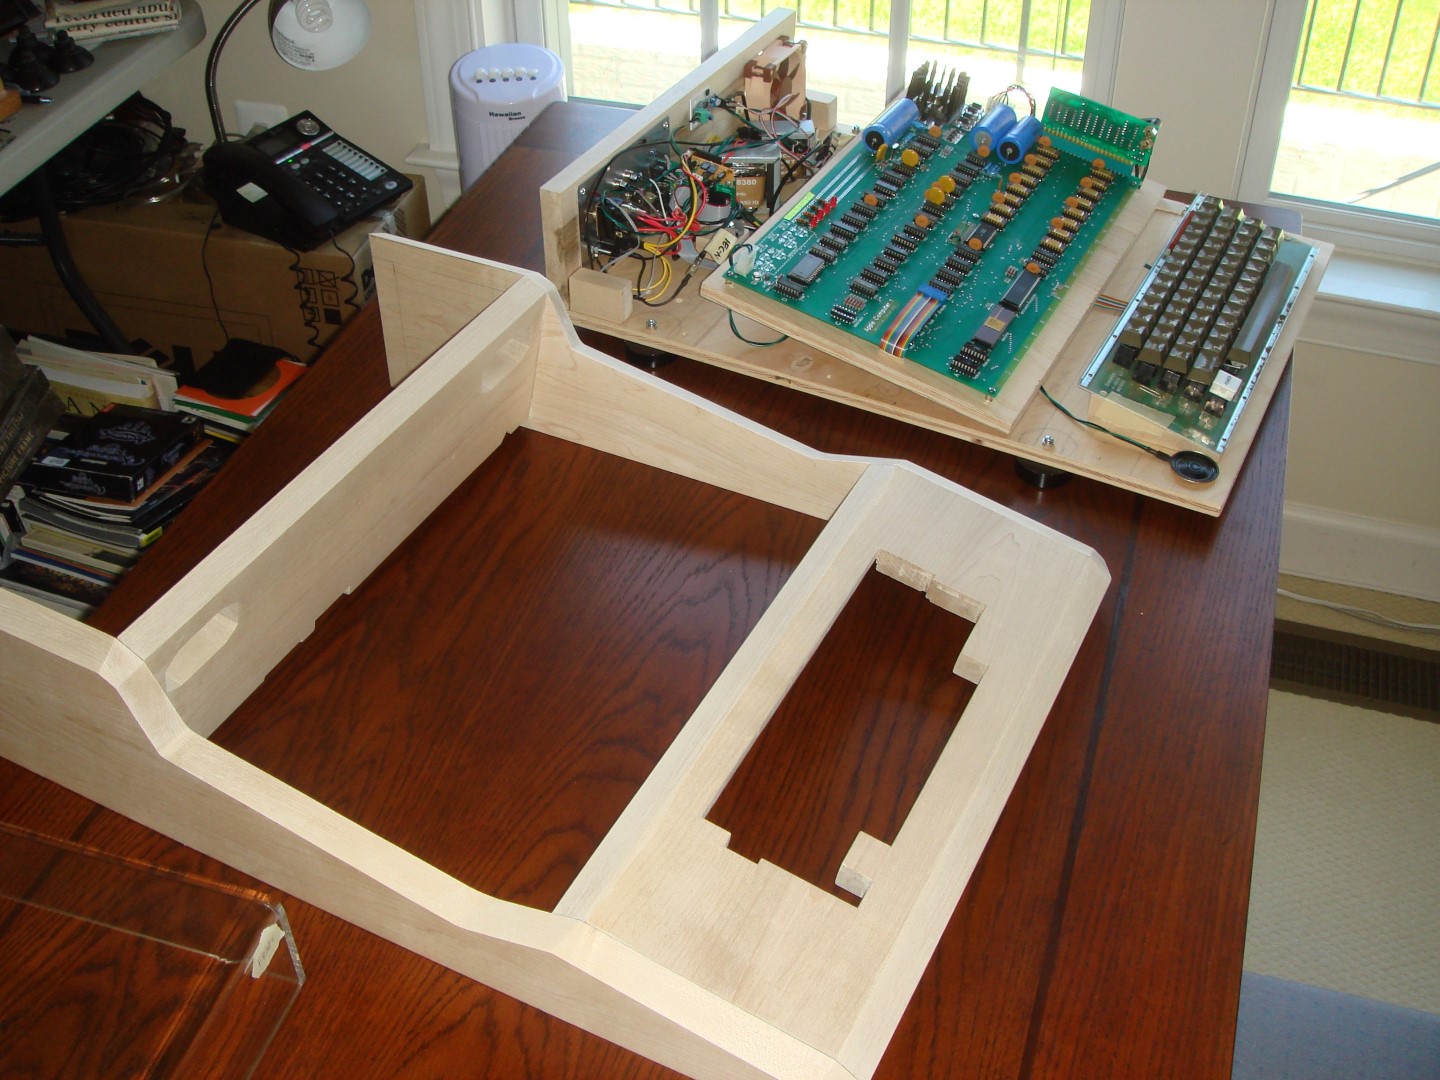
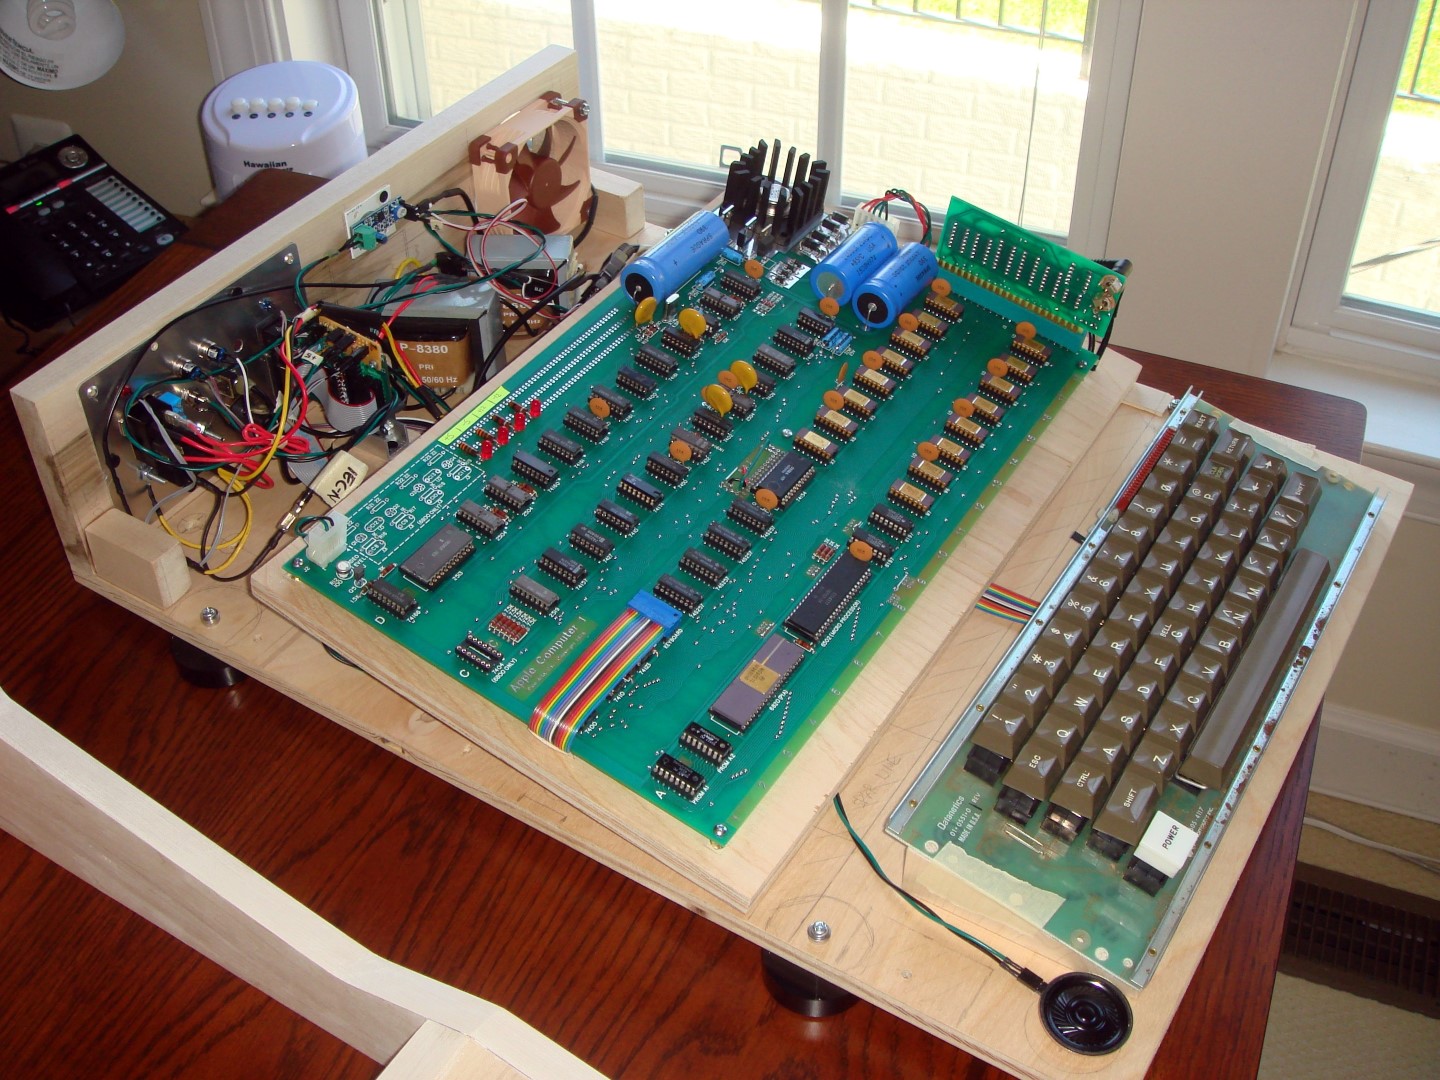
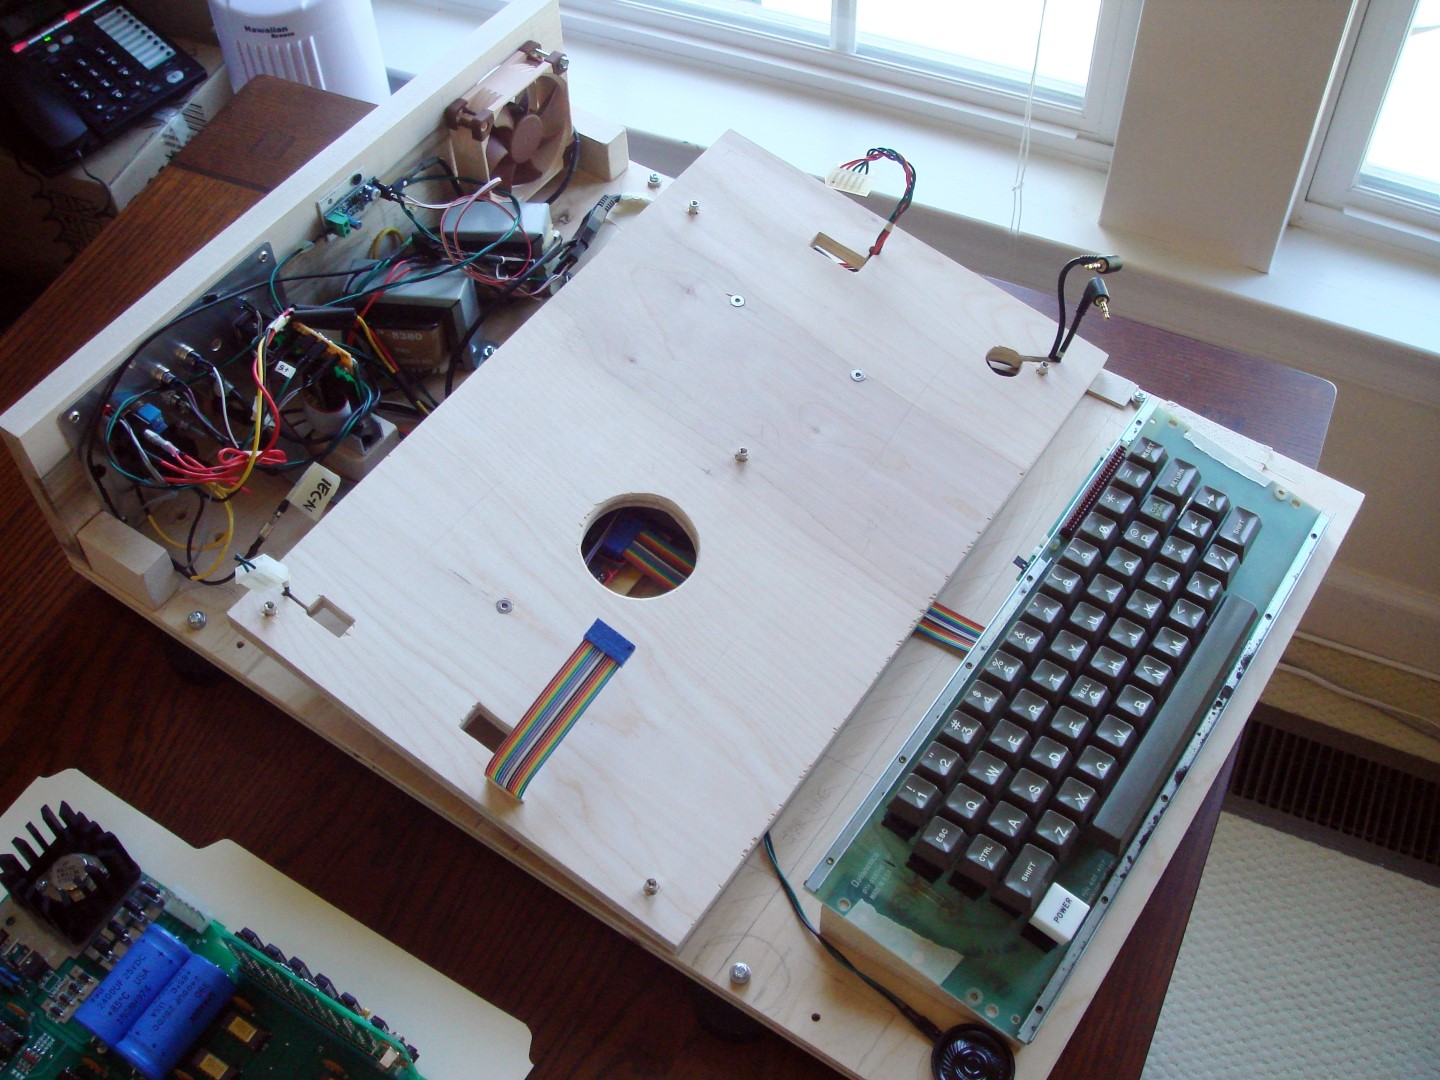
I've finally come to about 95% complete on my enclosure, so I thought I'd share some pictures. Like always, it's taken a lot longer than I had planned, and it's amazing how complicated things get once you get into them. But I'm very happy with the result, and maybe it will give others out there some ideas about their own enclosures.
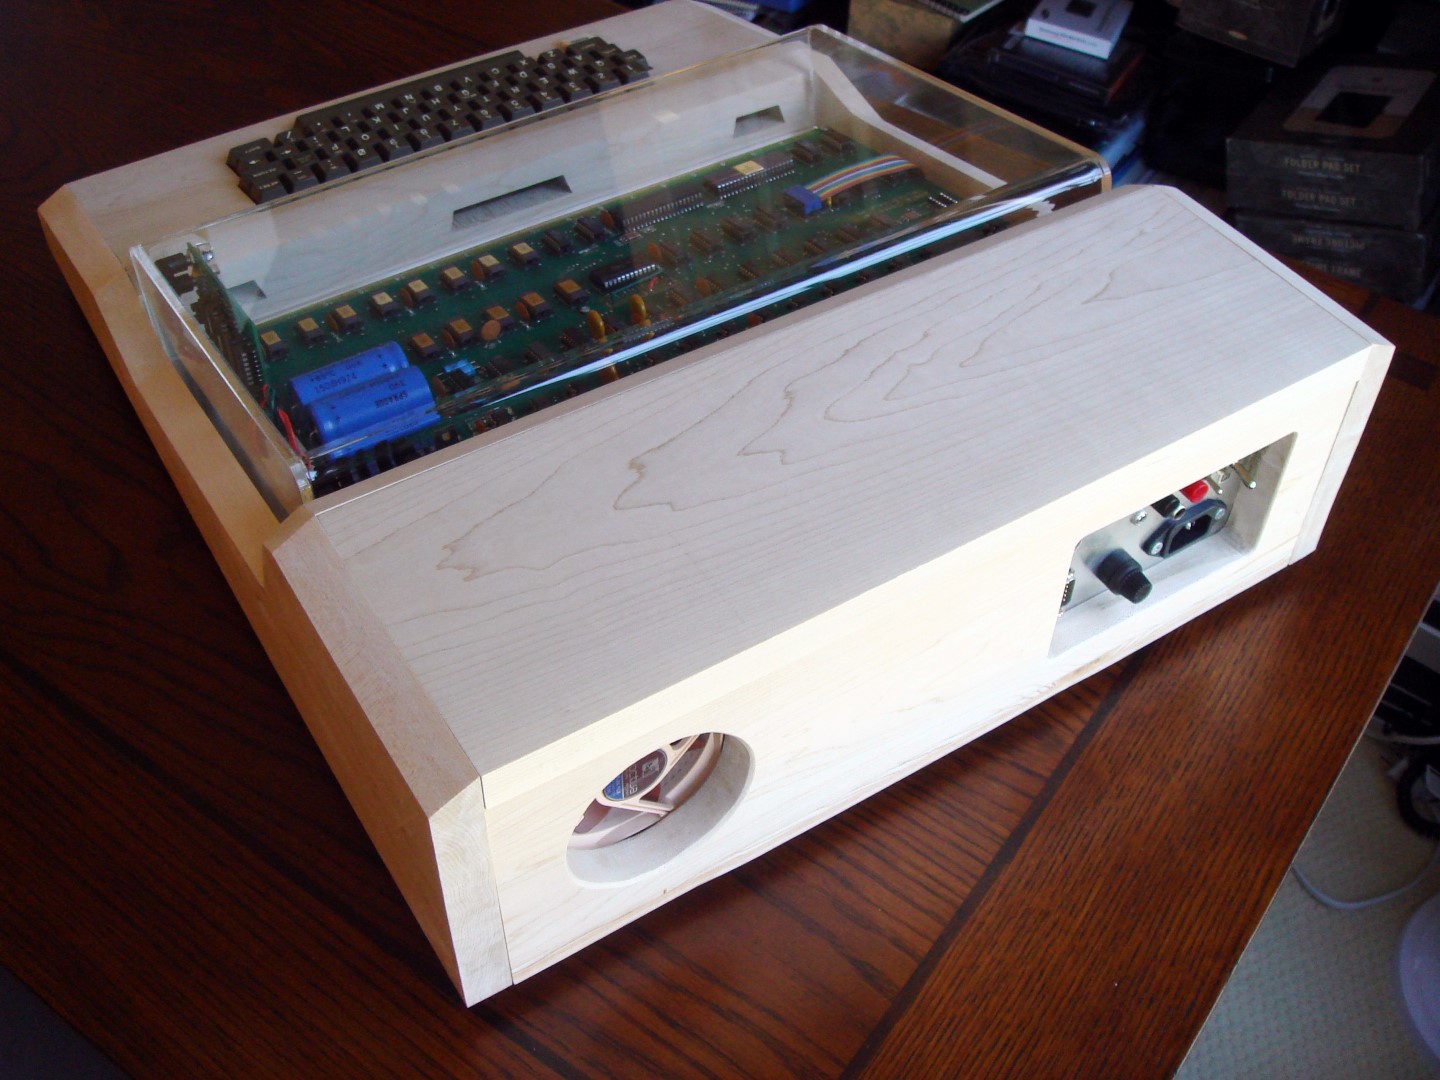
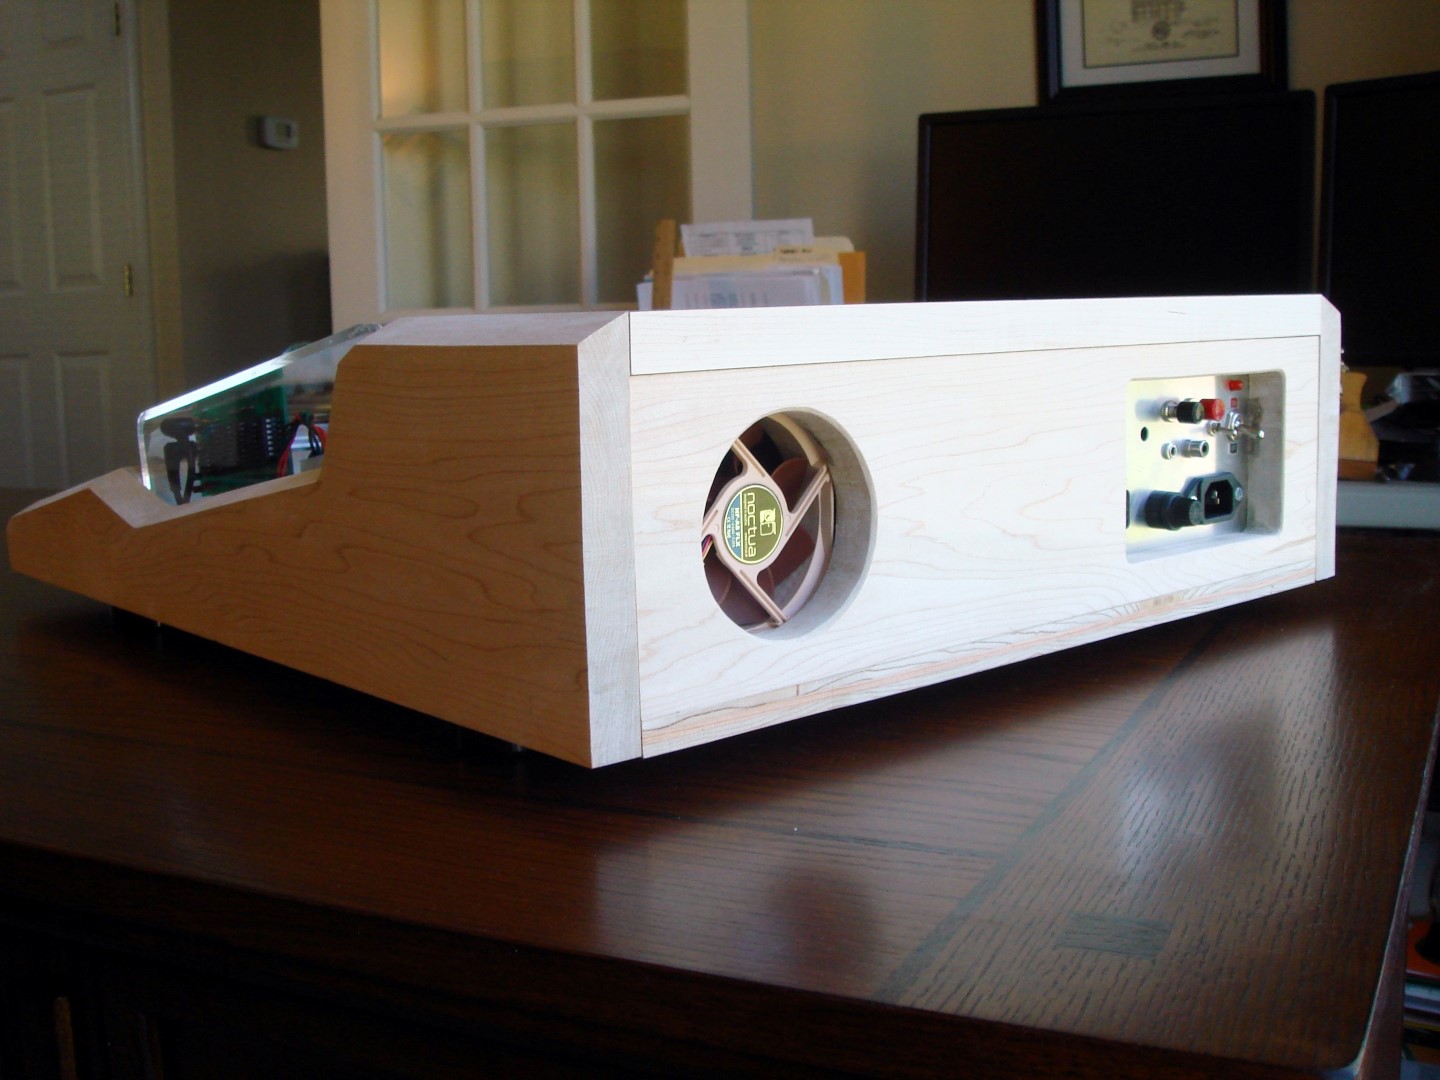
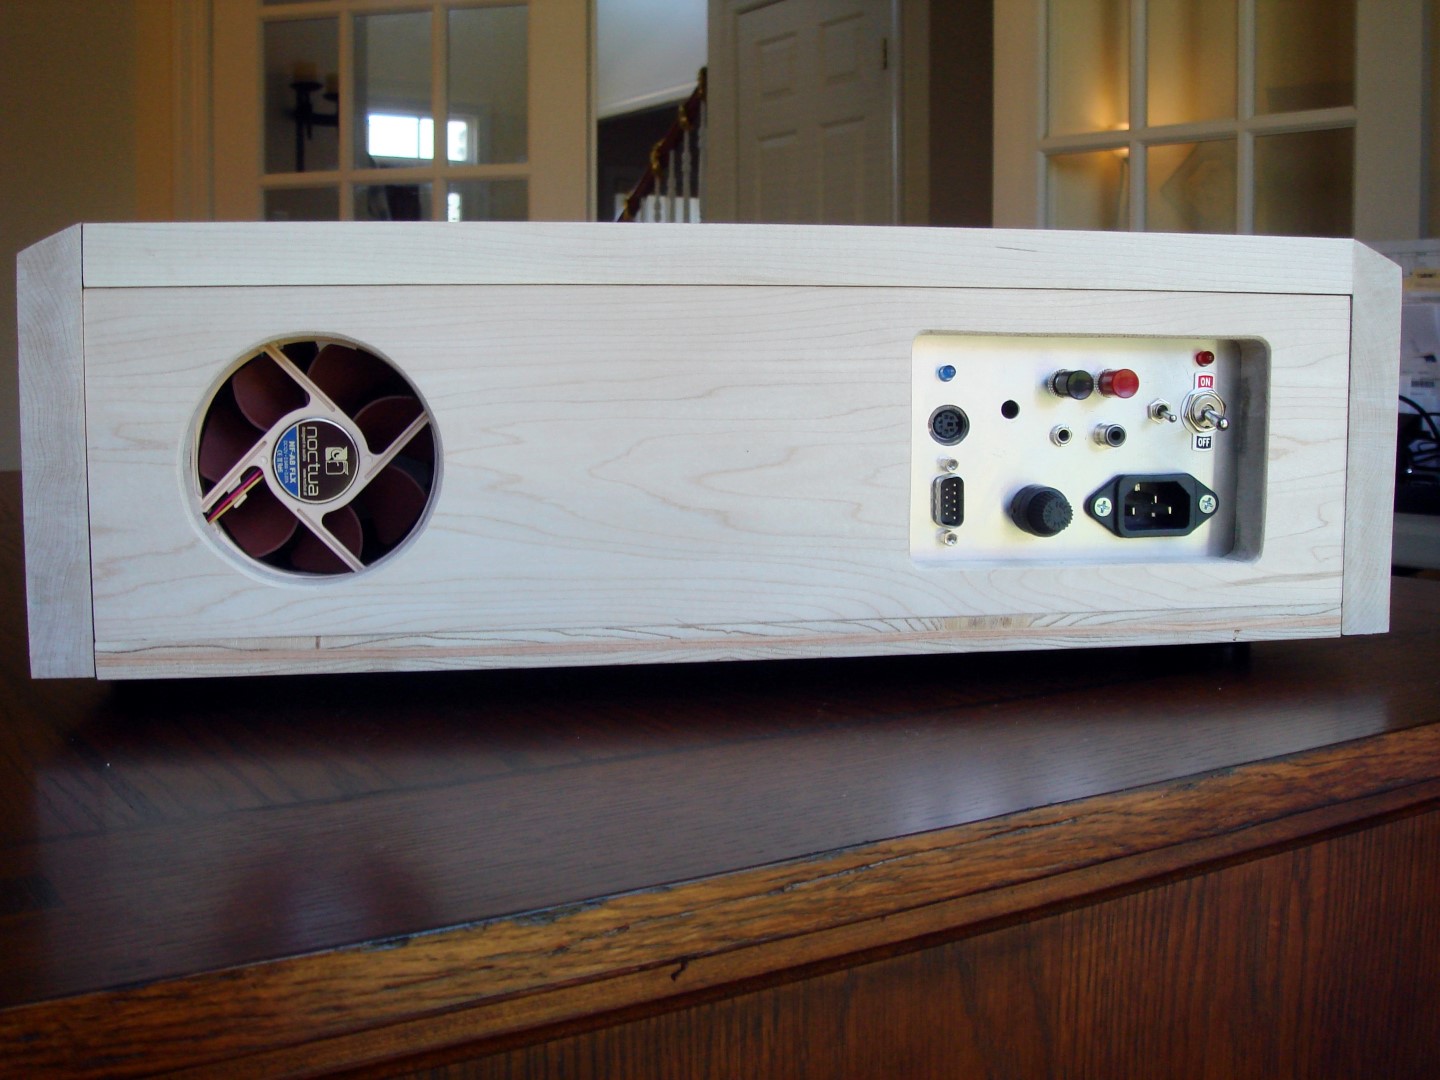
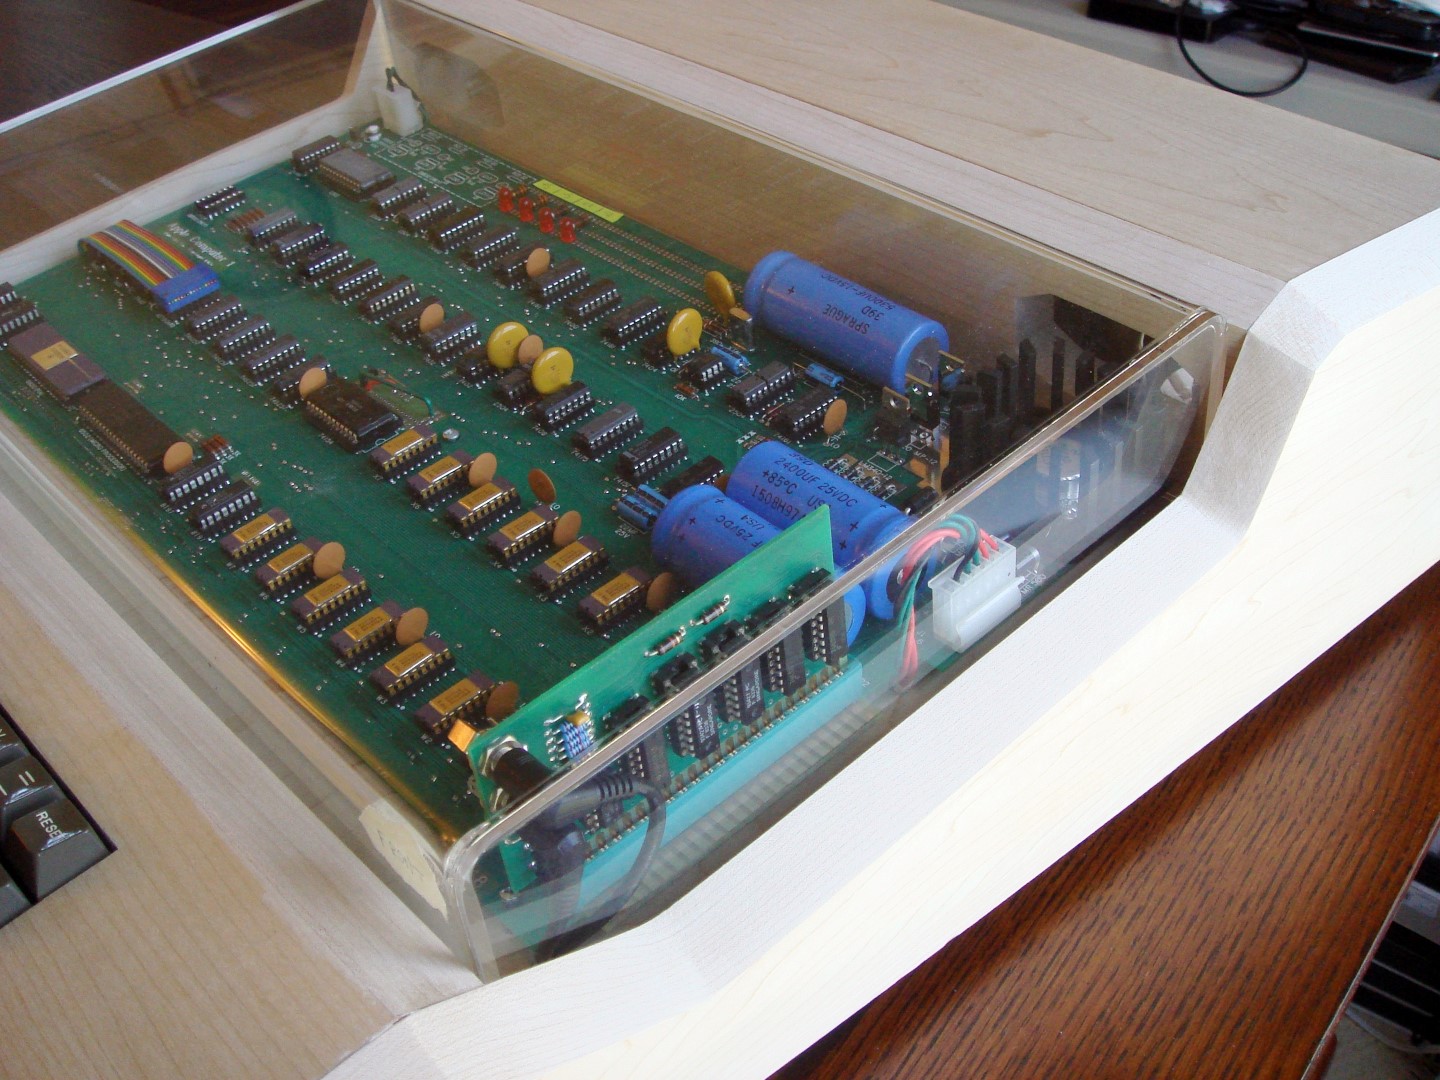
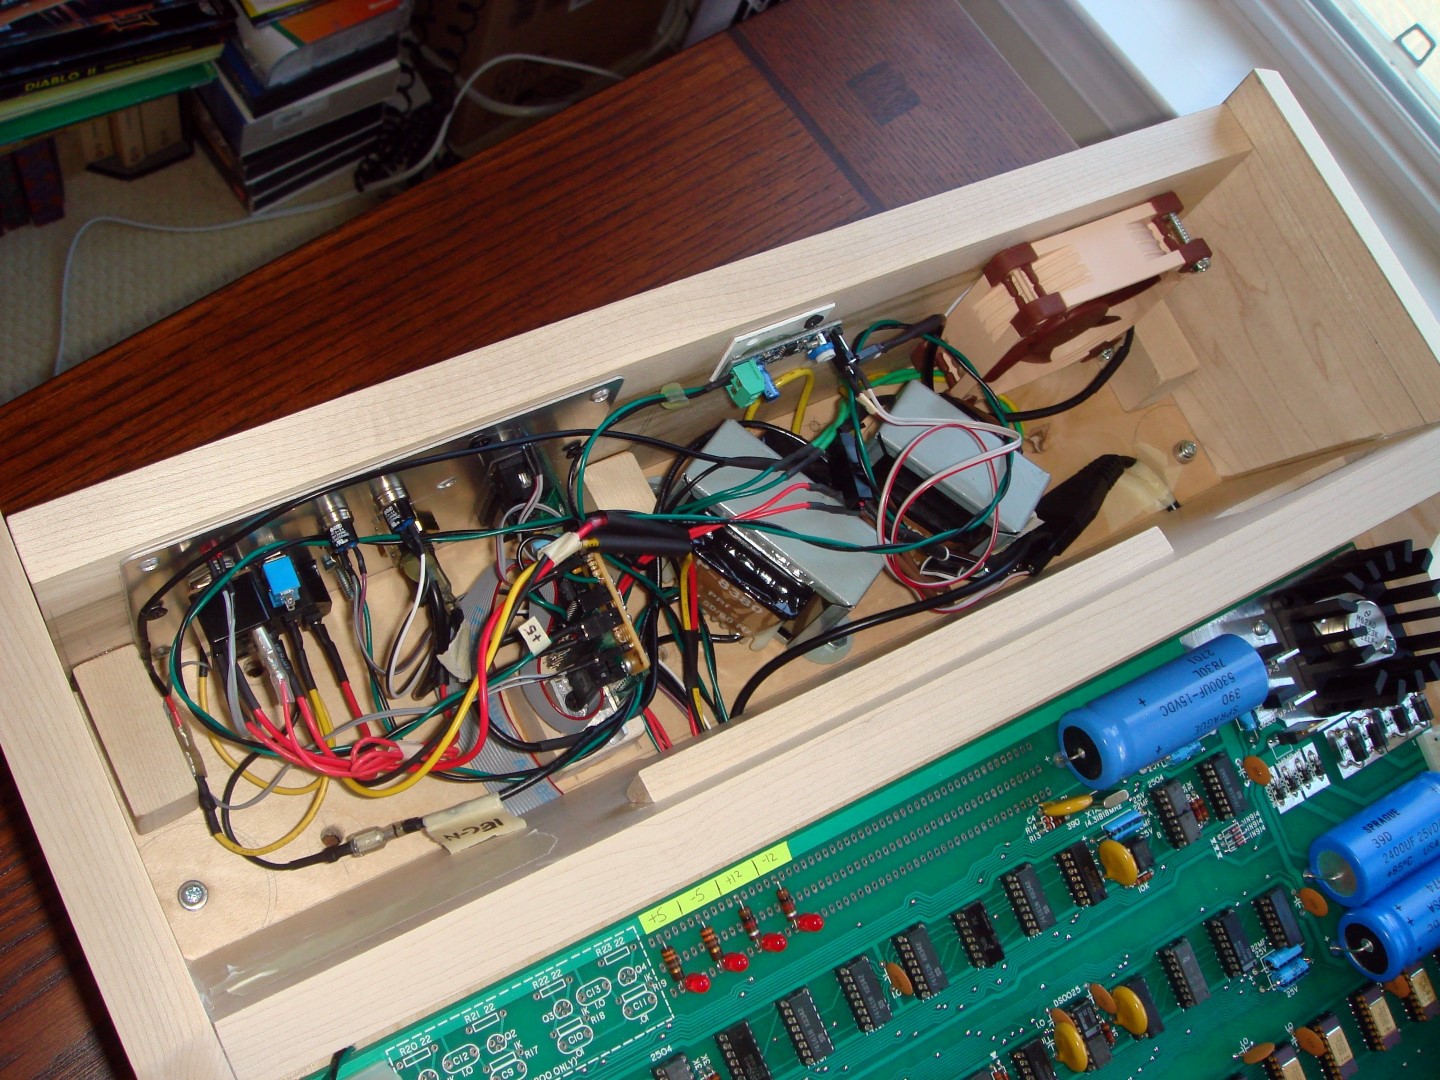
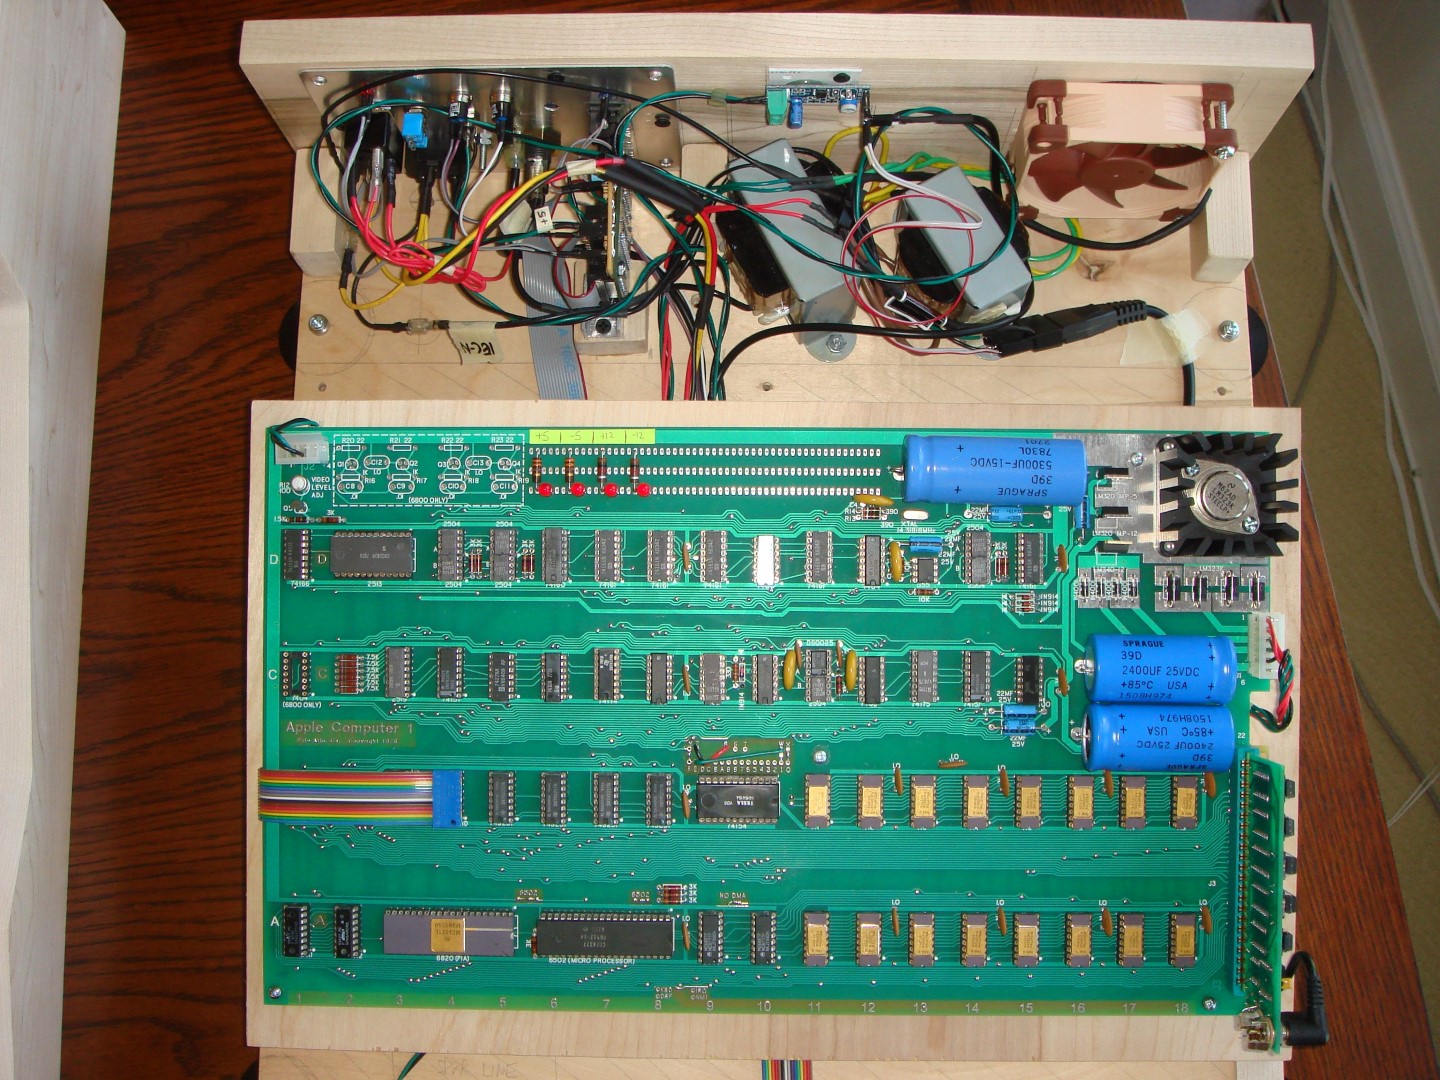
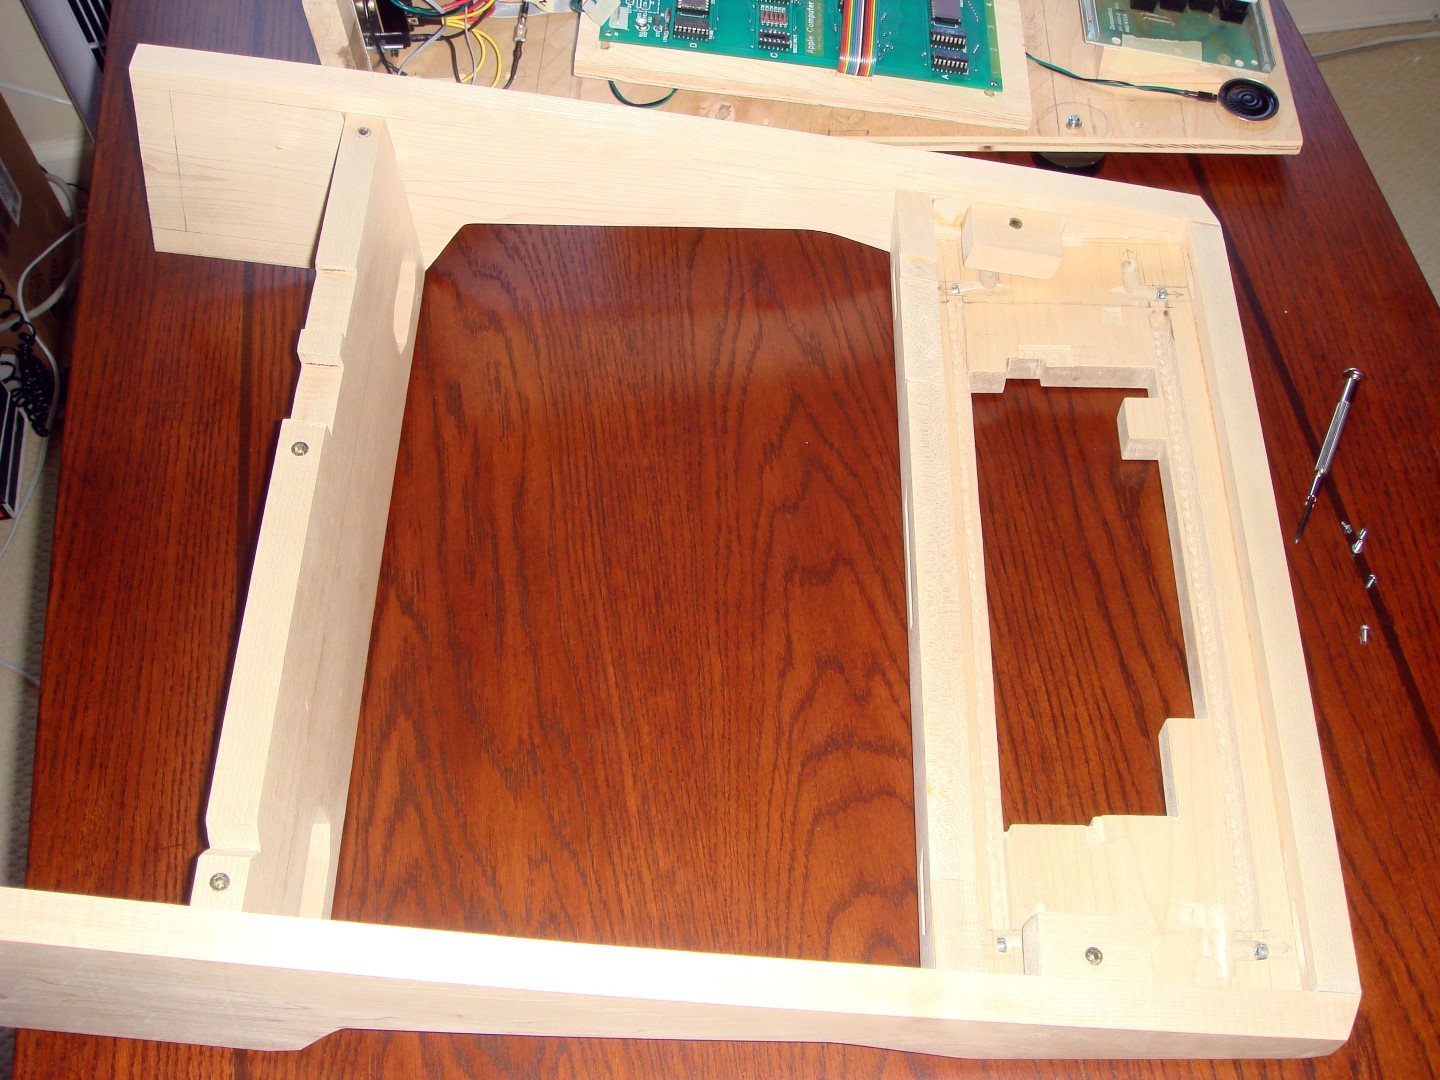
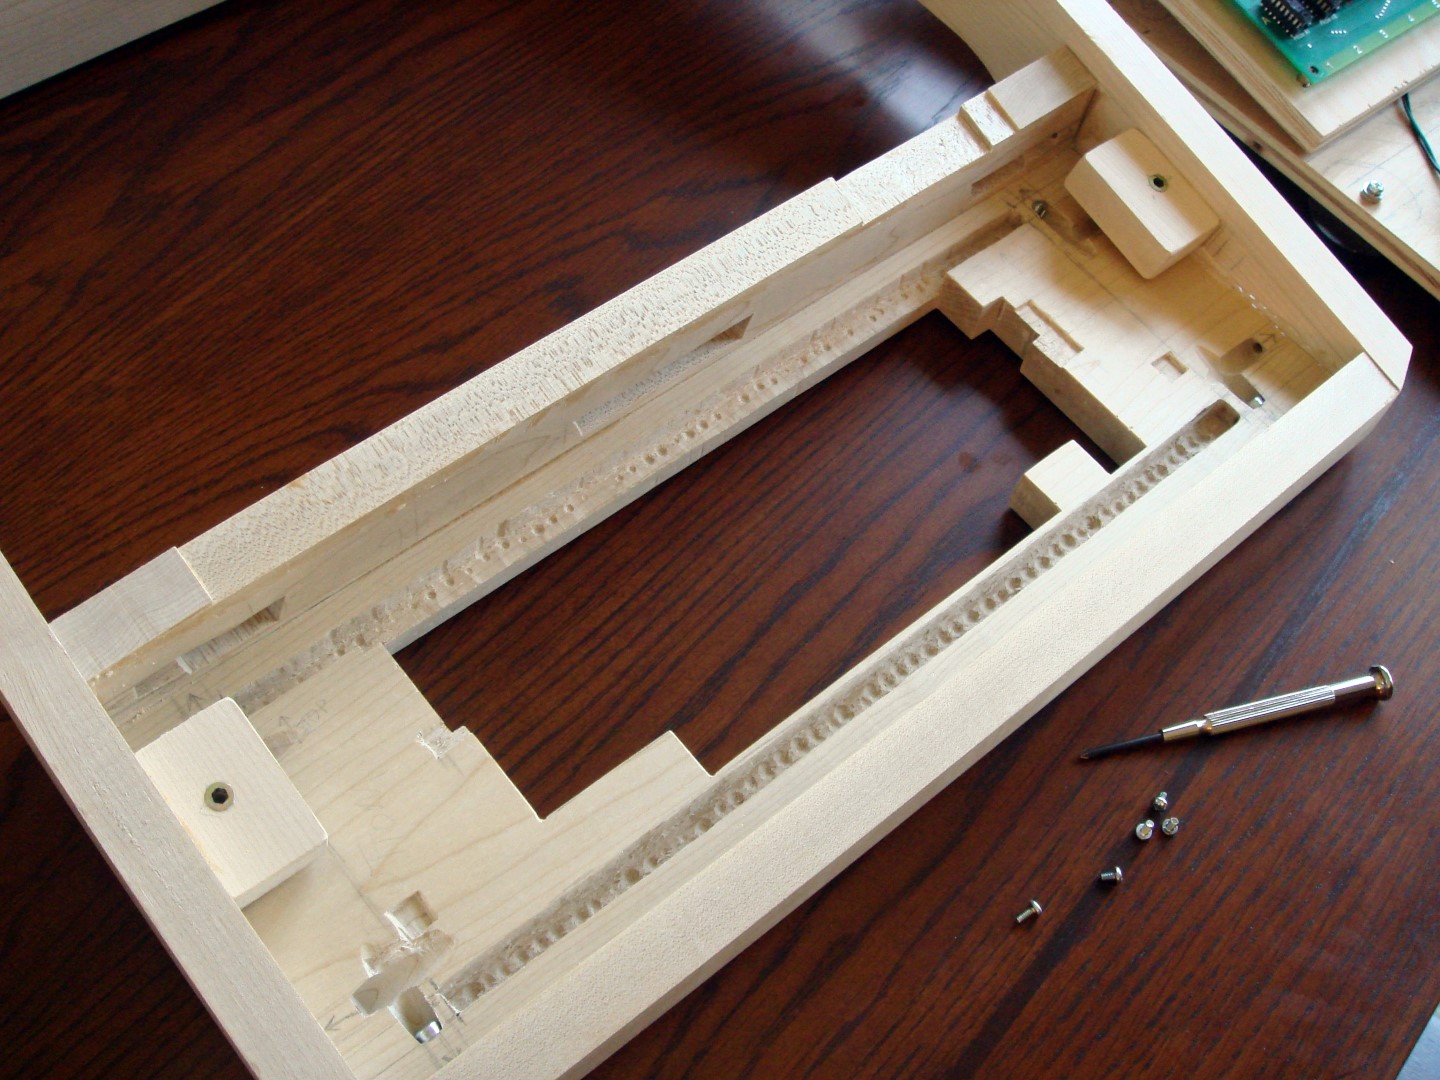
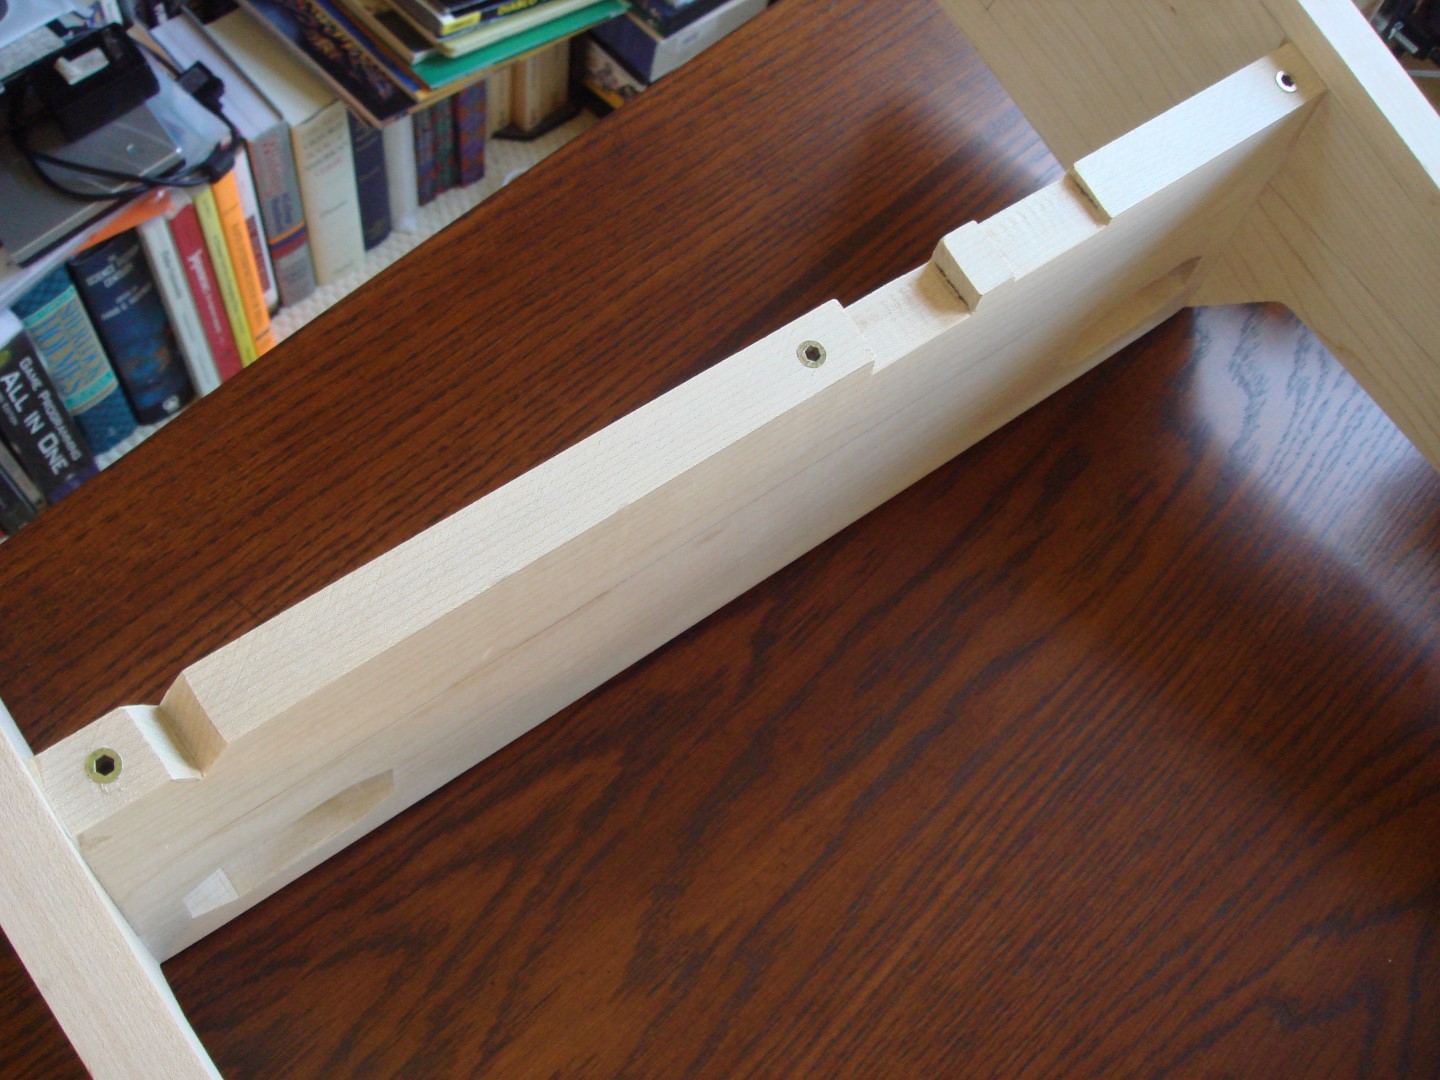
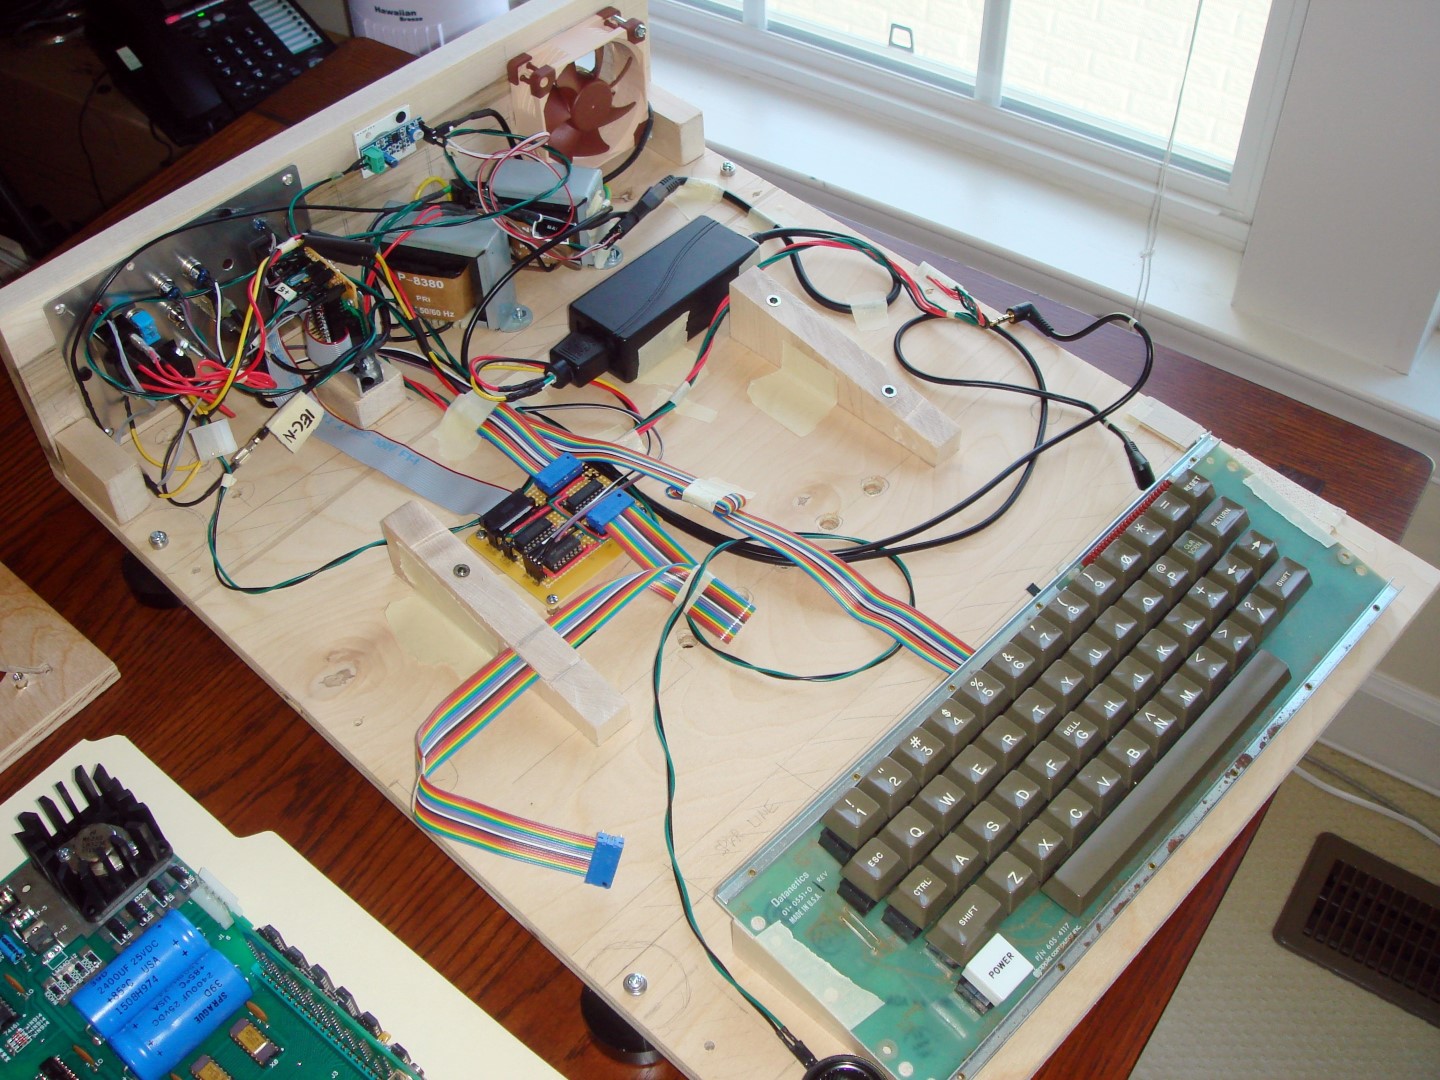
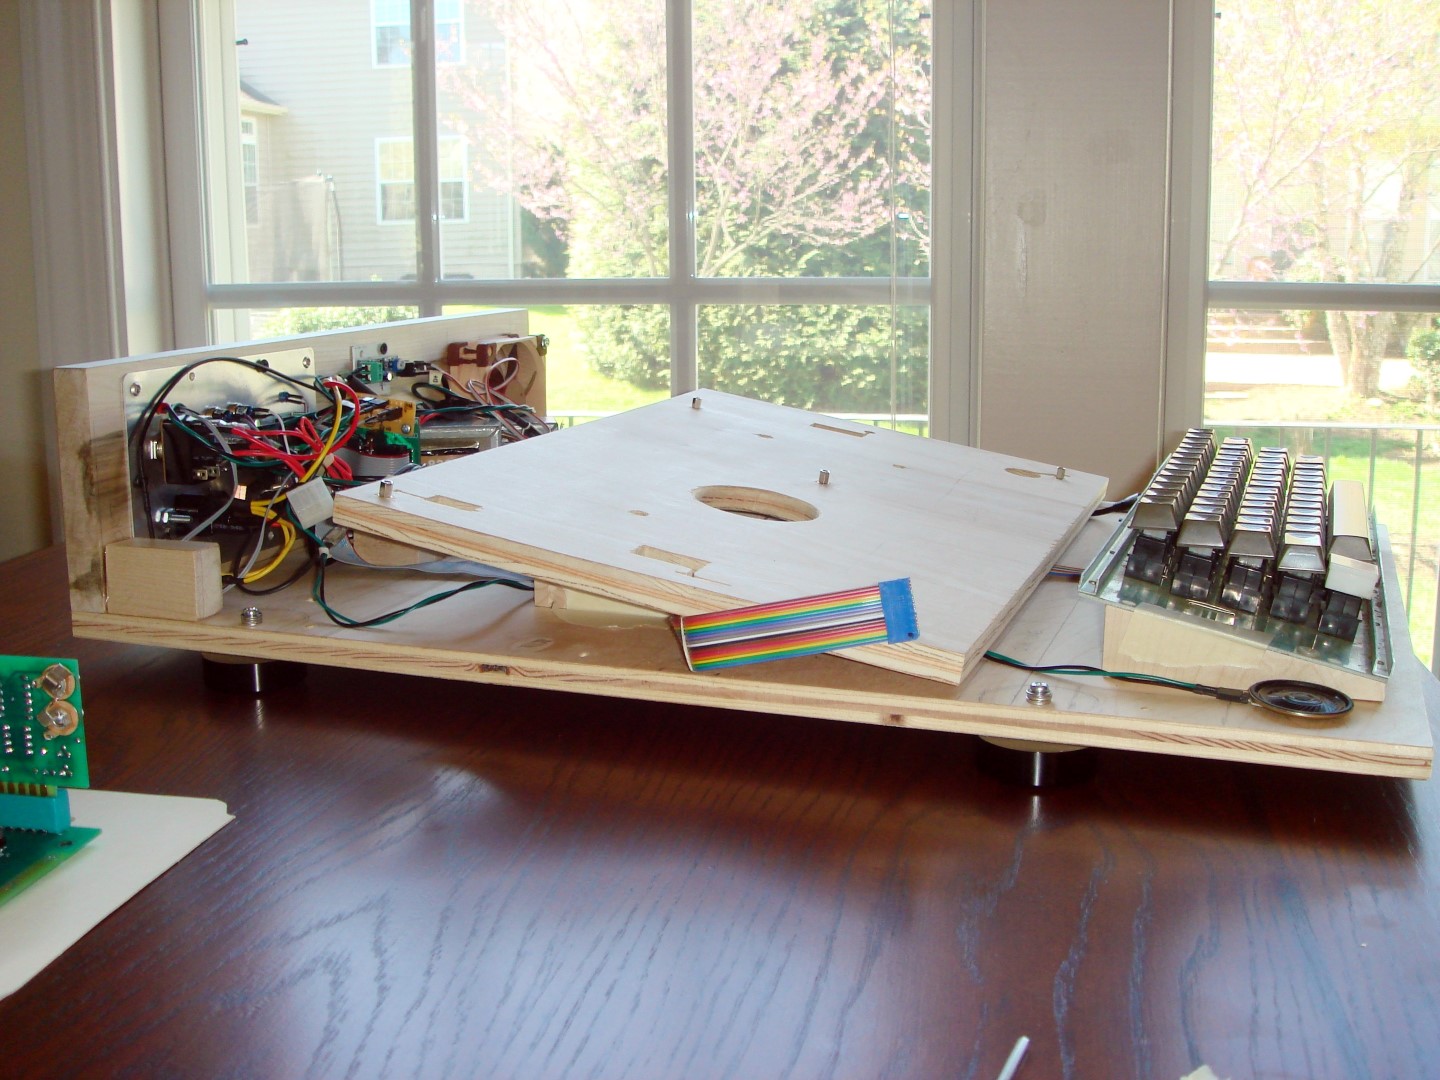
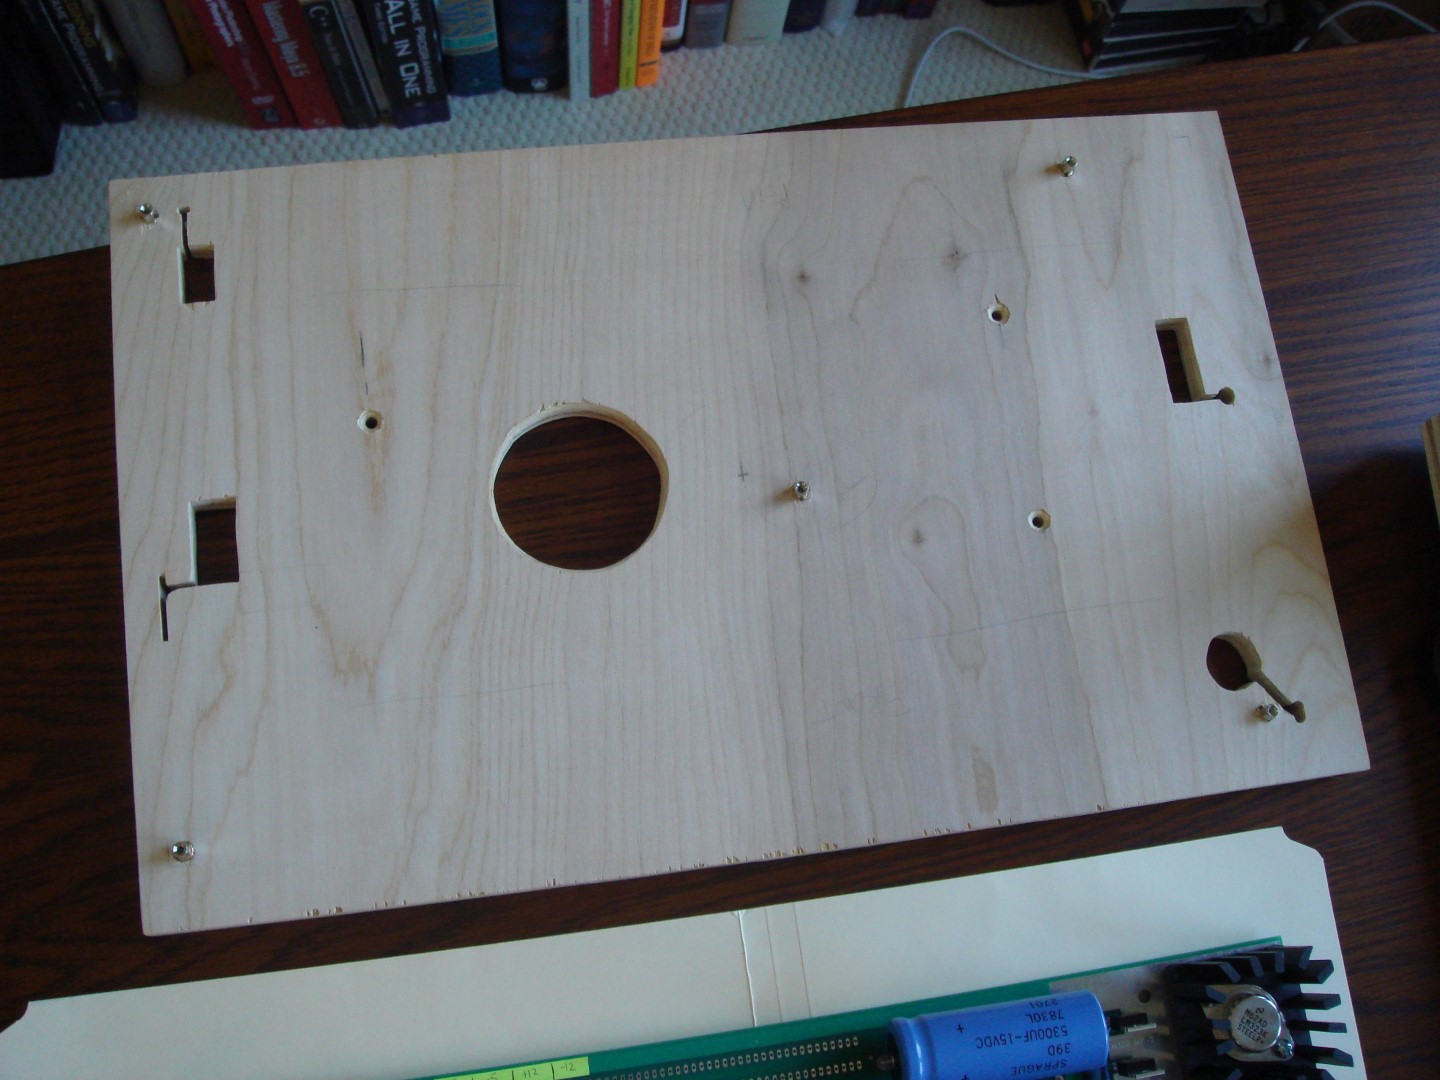
I wanted to be able to take the entire top of the cover off, and still be able to run the Mimeo. So you can remove the cover and replace it, and not have to detach anything. For this reason, I had to mount the keyboard on the base. All the cables going to the motherboard pass through the Mimeo platform through cutouts which are hidden beneath the motherboard. The amplifier board is attached to the inside of the rear-most panel, and connects to the speaker in the front, to the side of the keyboard. Behind the Mimeo, there are 2 large cutouts for the ventilation. I'm planning to glue some louvres in there, so you can't see back into the PEM section in the back. I'm also planning on cutting out holes in the acrylic cover to allow the acrylic cover to be on there while you run the Mimeo, and still not cause any overheating. I've also got to cut out the sheet of black acrylic to go around the keyboard area, to frame it. All the enclosure is held together with bolts which screw into metal threaded inserts, so they can be screwed and unscrewed multiple times without wearing out the holes. You can find these cheap on ebay.
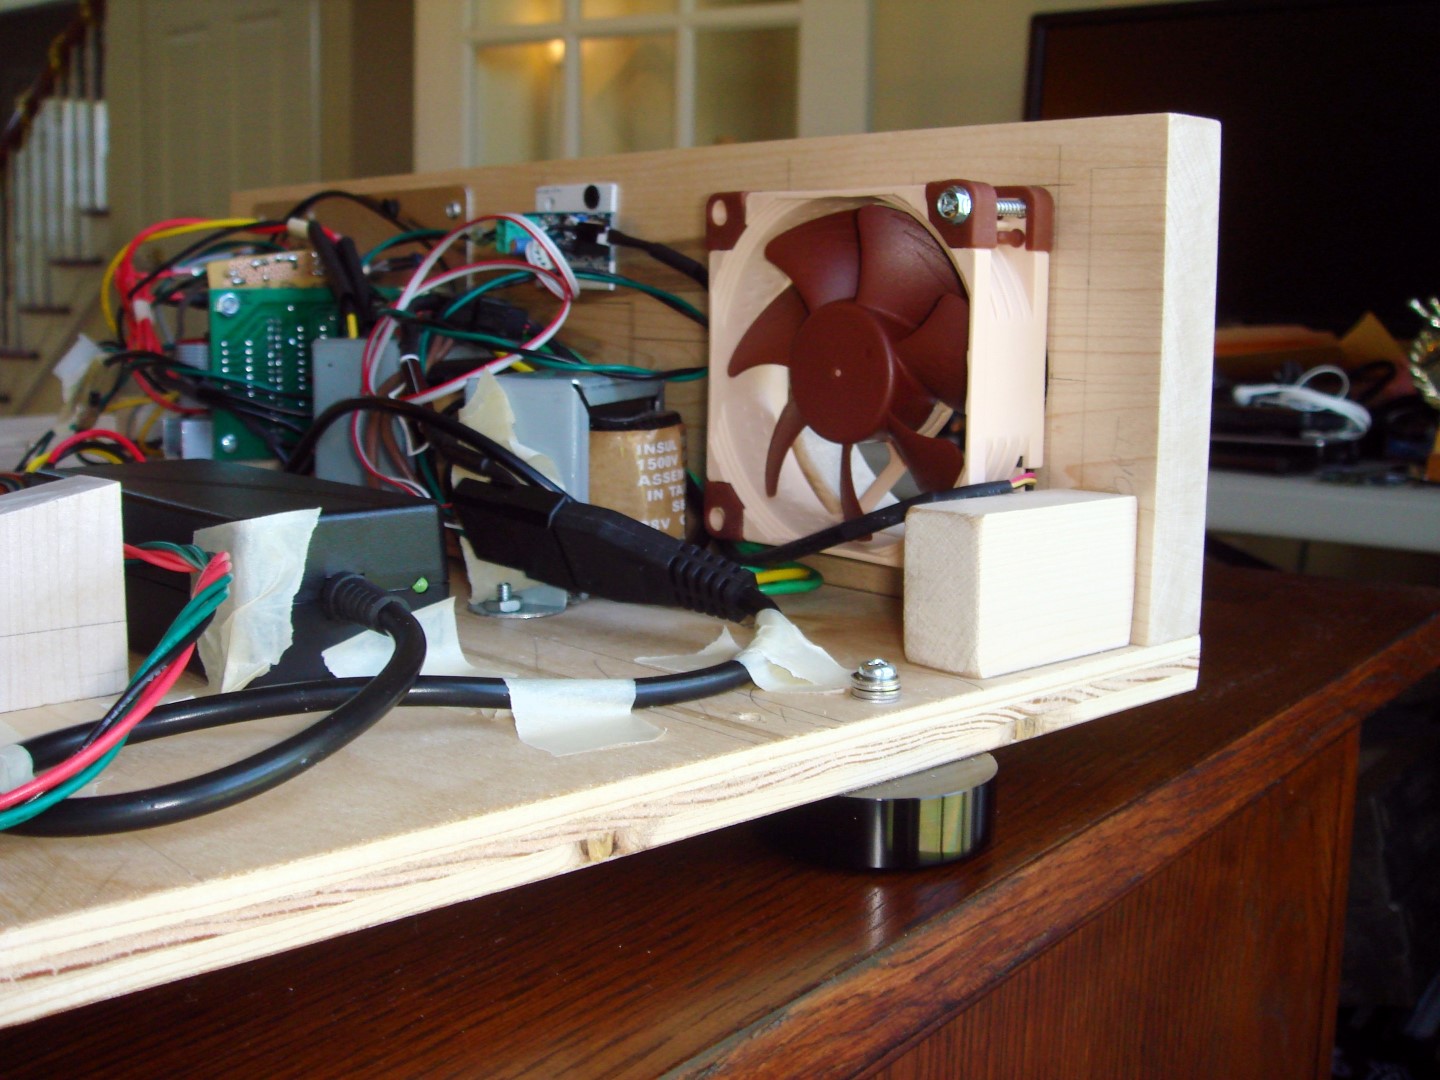
The whole thing is sitting on some turntable-type aluminum feet with rubber on the bottom, which I think finish the case off nicely. The plugs for the audio in (for the ipod) are in the back, so they're out of the way. The power switch not only provides power to the mimeo, but also to the secondary power supply, sitting under the mimeo platform, and this powers the fan, amplifier, and the Mike Willegal PS/2-Serial board.
I'm planning on finishing it with a basic shellac finish, which will be just slightly darker than the unfinished wood you see on it now. It also adds a nice chatoyance to the wood.
So here are the pictures!


Sherlock,
Your case is absolutely Awesome!
WOW!

Steven
Hmm, so when I clone your clone, which itself is a clone, what would I have? Anyway, fantastic work. Were do you live? Can I break in, I mean come over and see it? LOL
WOW! That is amazing, the mock-up you posted awhile back looked great but with all of the little fine details it looks awesome. When are going to start selling them? I would also like one for my IIe.
Best Apple 1 case I've ever seen. Big thumbs up!
Woz ought to get a look at this. I think he'd approve.
Awesome work. Thanks for sharing.
Let me know when you're ready to take orders ...
Spectacular! What a great way to show it off.
Thank you everyone for the flattering comments!
I would love to have this process down to where I could manufacture them for you guys, but I don't really have experience with this sort of thing, so everything I've done has mainly been through internet searches of woodworking techniques, and inventing a way to do it (for me). Each step involves very manual work, since I don't have the perfect tools. I know what I'm going for, and I basically hack at it until it looks like I want. As a result, it's really inefficient, and it feels like I have to re-invent the wheel each time. I'm sure someone with cabinet-making experience would be able to bang them together in no time! I'm honored by the requests, though.
Hey, I've uploaded my basic plans, though, so if someone wants to have a go at it, it should make the process easier, since you can get the key dimensions of each piece of wood off that. From there, it's a lot of hand-fitting. If someone does take on the task, I'm happy to share how I did each part in detail. I took lots of picture of the whole process. Maybe I'll make an Instructable on it!
I'll post pictures again, once I get the final finish on the wood.
Thanks again to all!
Wow this looks really great!
Thanks!
Beautiful case, really impressive.
Thank you very much!
I'm cursing a bit at it lately because getting all the surfaces prepped and finished is becoming a lot more complicated that I had anticipated. I finished cutting and beveling the black acrylic sheet that I've made to go around the keyboard.
Can't wait to get it fully done, and am losing some of my patience with it.
When you start to lose patience,
get up and walk away for a while.
Steven
What a beauty! Thank you for sharing this.
Thank you everyone!