I just took my old apple 2+ out of storage. Last use was over 20+ years ago. From a sound perspective it goes through the nomal boot process. I am struggling with getting working video.
My montor III looks like this when powered on with nothing connected to it. It doesn't matter if the apple 2+ is conencted or not, the image aloways looks the same. Messing with the vertical/horizontal controls doesn't help. Does this Montor III look right? I wasn't expecting to see anything on it's screen until I powered up the apple 2+.
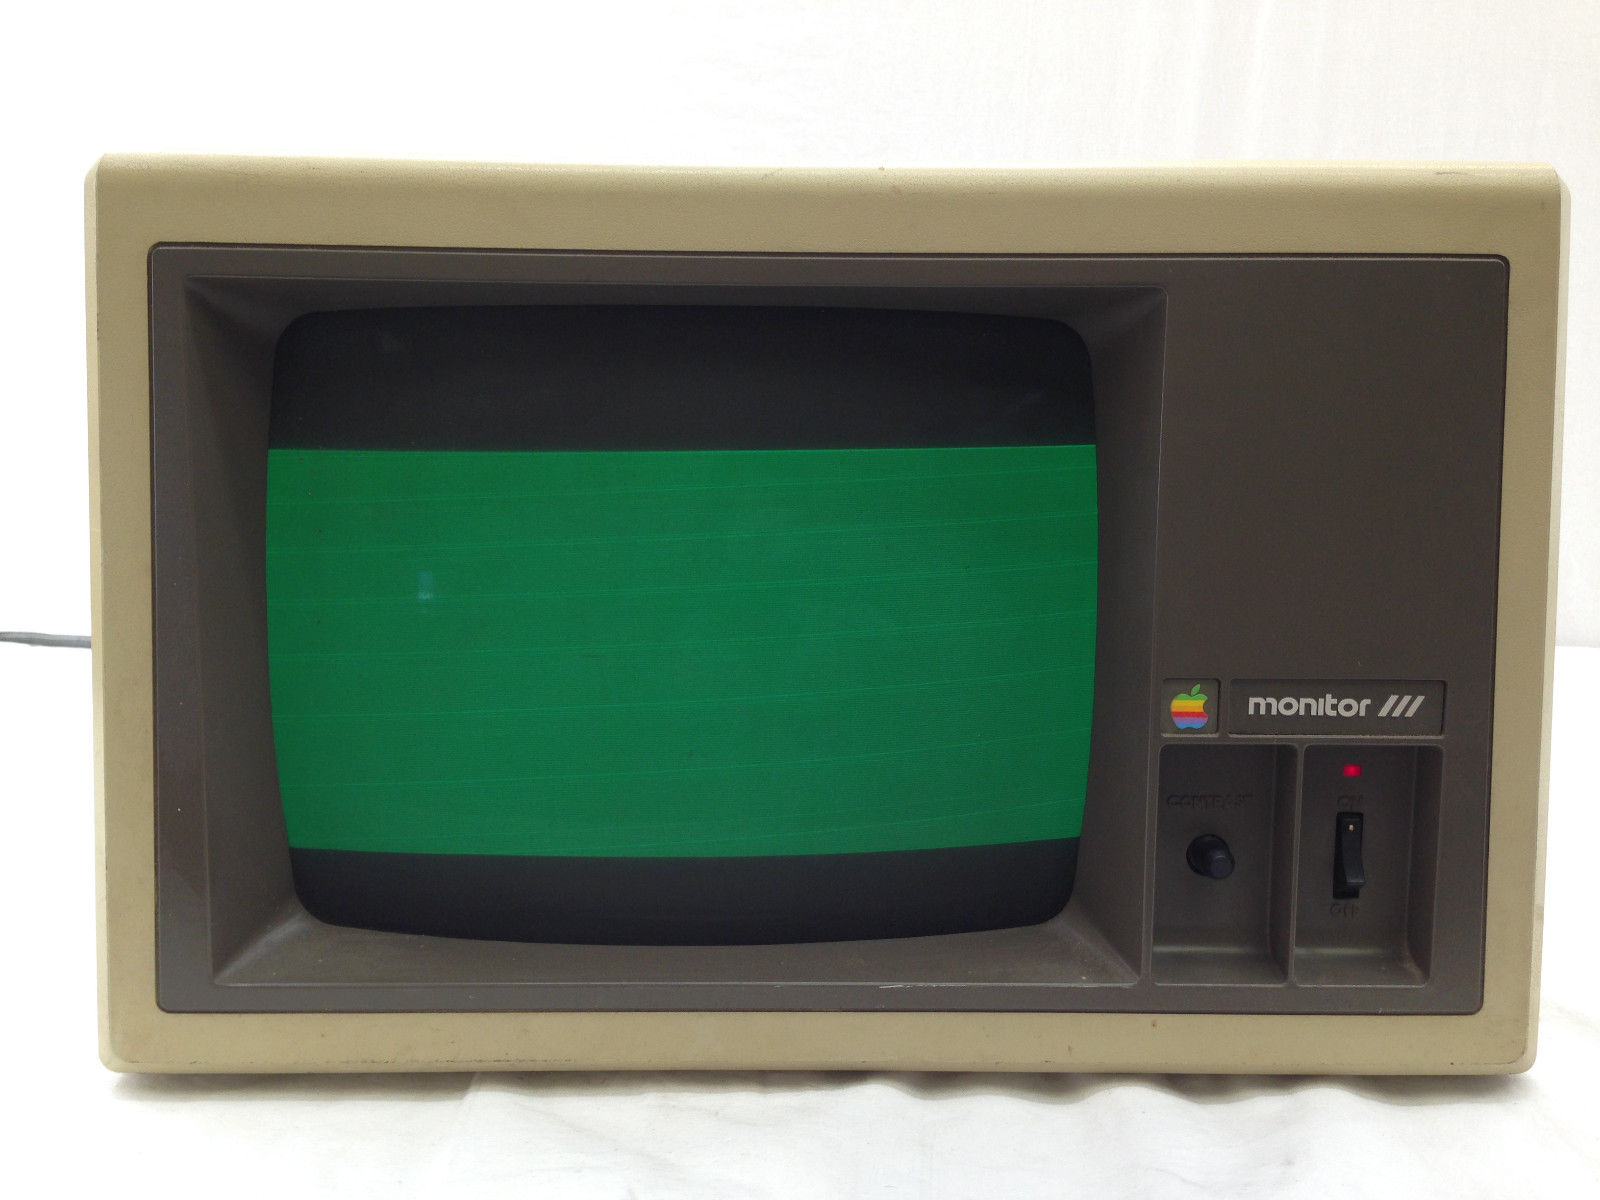
To answer your question, no this doesn't look right, although it is perfectly normal to see a green screen like that on power up, it should fill the screen. Normally the green means that the brightness or contrast needs adjustment, but it's best to do that with an active composite signal (computer, game console, the thing's kinda trippy on Super Mario with my NES). Also, the Apple Monitor /// doesn't have any horizontal controls, only vertical hold, and size (which I always thought was weird).
To fix your problem, I would suggest cleaning the potentiometer for the vertical size nob (the one closest to the composite in port). The issue is probably similar to that of a bad paddle control, gunk or oxidation is has gummed it up, and it needs a good cleaning. I have a similar issue with the vertical hold control on mine. The nob works, but it's extremely jittery. I've learned to live with it for now, but eventually, I know I'll have to clean it. However, since yours is nonresponsive, you might as well clean it with some 99% rubbing alcohol and see if that makes a difference. You might have to desolder the part and take it apart to get a good cleaning, but I would not suggest replacing it since Apple tended to use odd values on their potentiometers that aren't made anymore (I don't know if this is true for the Monitor ///, but it is an issue with paddle and joysticks, so better safe than sorry).
There is still a chance that this could be a bad capacitor or electrical issue affecting the vertical hold or size. This will be evident when you open the case, should you see any bulging or leaking capacitors, or burned out components on the analog board. Still, I'd start with the simple solutions before getting too complicated. Good luck.
Also here are some teardown and repair videos on YouTube for the Monitor /// that might help. They don't answer your question specifically, but they should be useful none the less.
https://www.youtube.com/watch?v=gGvs1qHjEIQ
https://www.youtube.com/watch?v=S-AXOvpqrUw
Thx for you reply. Regardless of vertical hold and size issues with this apple III display, I am still trying to rule out if I have an issue with my apple II plus or with the monitor being able to display any kind of image itself. I have some working old consoles, an Atari 2600, an Intellivsion, and an Atair 800. Should any of these be able to use the Monitor III? Nothing I hook up to it seems to work. This is making is hard to determine what the issue is with my apple II plus, which powers on, makes the single boot beep, spins the disk drive, reacts to the reset key, but no visible video output on the Monitor III.
Update: Raspberry Pi just worked with the Monitor III, so it is able to display an image.
Since you've ruled out the Monitor, I'd turn my attention to the video port. If the computer's beeping on startup and the power light comes on, then this is the first most likely suspect. Look to see if the port is properly soldered in and that it doesn't rotate free of the bracket holding it to the motherboard (If it does a 360˚ then you have a problem). Sometimes they break loose, and the center pin is severed in the process. If so, you can fix it with a dab of solder, I would also add a dab to the ground shield of the port to hold it in place with the bracket. Another possibility is that the port is just dirty. You can clean it with some 99% alcohol and a q-tip.
The port is properly soldered in and it doesn't rotate at all. The solder looks good.
I don't have any 99% in the house. Will pick up some tomorrow.
I'd check out repair manuals like the Sam's and Chilton's that you can find here:
https://mirrors.apple2.org.za/Apple%20II%20Documentation%20Project/Books/
Here are a few more links to books relevant to repairing a ][+:
http://69.60.118.202/books/apple/How_to_Repair_the_Apple_Computer_Vol_1_1st_Edition_1982.zip
http://69.60.118.202/books/apple/SAMS_ComputerFacts_(CC1)_Apple_II_and_II_Plus.zip
http://69.60.118.202/books/apple/Apple_Care_Manual.zip
http://69.60.118.202/books/apple/How_to_Repair_and_Maintain_your_Apple_Computer.zip
Check the voltage on the video port, red on center, black on the ground. You should get somewhere around 0.6 volts DC. If not, then you might have a corroded trace or damaged component along the video line.
[quote=DistantStar001]
Check the voltage on the video port, red on center, black on the ground. You should get somewhere around 0.6 volts DC. If not, then you might have a corroded trace or damaged component along the video line.
[/quote]
Just to confirm....with the apple turned on:
I place the red contact of the multimeter into the hole of the back of the Apple (the RCA jack).
I place the black contact of the multimenter where for the ground? Sorry I am new to some of this.
Update:
I plugged my male to male cable in the jack of the video port.
Red on the end of the RCA cable, only touching the male. Black on the outside of the cable into the apple. I get .4v on the multimeter.
That does seem to be within tolerance, given the cable, but it is still a little low. I would try plugging your Apple II into another composite monitor (like a TV) in case there's an issue with the connection between the Monitor /// and the Apple II. If that works, then it's possible that the ports on both the computer and the monitor are simply dirty, and the stronger signal from your Rasberry Pi is getting through where your Apple II cannot. 99% alcohol and a q-tip is still the best solution, but you might step it up with some electronic contact cleaner. Also, I would clean the contacts on the cable as well.
The 99% is supposed to arrive on Wednesday. I will clean everything as best I can.
I have tried hookiing up the Apple II in various ways and nothing has worked
I tried using a RCA Composite S-Video AV in to PC VGA LCD Out converter into a port on a VGA monitor, an RCA to HDMI converter into a flatscreen, I also tried right into the RCA into the flatsreen. No signal. I don't have old TVs and the Monitor III is the only old CRT I have.
file-2.jpeg
So the above is a picture on the underside of the MB. I assume those raised areas that look like little hills is not a good sign? I thought maybe it could be normal until I looked at some MBs on ebay.
Here is another view
file-3.jpeg
It's normal. The "hills" are solder leftover from the wave-soldering techniques used back in the 80s and 90s.
Yes! Cleaning helped.
file-4.jpeg
Now I have a keyboard issue. ;) Entire qwerty row is out and then some random keys from the bottom two rows.
Look at the keyboard ribbon cable connection first. Ensure there is no corrosion at the connectors, (both) especially where the ribbon cable enters the connector itself.
Good luck!
Congratulations on the video! And your vertical hold looks good too.
As for the unresponsive keys, it will depend on your keyboard. If it's an original Apple part, then it should be using the same switches found in early //e's and Macintosh keyboards (model #s M0110 & M0110a). These switches pretty reliable, but if you don't use them, they can oxidize and become unresponsive.
The solution is to remove the keycaps from the affected keys, spray a little contact cleaner on the switch (make sure it's safe for plastics as not all of them are) and press the switch repeatedly (working the cleaner into the switch) until you see the character appear on the screen (yes the key will repeat endlessly as the liquid is short the switch). Then turn your computer off, and let it sit for a few seconds before pressing the switch about 20 to 40 times periodically as it dries (possibly overnight). You don't have to wait for each key to dry before starting on the next, but I would disconnect the speaker while you're doing this, as the wet switch will continue to short, and your Apple II will complain loudly and repeatedly after a certain number of repeats (it beeps a lot). The idea is that the cleaner will emulsify the oxidation, and then the mechanical wear of pressing the key will clean the surface.
If this doesn't work, desolder each affected switch, dismantle them for a more them and clean each contact with either contact cleaner or 99% alcohol and a q-tip. Alternatively, you could simply replace the switches, but they tend to be difficult to find, and rather expensive when you do.
Starting with the Q and W keys, continuity testing is sucesssful when I press either of these keys down. So that would seem that the switches are working. So does that point to the encoder board?
Yes, or the cable from the encoder to the motherboard. But the symptoms point more to the encoder board. I'd try cleaning and re-seating any socketed chips on the encoder board as well as cleaning the pins between the encoder board and the keyboard. If that doesn't work, try swapping in a different encoder board and see if that helps.
I cleaned everything I could but have not reseated anything yet. Thanks I will try that.
I also bought a PS2 keyboard adapter that plugs right into the motherboard keyboard interface for additional troubleshooting. Not sure when that will arive though.
If its the RFI keyboard they are fixable if a little fiddly.
What I did was
remove the encoder card
remove all the screws and the PCB lifts away
clean all the contacts on the PCB
Inspect the spiders web of key fingers and clean as necessary, be careful, the little pins that hold the strips in alignement are easy to break making reassembly a bit hit and miss
Put it all back together
I removed the screws but the PCB(The Keyboard Company ASSY k620-3001-0, PCB K820-0005-02,) does not lift away from the keyboard. I didn't want to force it. Are there some models where these two parts do not come apart?
I think on some of those you may have to unsolder all the keyswitches to separate the PCB from the frame. The design of the ][+ keyboards changed several times over the years. Apple bought out TKC somewhere in there. The later ][+ keyboards I think were made more similarly to the //e keyboards than the earlier ones were.
I think I found the issue. I traced some of the bad keys to where they connect to the encoder board via the metal pegs (probably not the right word for them). I pass continuity to the soldered endpoint, but lose it to the hole above for four of them.
file-5 (002).jpeg
The part related to this on the other side is this.
file-6.jpeg
Clean the long pins and the connector they go into as well as you can. If you still can't make it work then you might try running a jumper wire from the encoder board to the keyboard PCB. That would be ugly, but it would guarantee connectivity.
I cleaned everything. Looks like I will have to jump.
It is ugly but all keys now work.
That's good news you got it to work. Sometimes functional is more important than pretty.
Thank you everyone for all of your suggestions. This was definitely a learning experience.
file-7.jpeg